Overview:
If you want specific employees to have access to a specific group only, you can utilize our Custom Groups. A good use-case is if you have different admins per location, and you want these admins to only have access to employees from their location.
TABLE OF CONTENTS
- Custom Groups
- Using Include / Exclude Conditions (NEW)
- Choosing the Custom Group in the Access Control
Custom Groups
Step 1: Go to Settings > Custom Groups > Add Group.
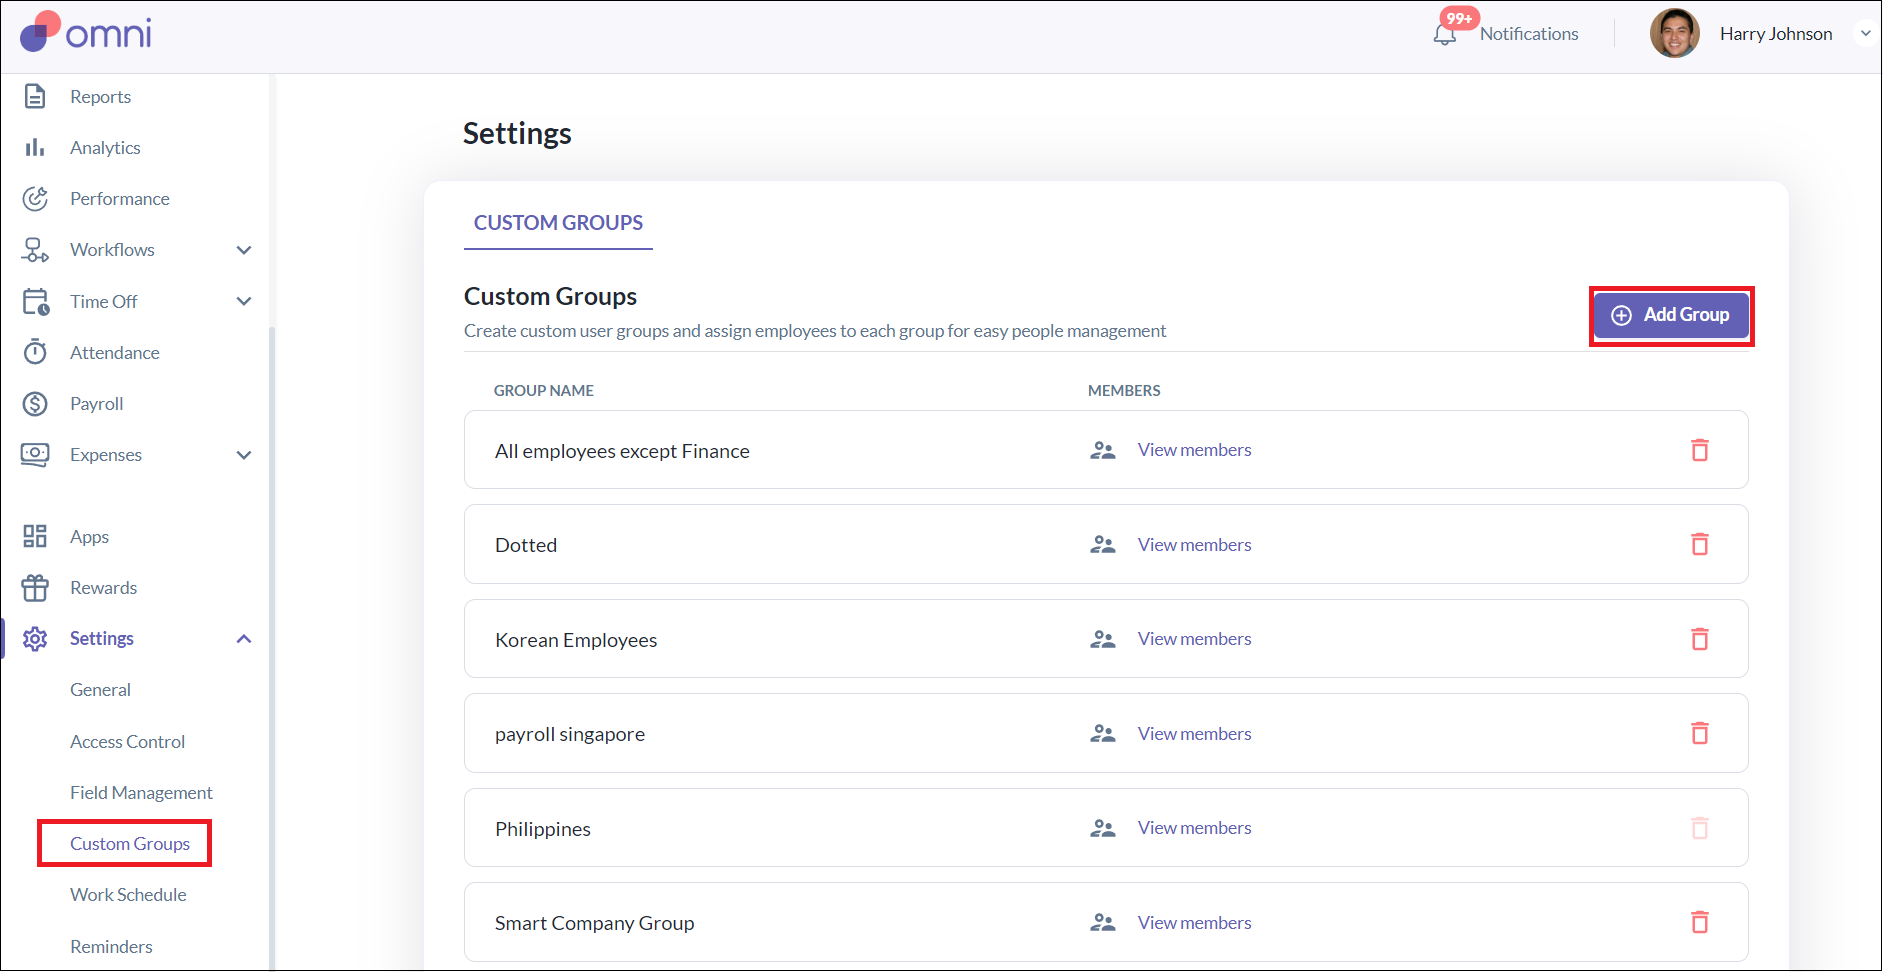
Step 2: Fill-in the details in the pop-up that appears.
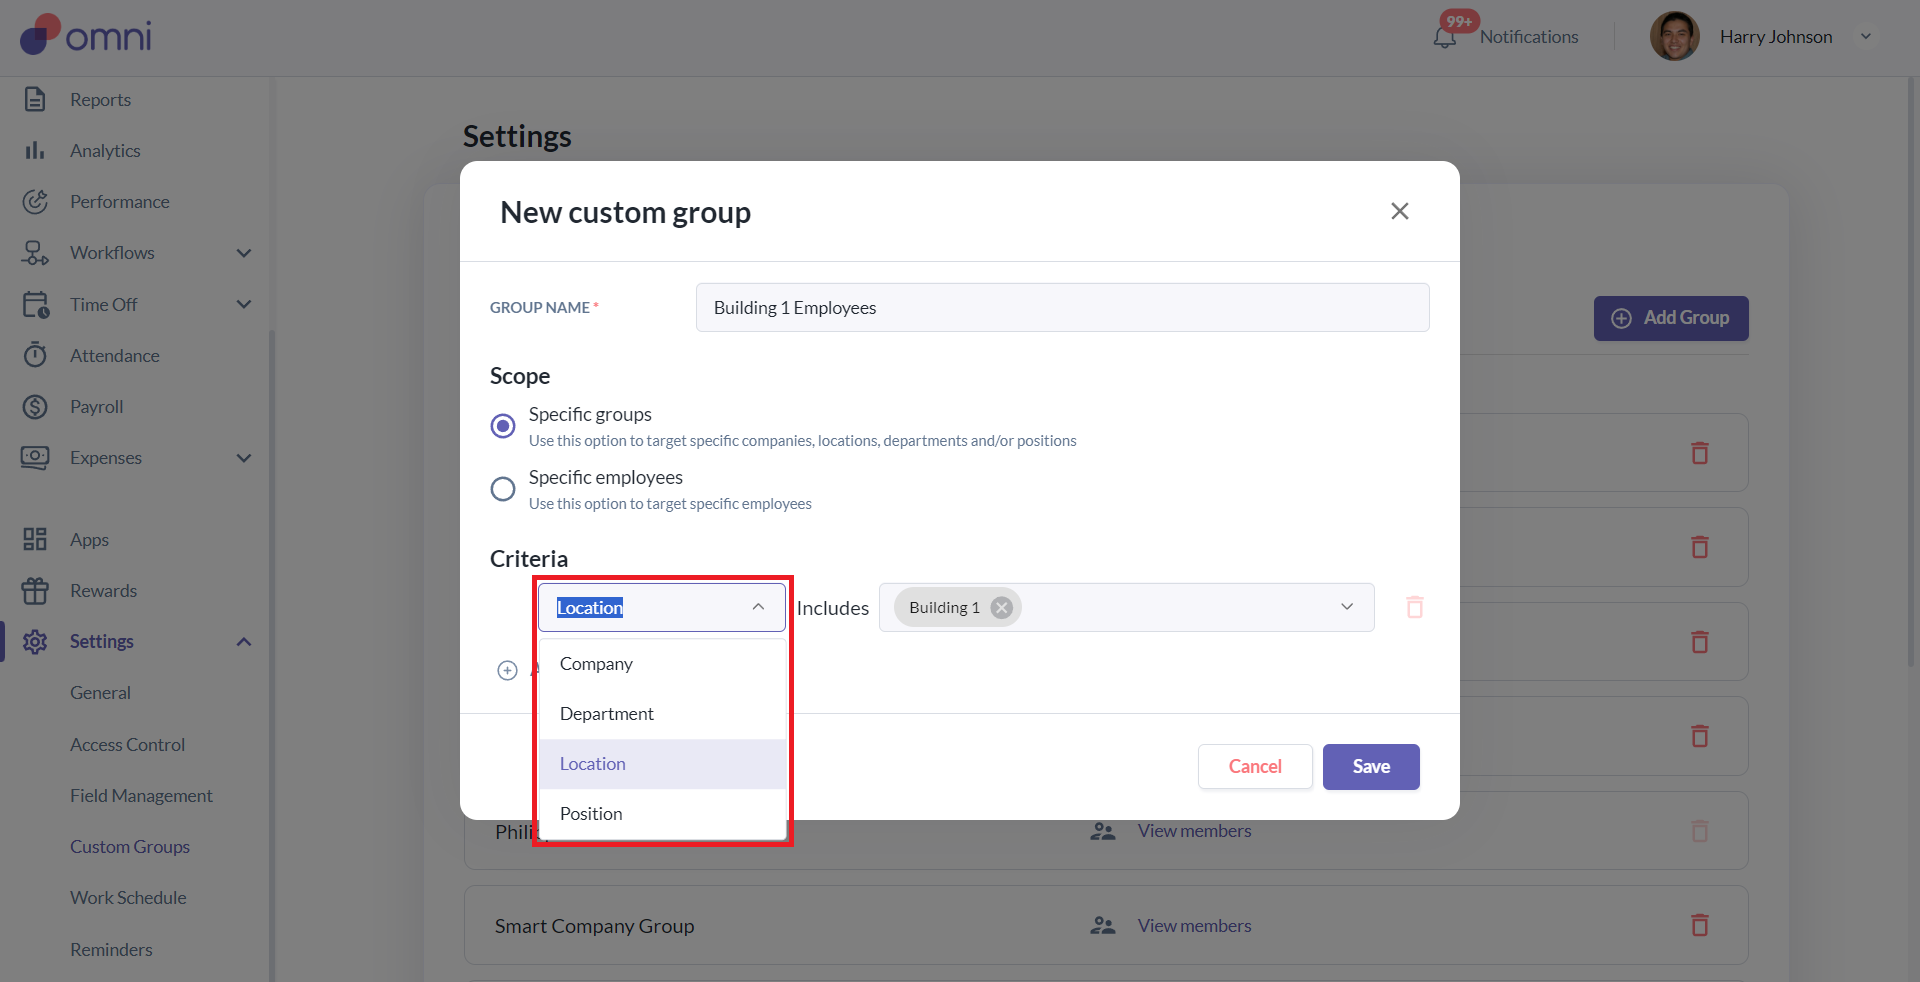
- For the scope, you may choose Specific groups or Specific employees.
- If you choose Specific groups, the Criteria section will allow you to choose criteria based on Company, Department, Location, and Position. You can add as more than one criteria as needed.
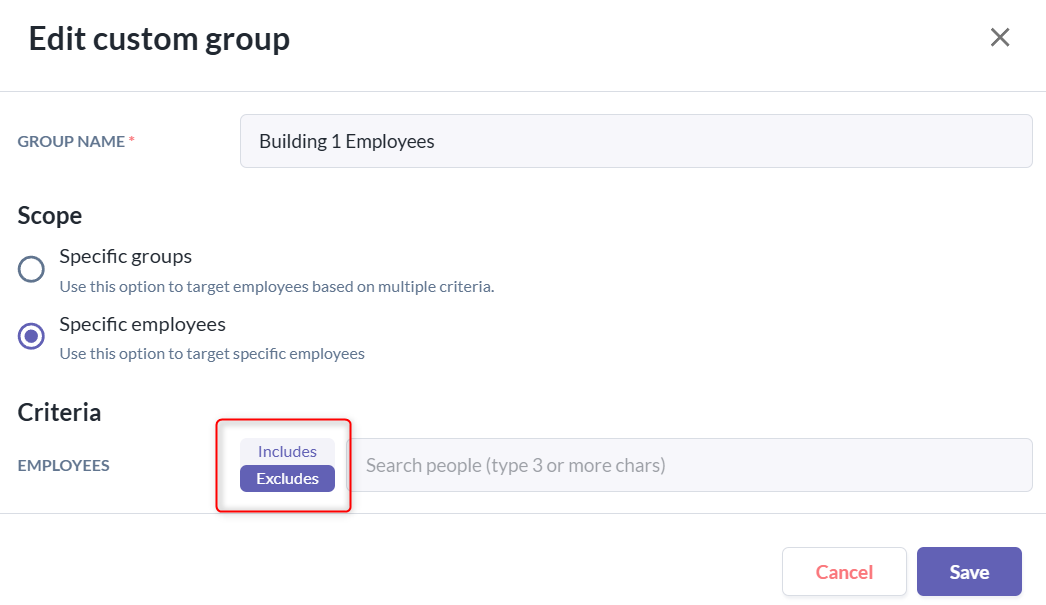
- If you choose Specific employees, the Criteria section will allow you to choose specific employees in your system to add to the group. Choose as many employees as needed.
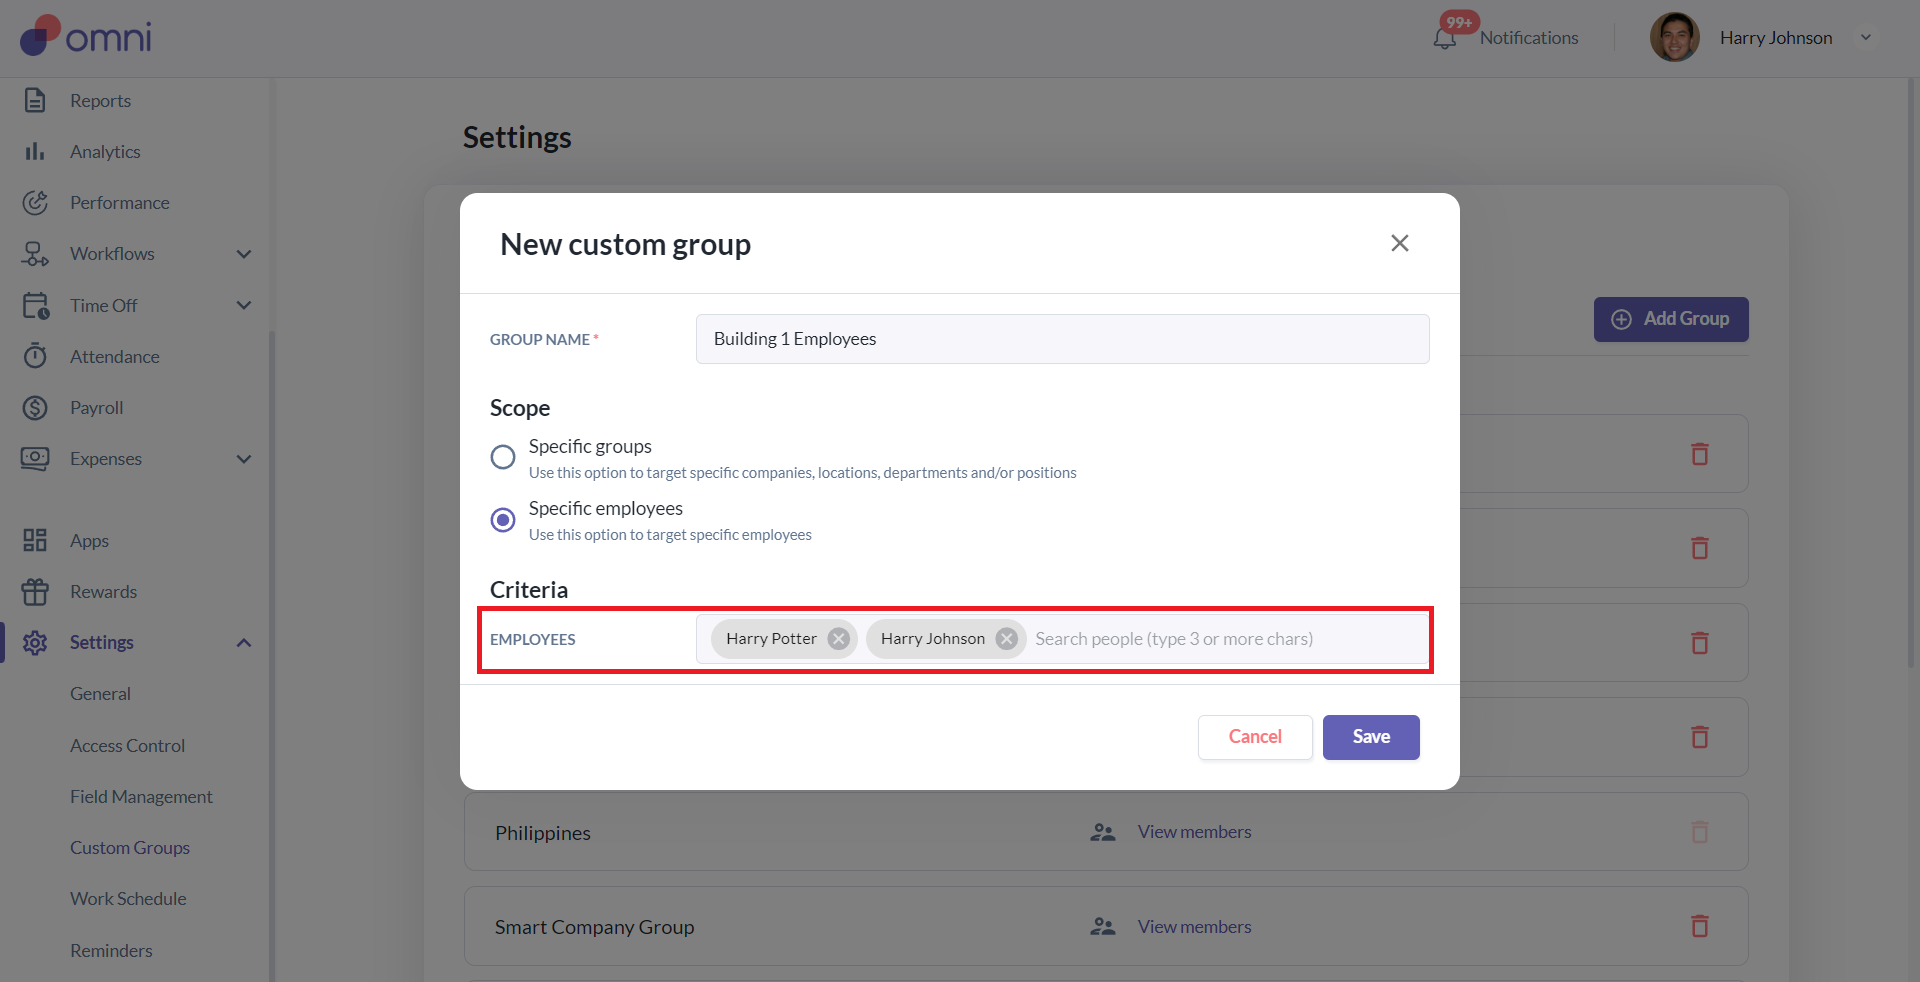
Step 3: Click Save.
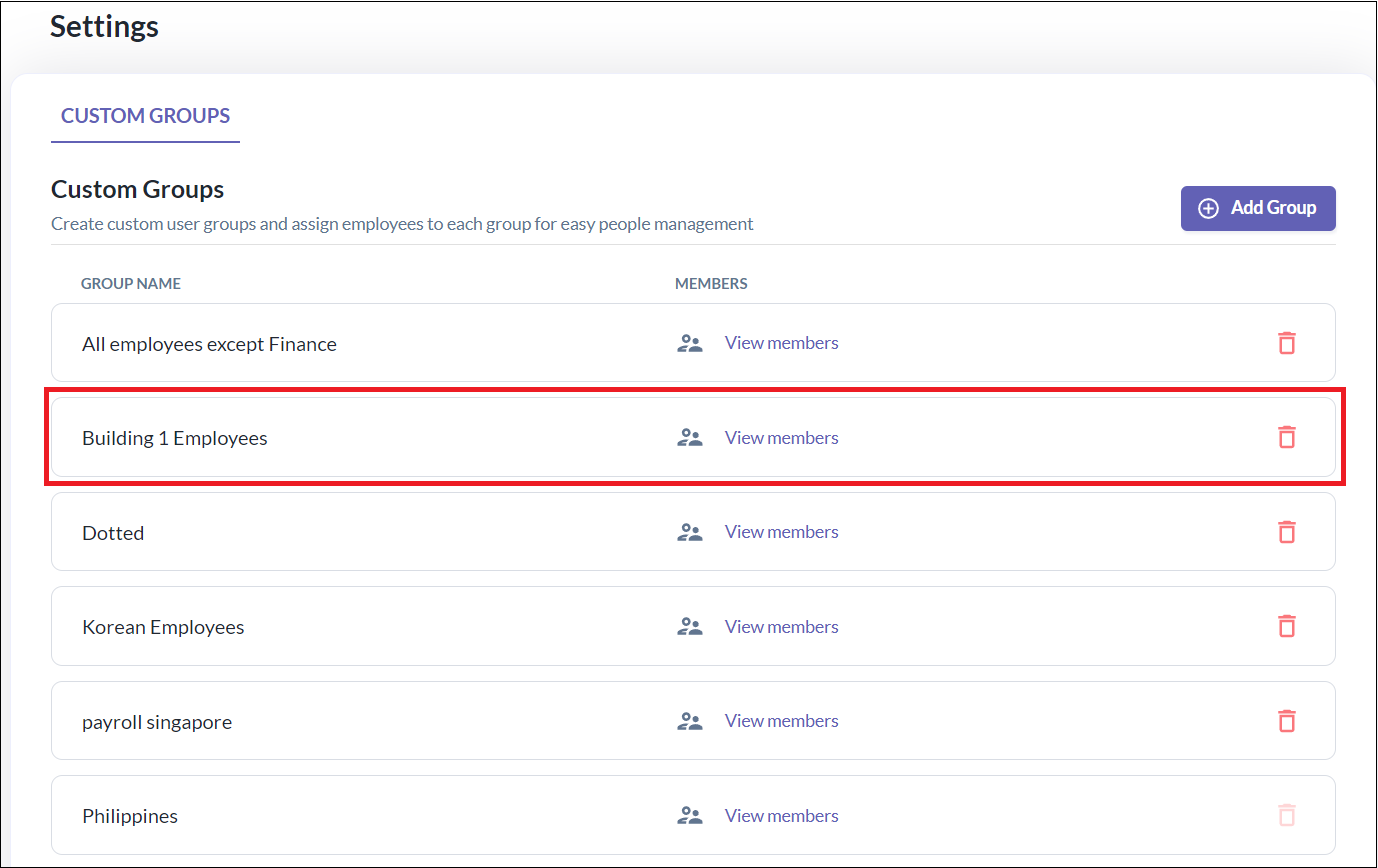
The Custom Group created will now appear in the list as seen in the screenshot below, and can be chosen in the Access Control.
Using Include / Exclude Conditions (NEW)
- When you choose Specific groups / Specific Employee, every criteria row now has an Includes / Excludes toggle next to it.
- Click + Add criteria to add a new row, or use an existing row.
- Pick a field — Company, Department, Employee, Employment status, Location, Position, or Team.
- Set the row to Includes or Excludes, then select the values for that field.
- Repeat for as many rows as you need. A single group can mix Includes rows and Excludes rows together.
- Example: Instead of ticking 19 out of 20 departments to build "everyone except Finance," you can now add one row:
Department — Excludes — Finance.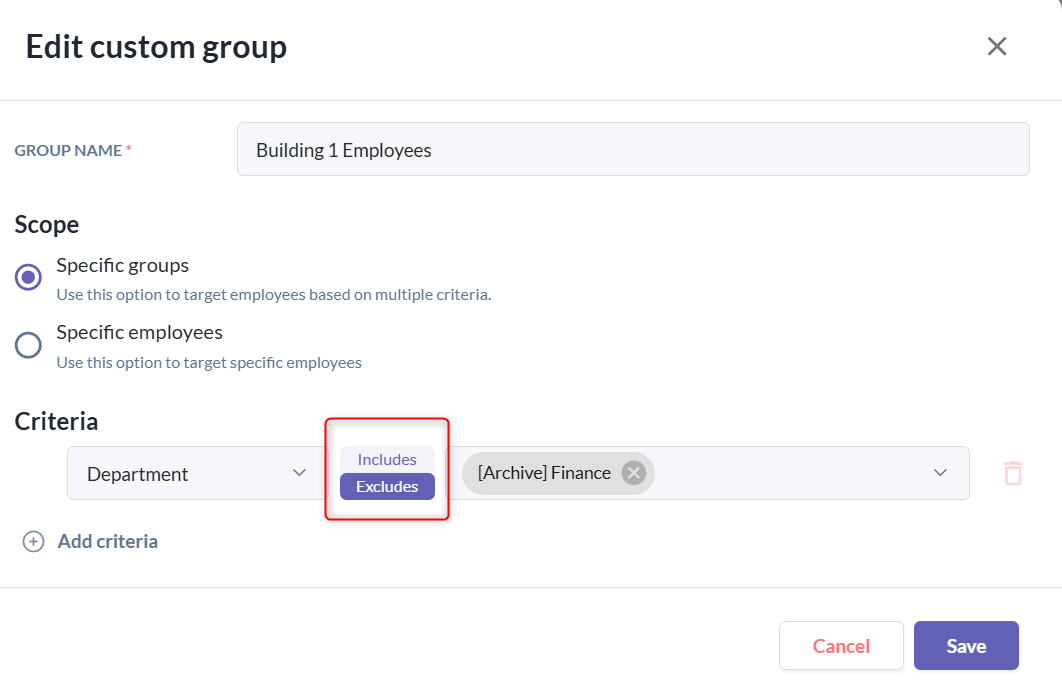
- Example: Instead of ticking 19 out of 20 departments to build "everyone except Finance," you can now add one row:
- How Includes and Excludes combine
- All the rows you set up have to be true at the same time for someone to be included. An Excludes row doesn't cross people off a list — it's just one more rule that has to line up.
- For example:
Rule: Include Department = Product, Exclude Team = Rojak
Employee: Department is Product, Team is Rojak
Result: Excluded — the rule reads as "department IS Product AND team IS NOT Rojak," and this employee fails the second half.
- Good to Know
- Excludes doesn't create an "exception." If a row says Department = Product and another row says Excludes Team = Rojak, both have to be true. So someone in Product who's also on team Rojak won't be in the group — the Exclude just adds another condition, not a special carve-out.
- One field, one row. You can only use each field (like Employee) once per group. So you can't add two separate "Employee" rows to the same group — if you need to exclude a few people, list them all in that single row.
- Typing to find people. For the other fields (Department, Location, etc.) you pick from a list. For Employee, you'll need to start typing their name to find them.
Choosing the Custom Group in the Access Control
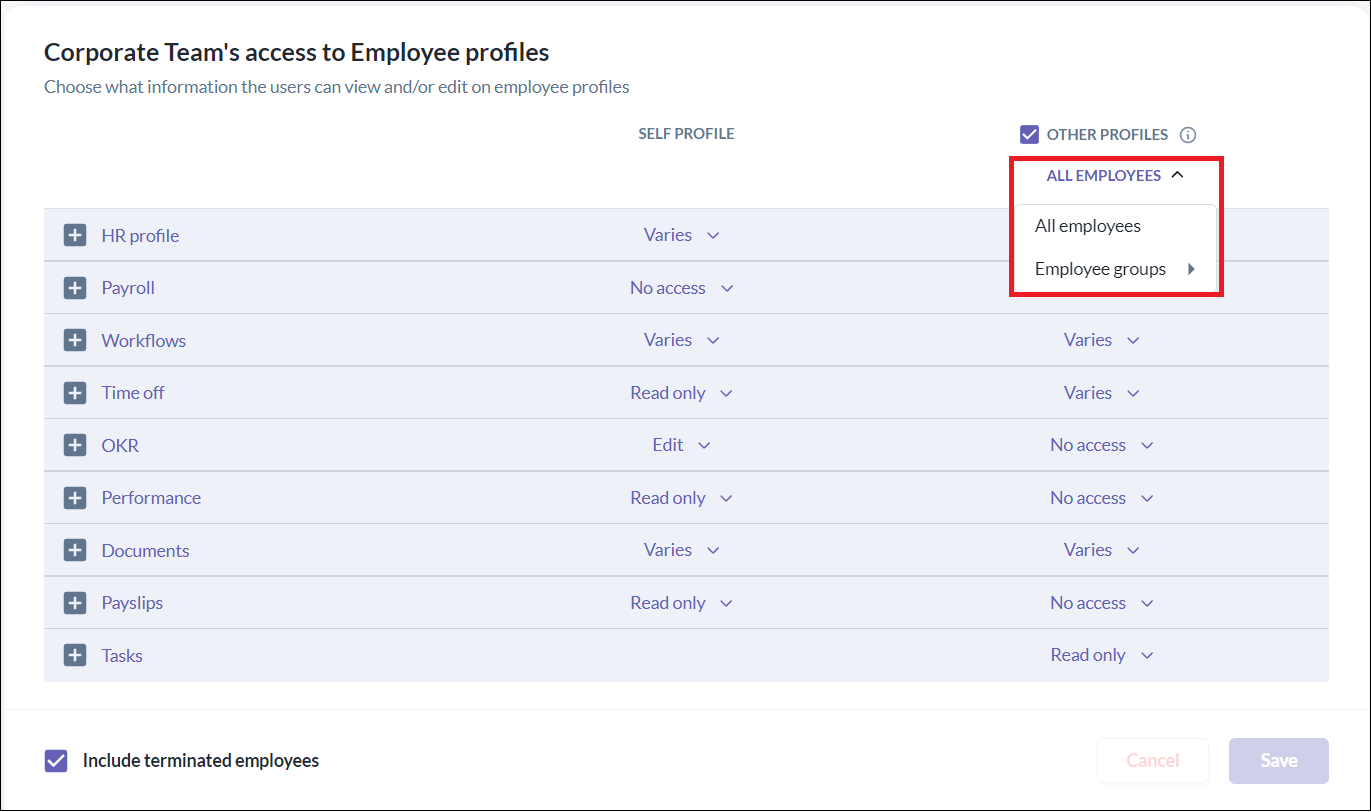
Step 1: Go to Access Control > choose the role you want to apply the Custom Group to > click the dropdown under Other Profiles > click Employee groups
Step 2: A menu with the Custom Group options will appear, allowing you to choose the Custom Group you want the role to have access to. Choose the Custom Group accordingly.
Step 3: Click Save.
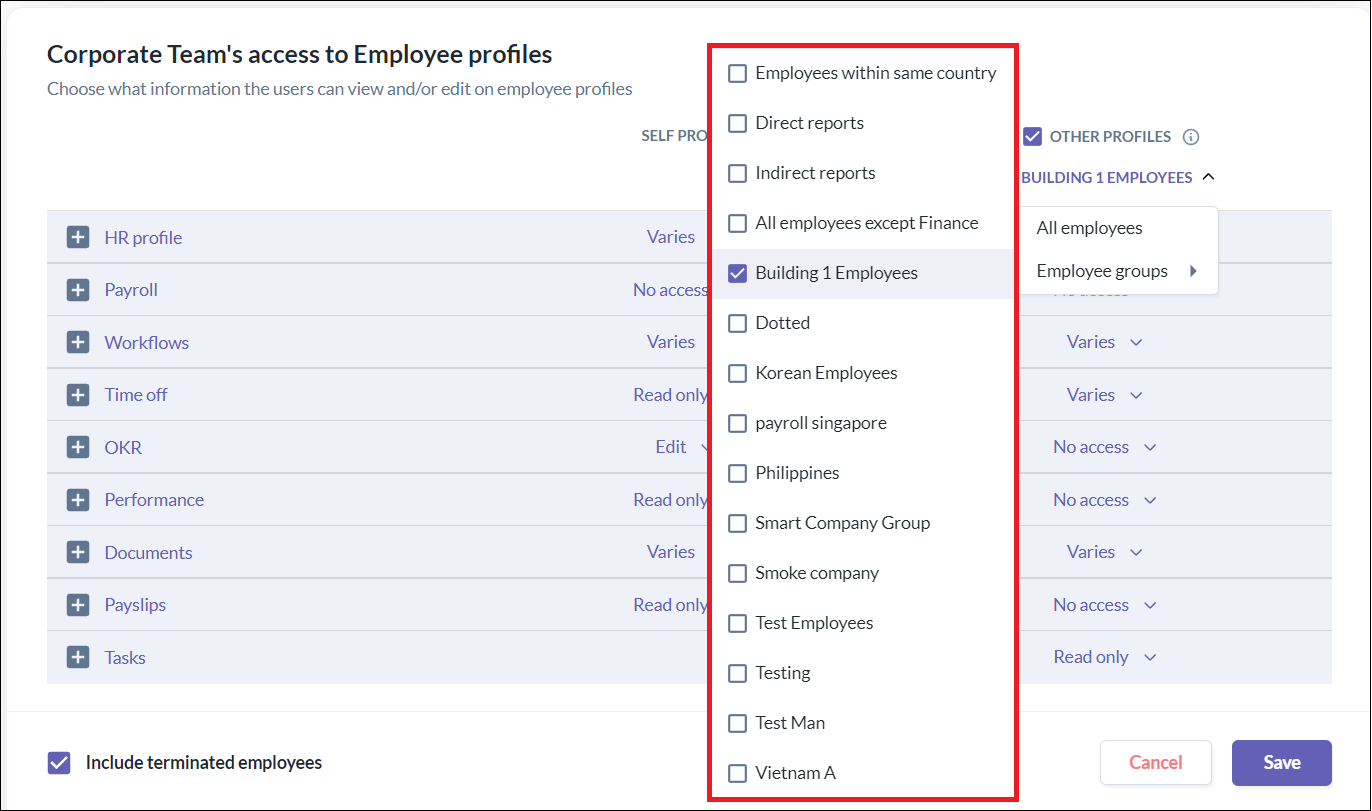
Employees with this role will now have access to the employees inside the Custom Group selected based on the configurations you set in the Other Profiles column for the role.
Still Need Help?:
Reach out to our support team should you need further assistance.
Was this article helpful?
That’s Great!
Thank you for your feedback
Sorry! We couldn't be helpful
Thank you for your feedback
Feedback sent
We appreciate your effort and will try to fix the article