Overview:
This guide explains how to send a contract to candidates and other required signers during the Offer Stage.
Once a contract is sent, it will be automatically delivered via email to all signers and routed according to the defined signing order.
TABLE OF CONTENTS
- Create a Contract Template
- Send a Contract at Offer Stage
- Email Notifications & Signer Process
- Contract Status Updates
Create a Contract Template
Before sending a contract, you’ll need to create a template.
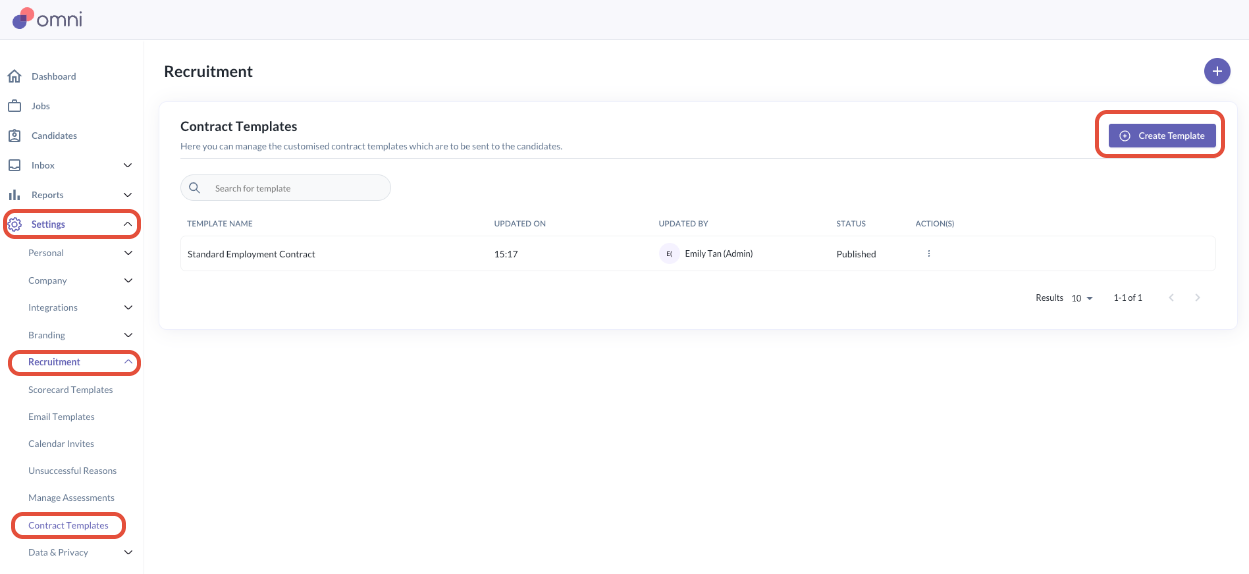
- Go to Settings > Recruitment > Contract Templates
- Click Create a Template
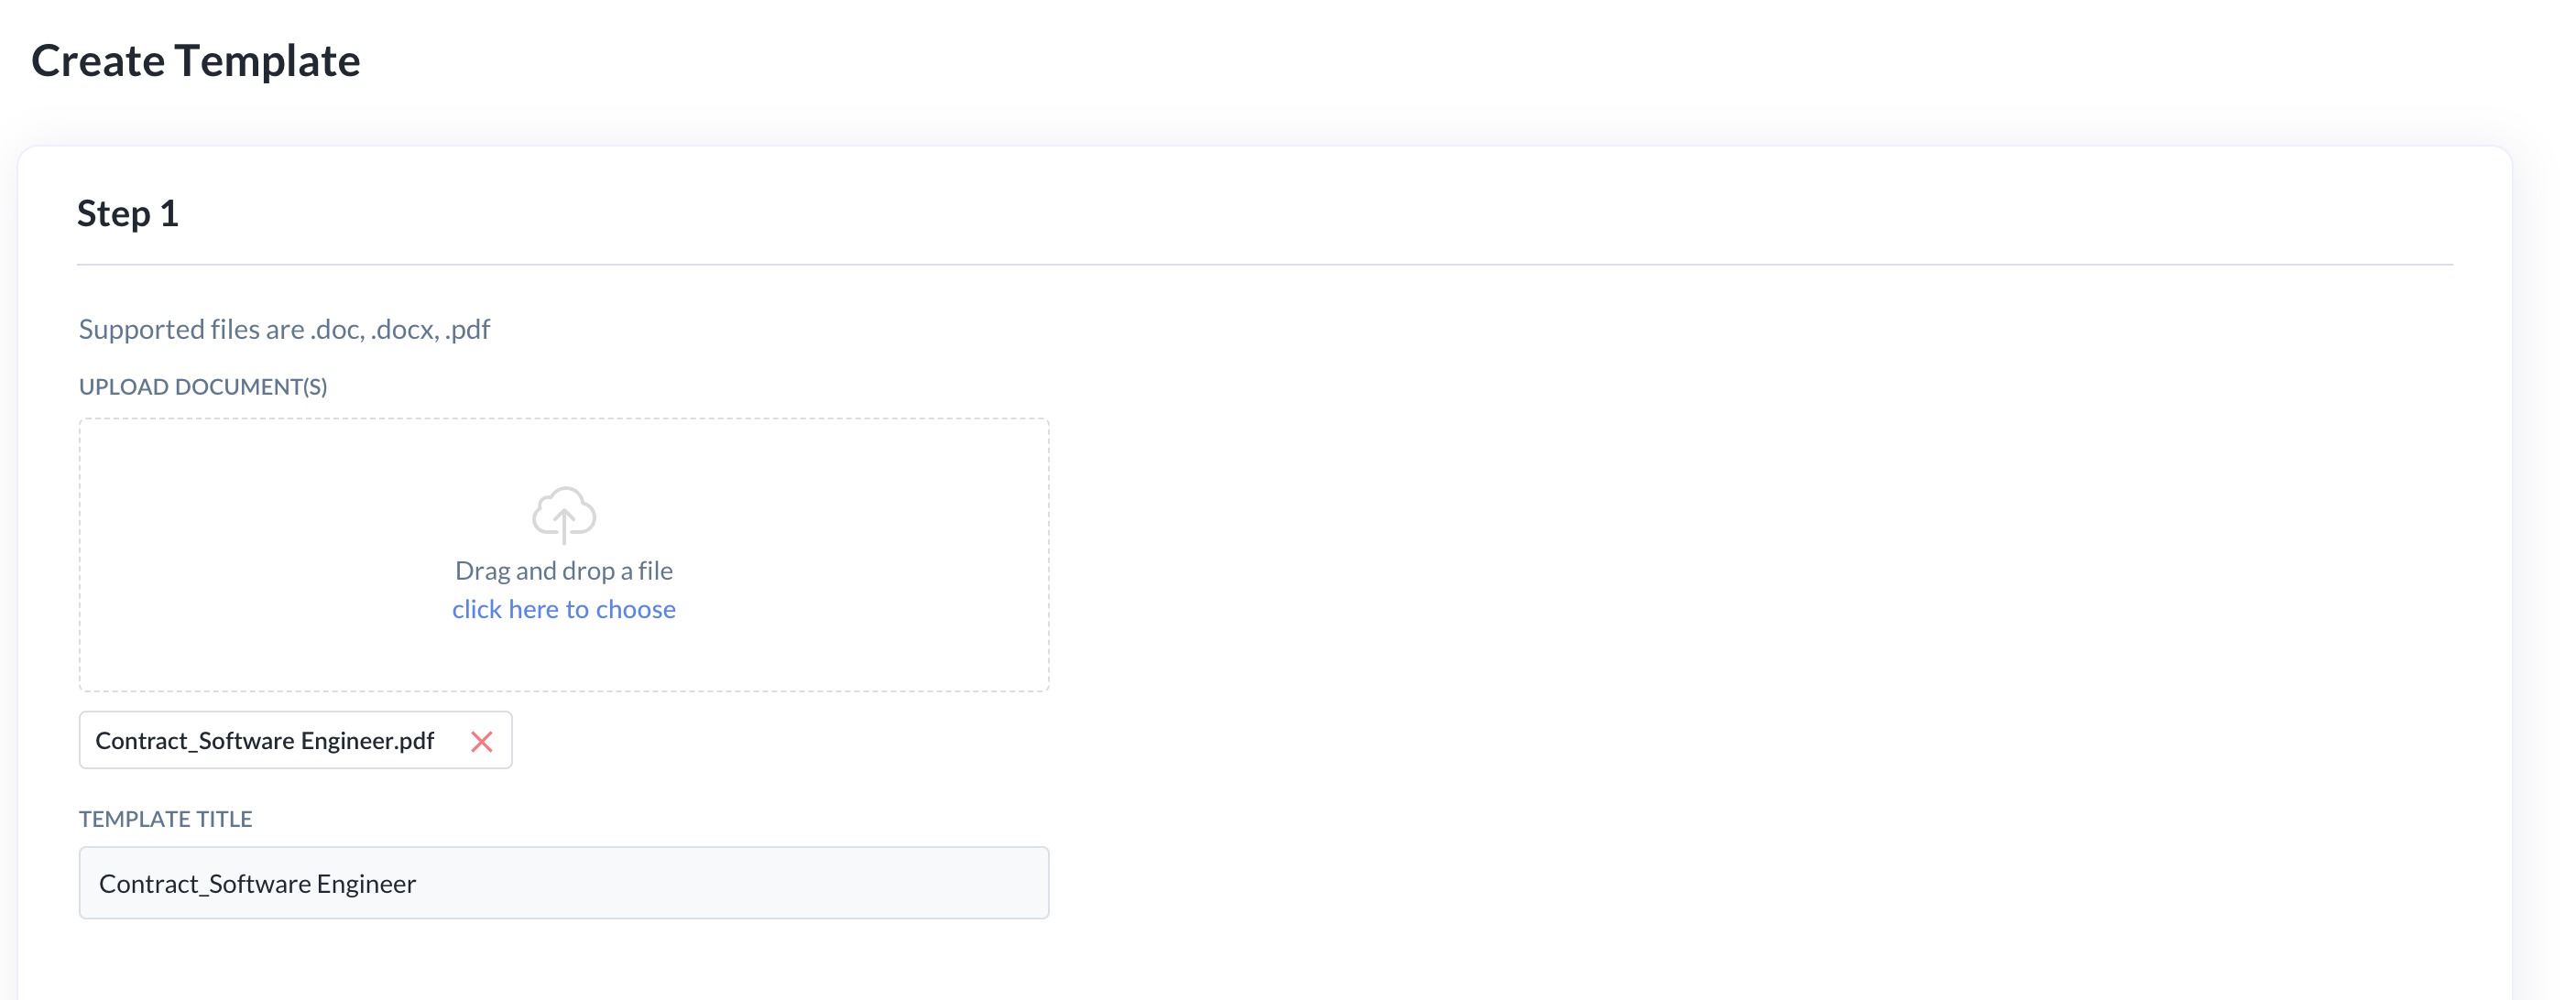
- Under Step 1, Upload your contract file (.doc, .docx, or .pdf) and enter a name in the Template Title field
- Add the required signer roles (e.g. Employee, Hiring Manager, Head of Department).
- Drag and reorder the roles to define the signing sequence
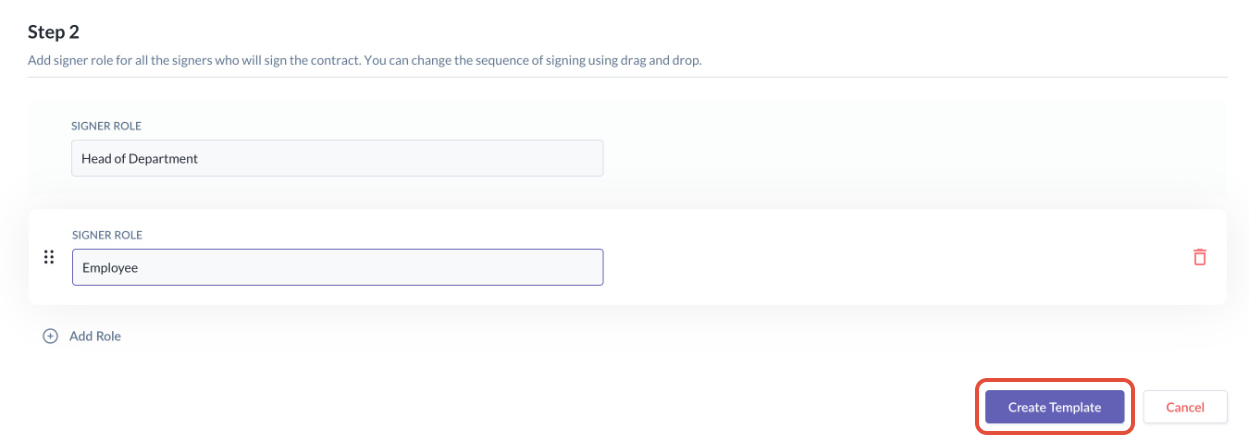
- Then click Create Template, where you’ll be directed to the document editor.
- You will be directed to the document editor where you can toggle between signers (top-left) to assign fields to per signer
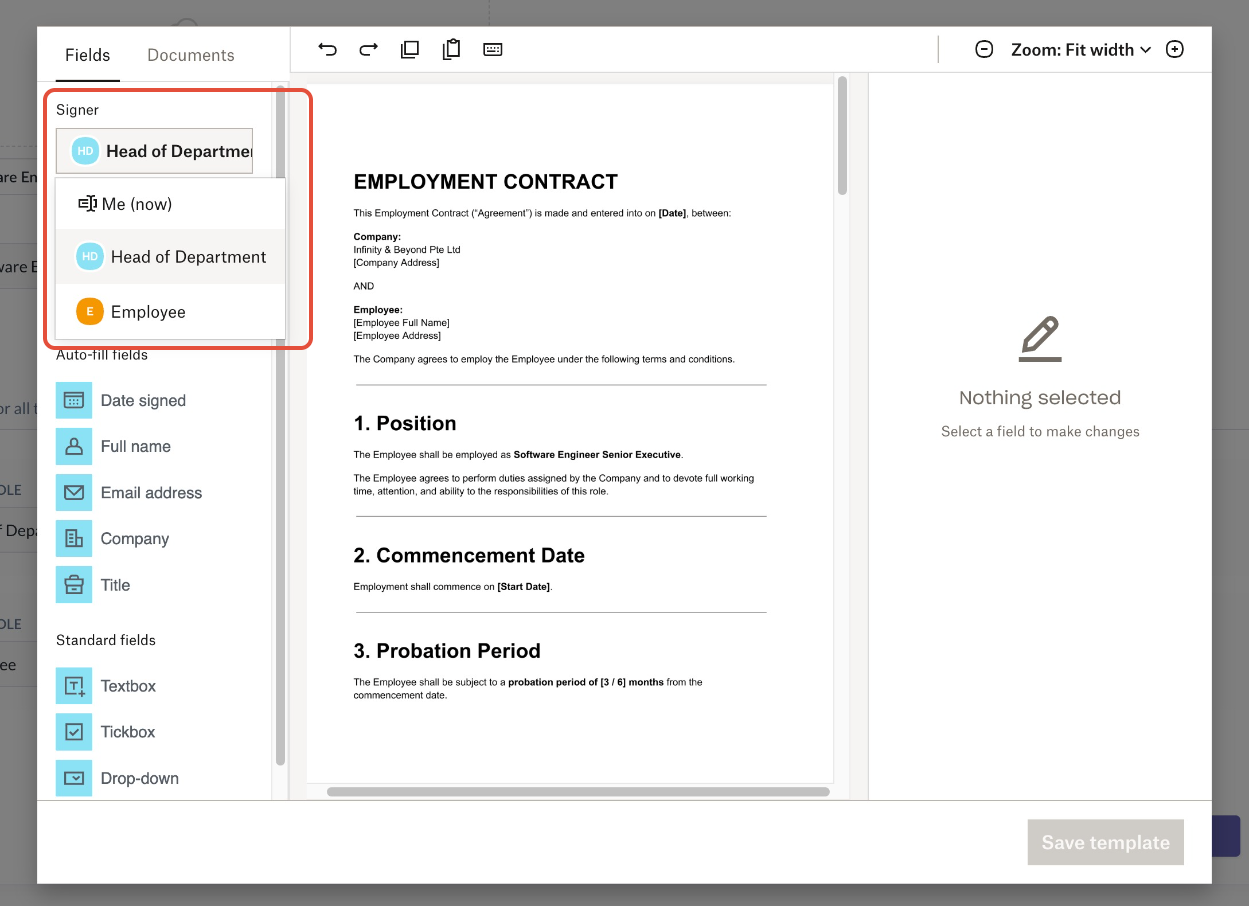
- You can then add fields by dragging them into the document:
- Signature fields → for signing
- Auto-fill fields → system-generated data
- Standard fields → custom input fields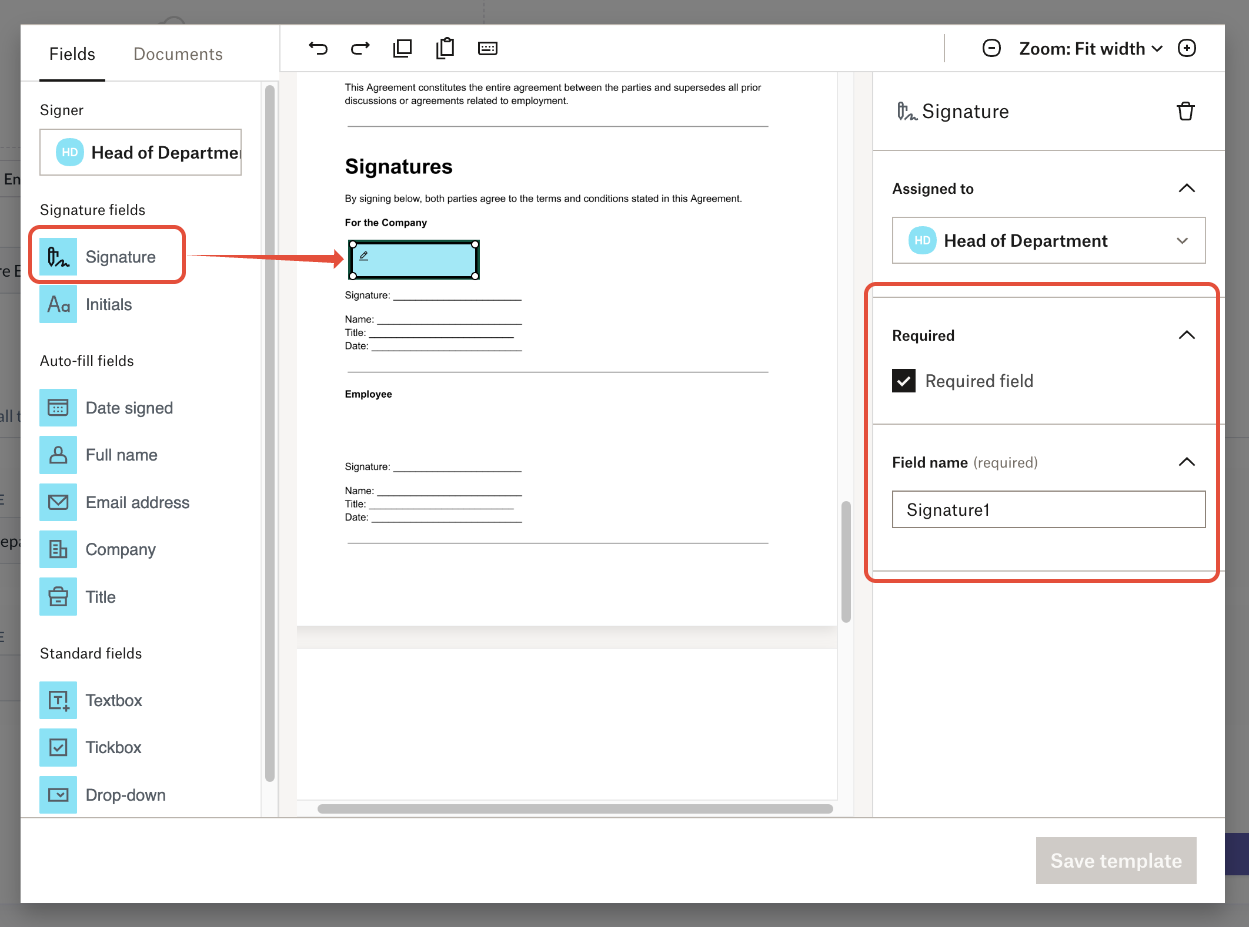
- You can customise the fields by resizing and repositioning them as needed
- On the right panel, you can mark fields as mandatory if required, rename fields for clarity or adjust formatting
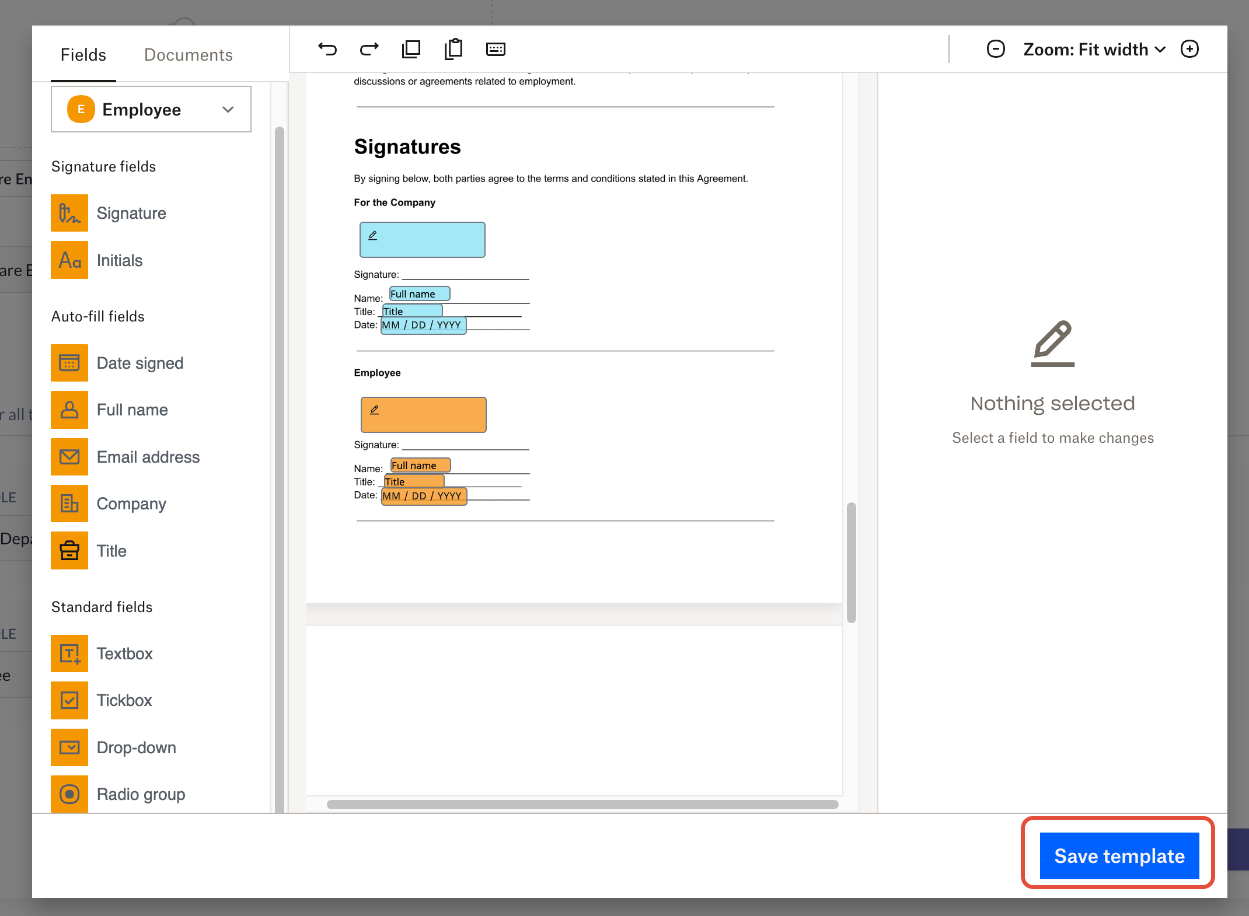
- Once all fields are set, you can click Save Template
- Your template will now appear in the Contract Templates list.
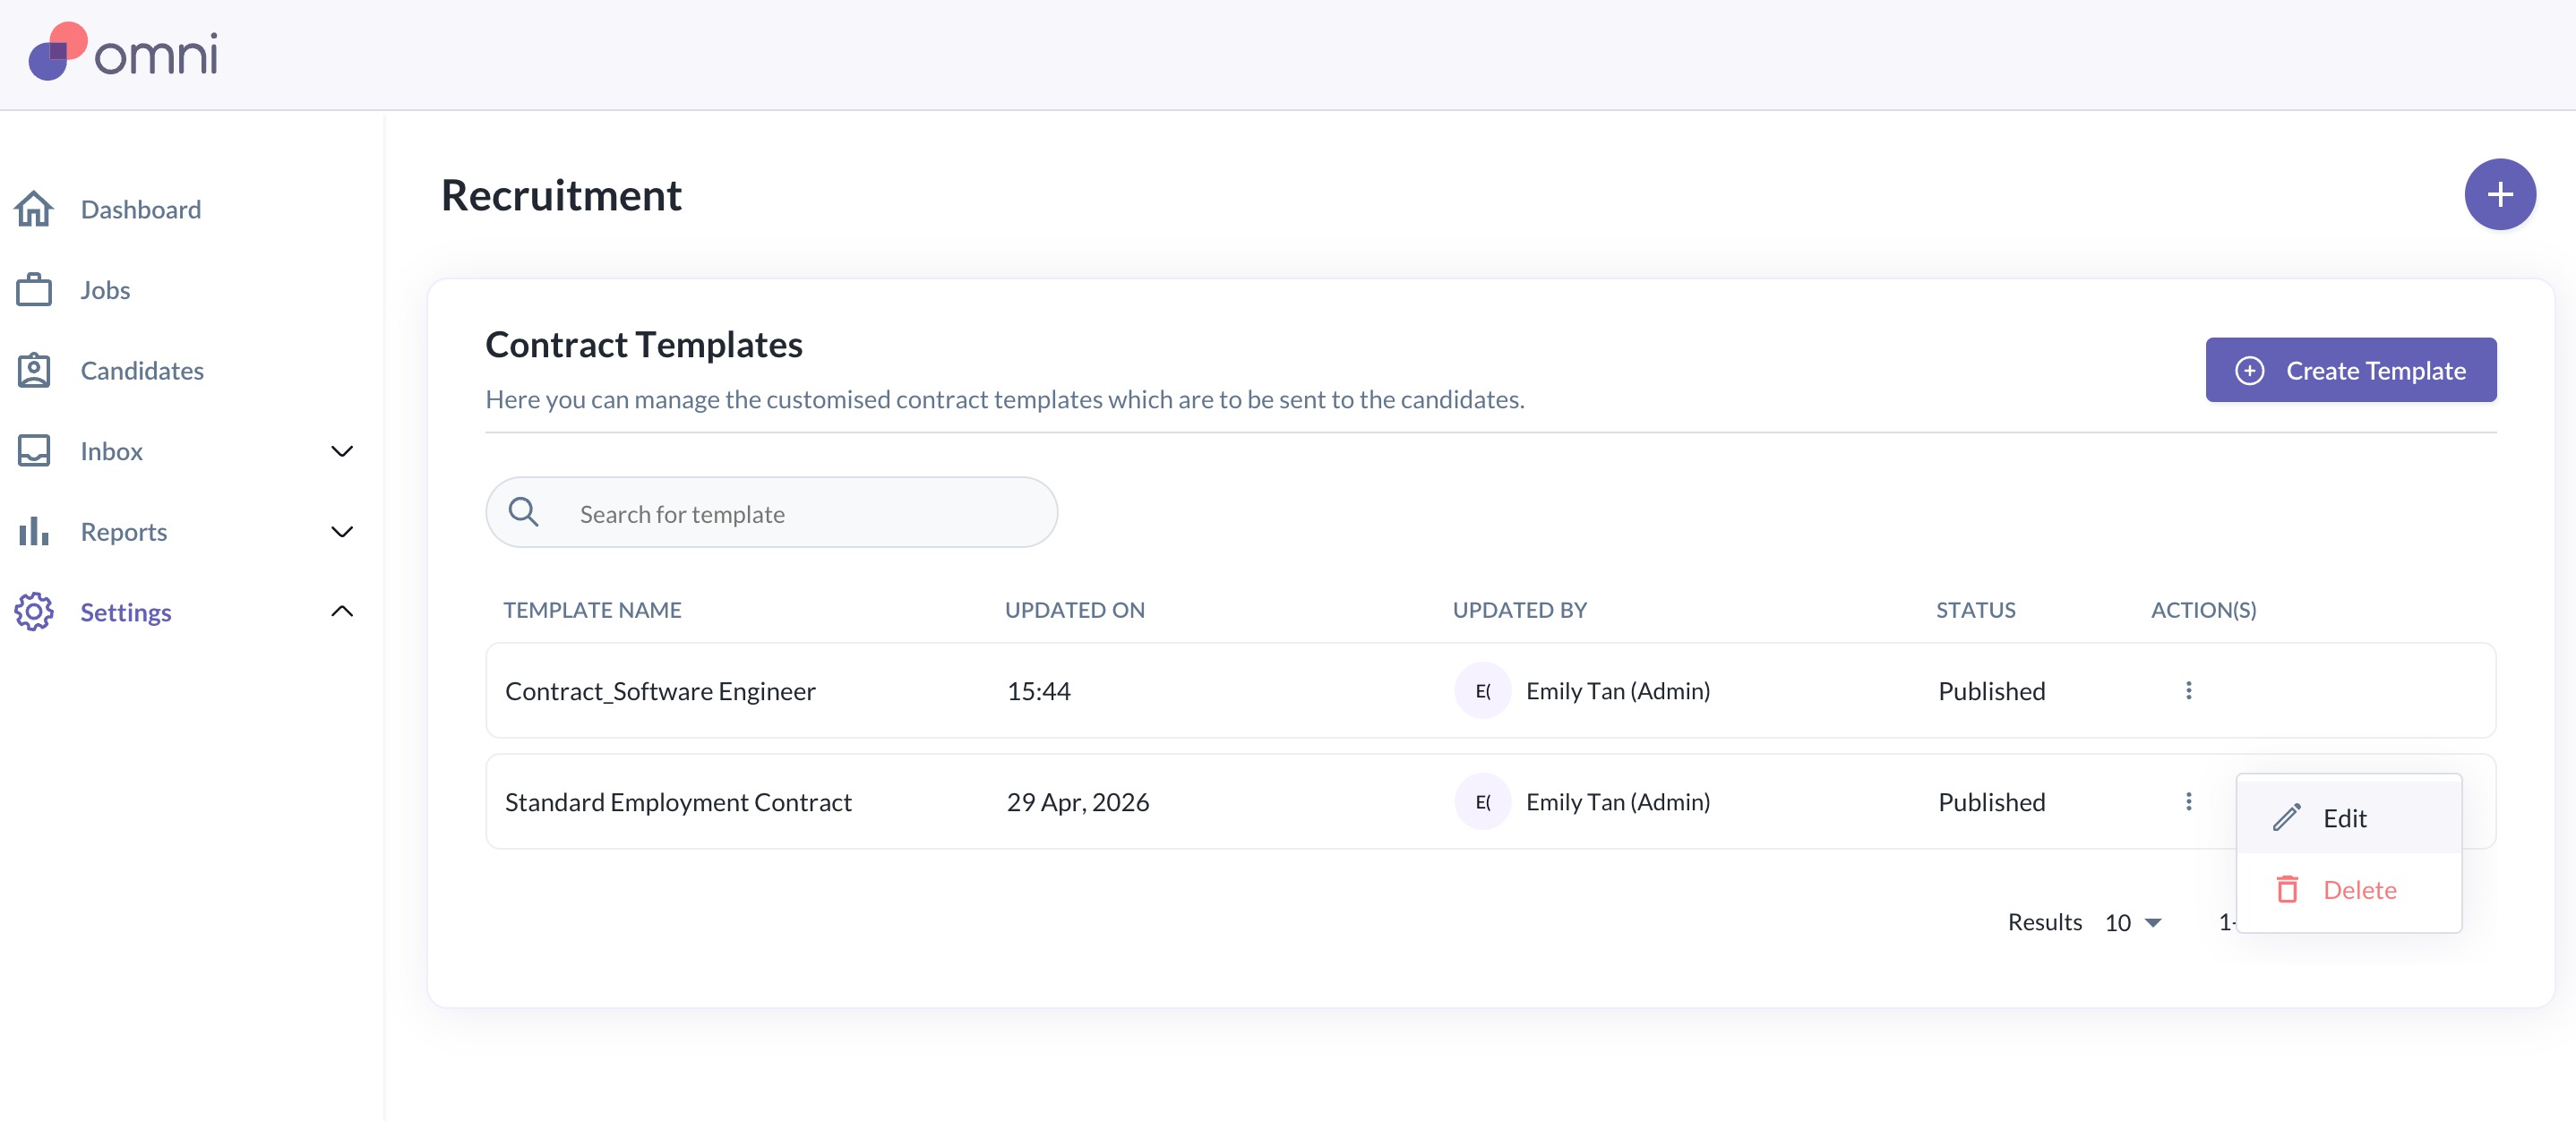
- You can always edit or delete the template by clicking the 3 dots next to the template and select edit or delete
Send a Contract at Offer Stage
- Once you move a Candidate into the Offer Stage, you can fill in the offer details and proceed to Click Save, or Click Save & Send
Note: You do not need to send the offer to proceed with sending a contract
- After Saving, you will then be redirected to the Offers & Contracts section in the Candidate page
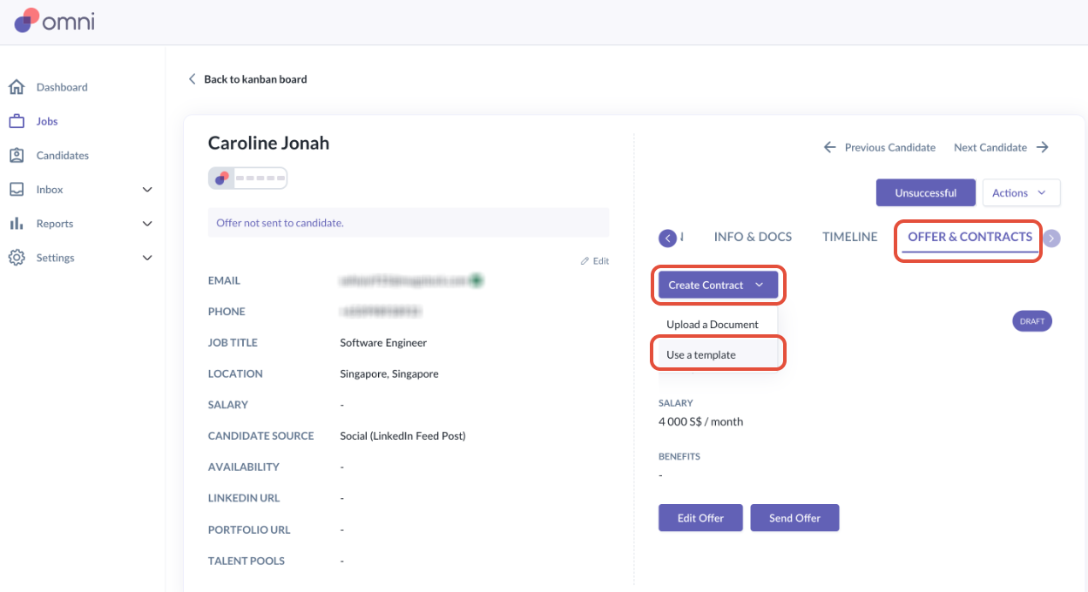
- Click on Create Contract > Use a Template
- Under Step 1, select your template from the dropdown
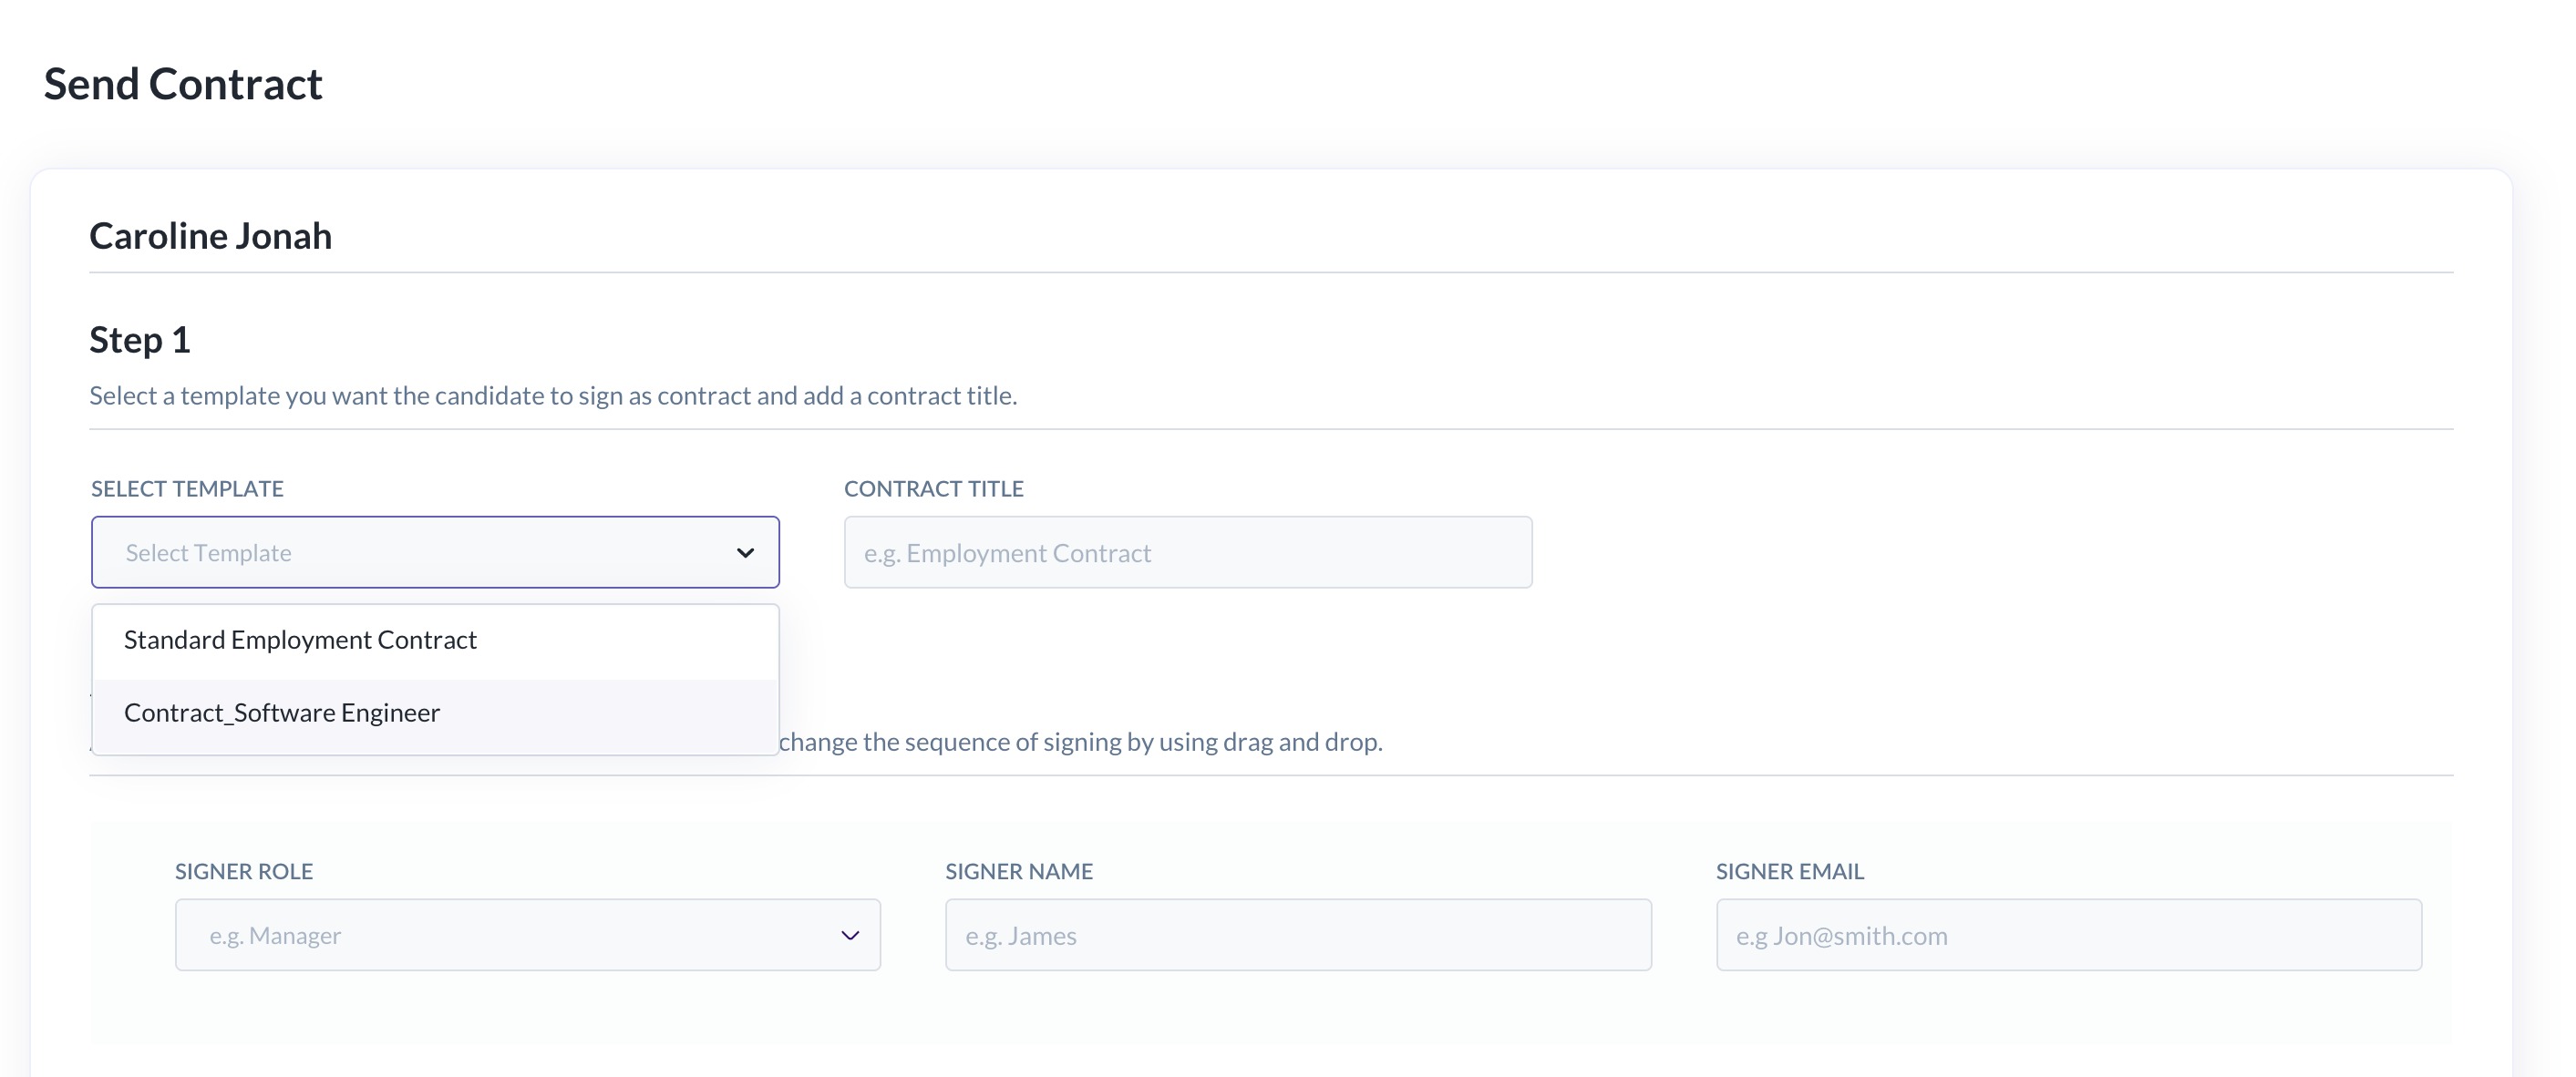
- Once you select the contract, the contract title will auto-populate
- The Signer Roles will also auto-populate and cannot be changed
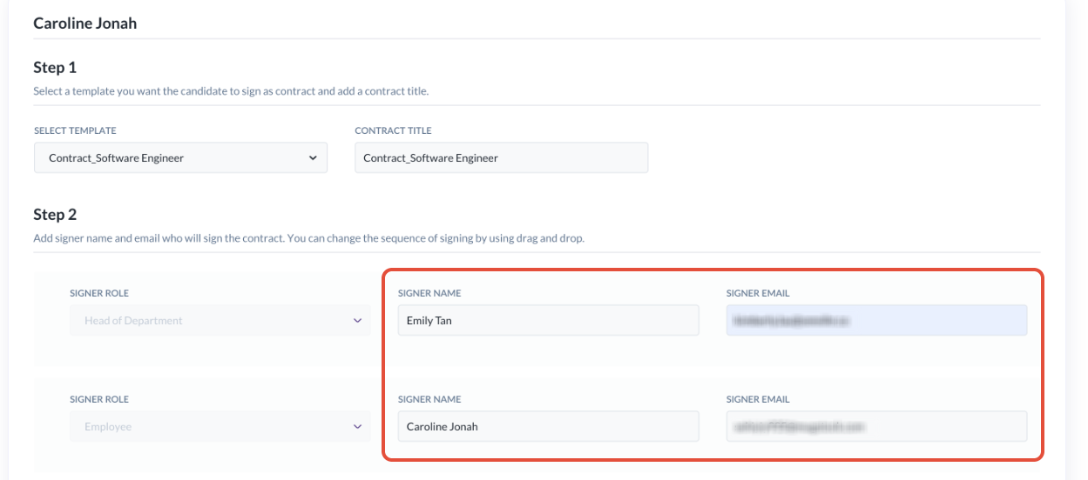
- You will then need to define the Signer Names and Signer Email Addresses
- At this stage, you may reorder the signers if needed
- At Step 3, you can enter your Email Subject and Email Body, then proceed to click Send Contract
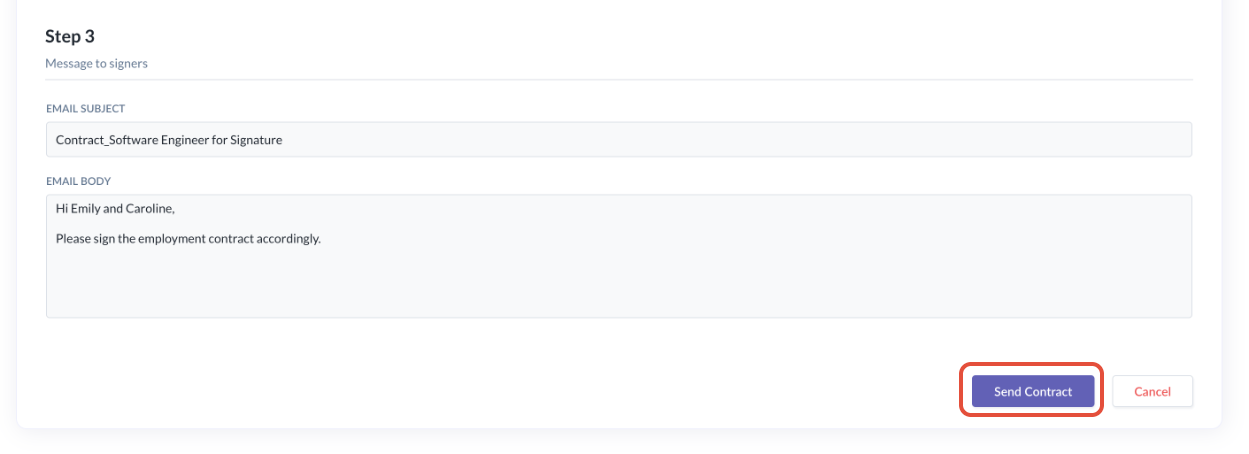
- The contract will be sent out for signature based on the defined signing order.
Email Notifications & Signer Process
What Signers Receive
- The first signer receives an email with the contract
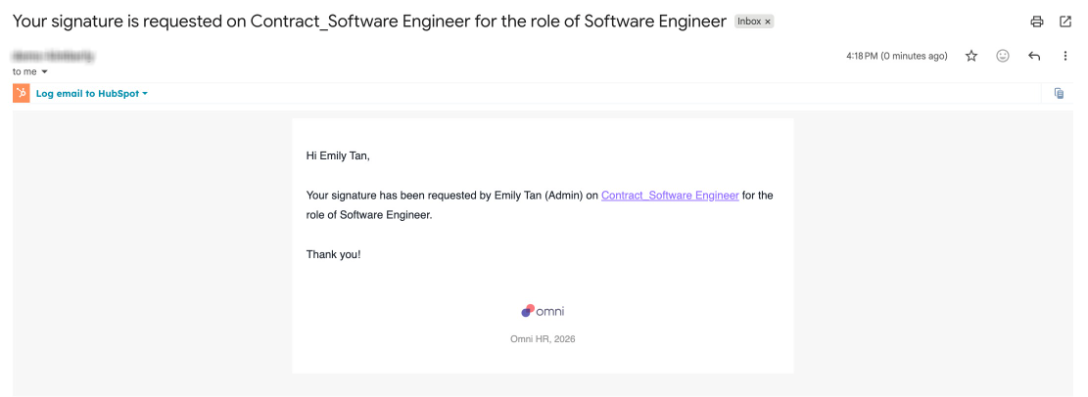
- Other signers receive a notification that the document is pending
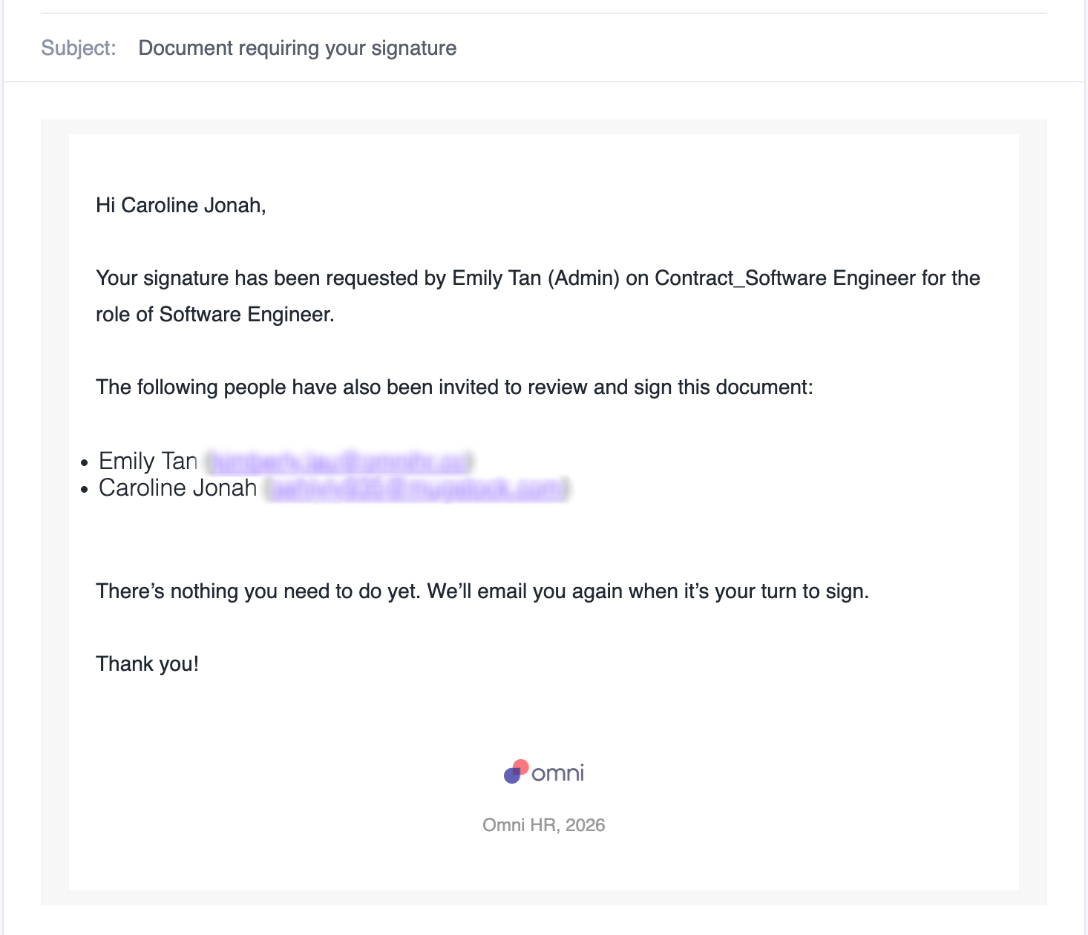
Signing Flow
- Signer opens the email and clicks the contract link where they will first see the lost of required signers
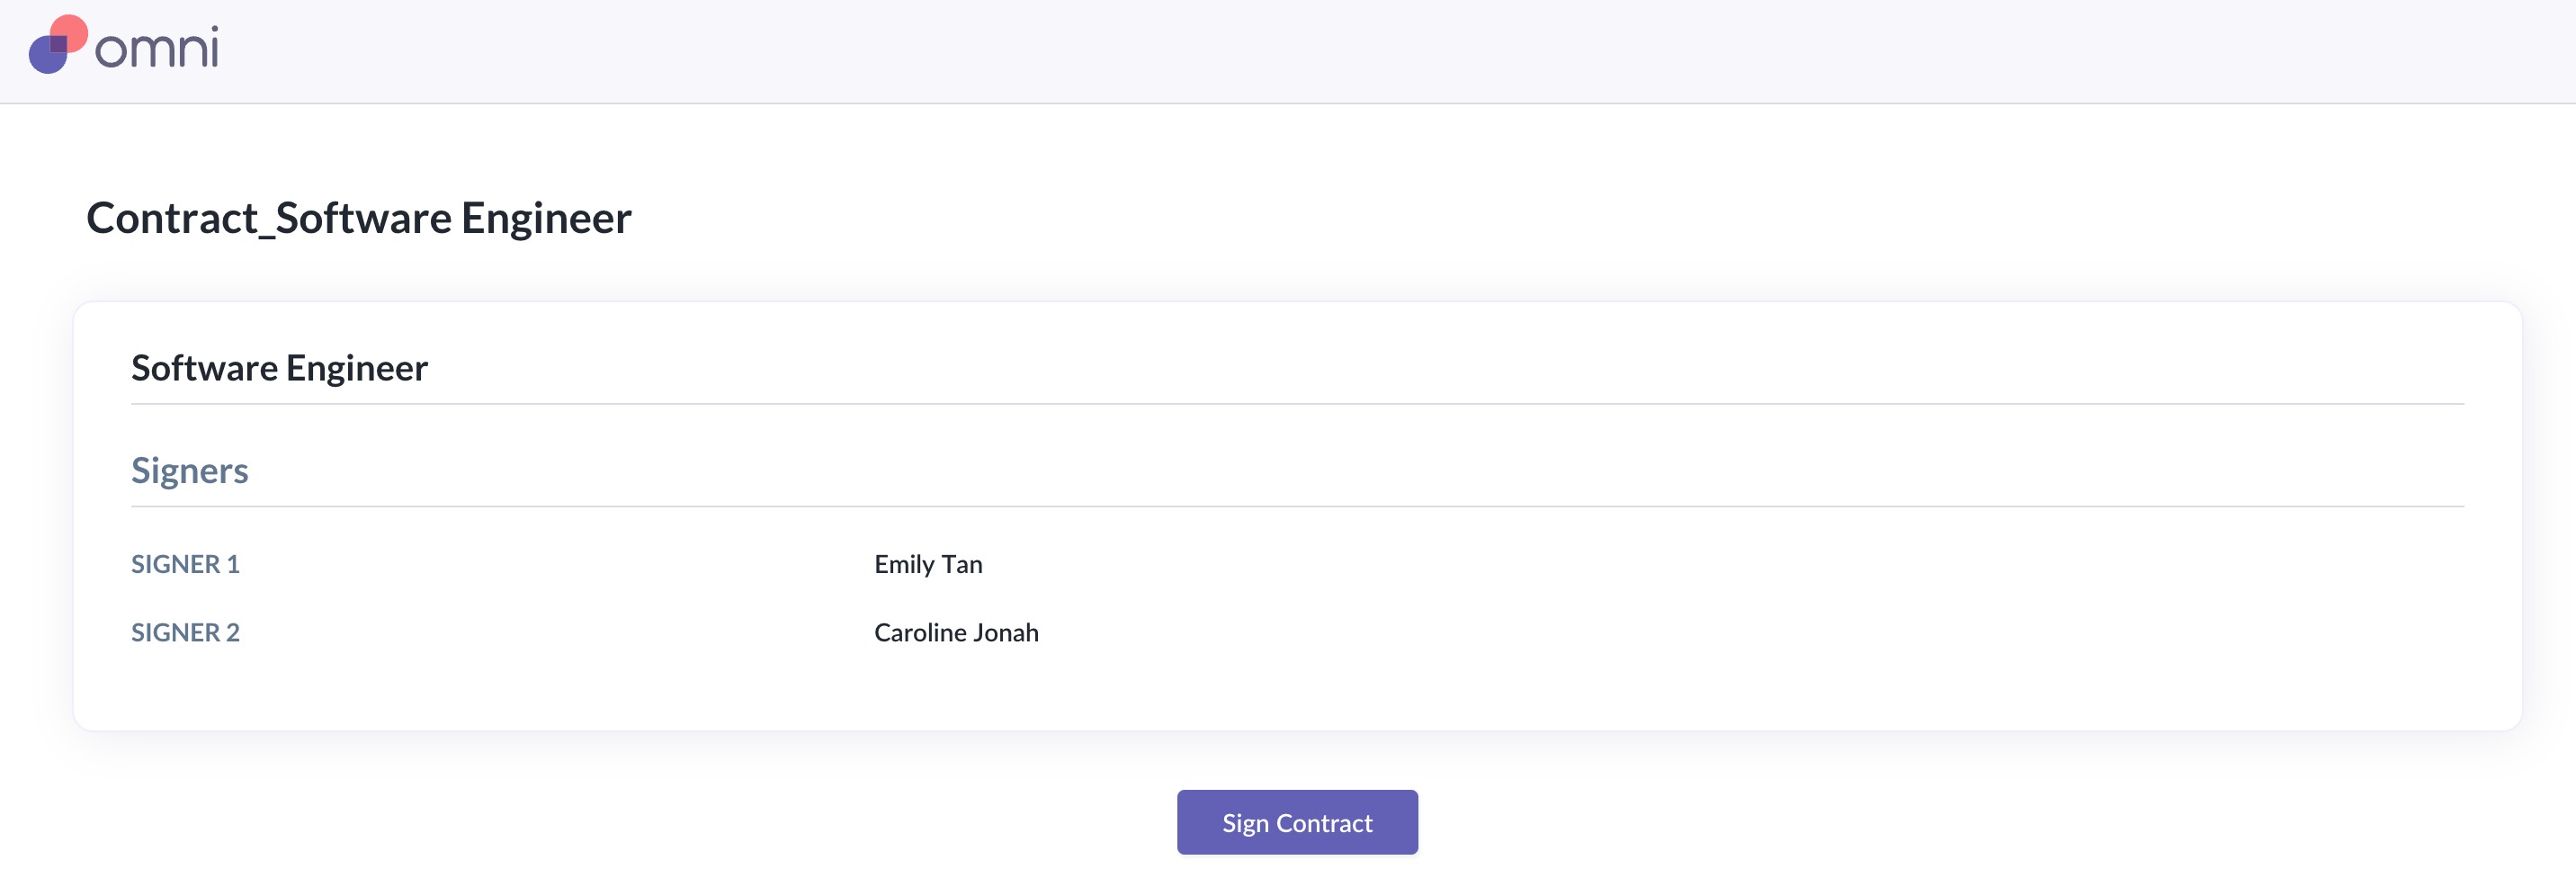
- Click Sign Contract to begin reviewing the document
- The signers will be required to fill in the fields that will be highlighted clearly
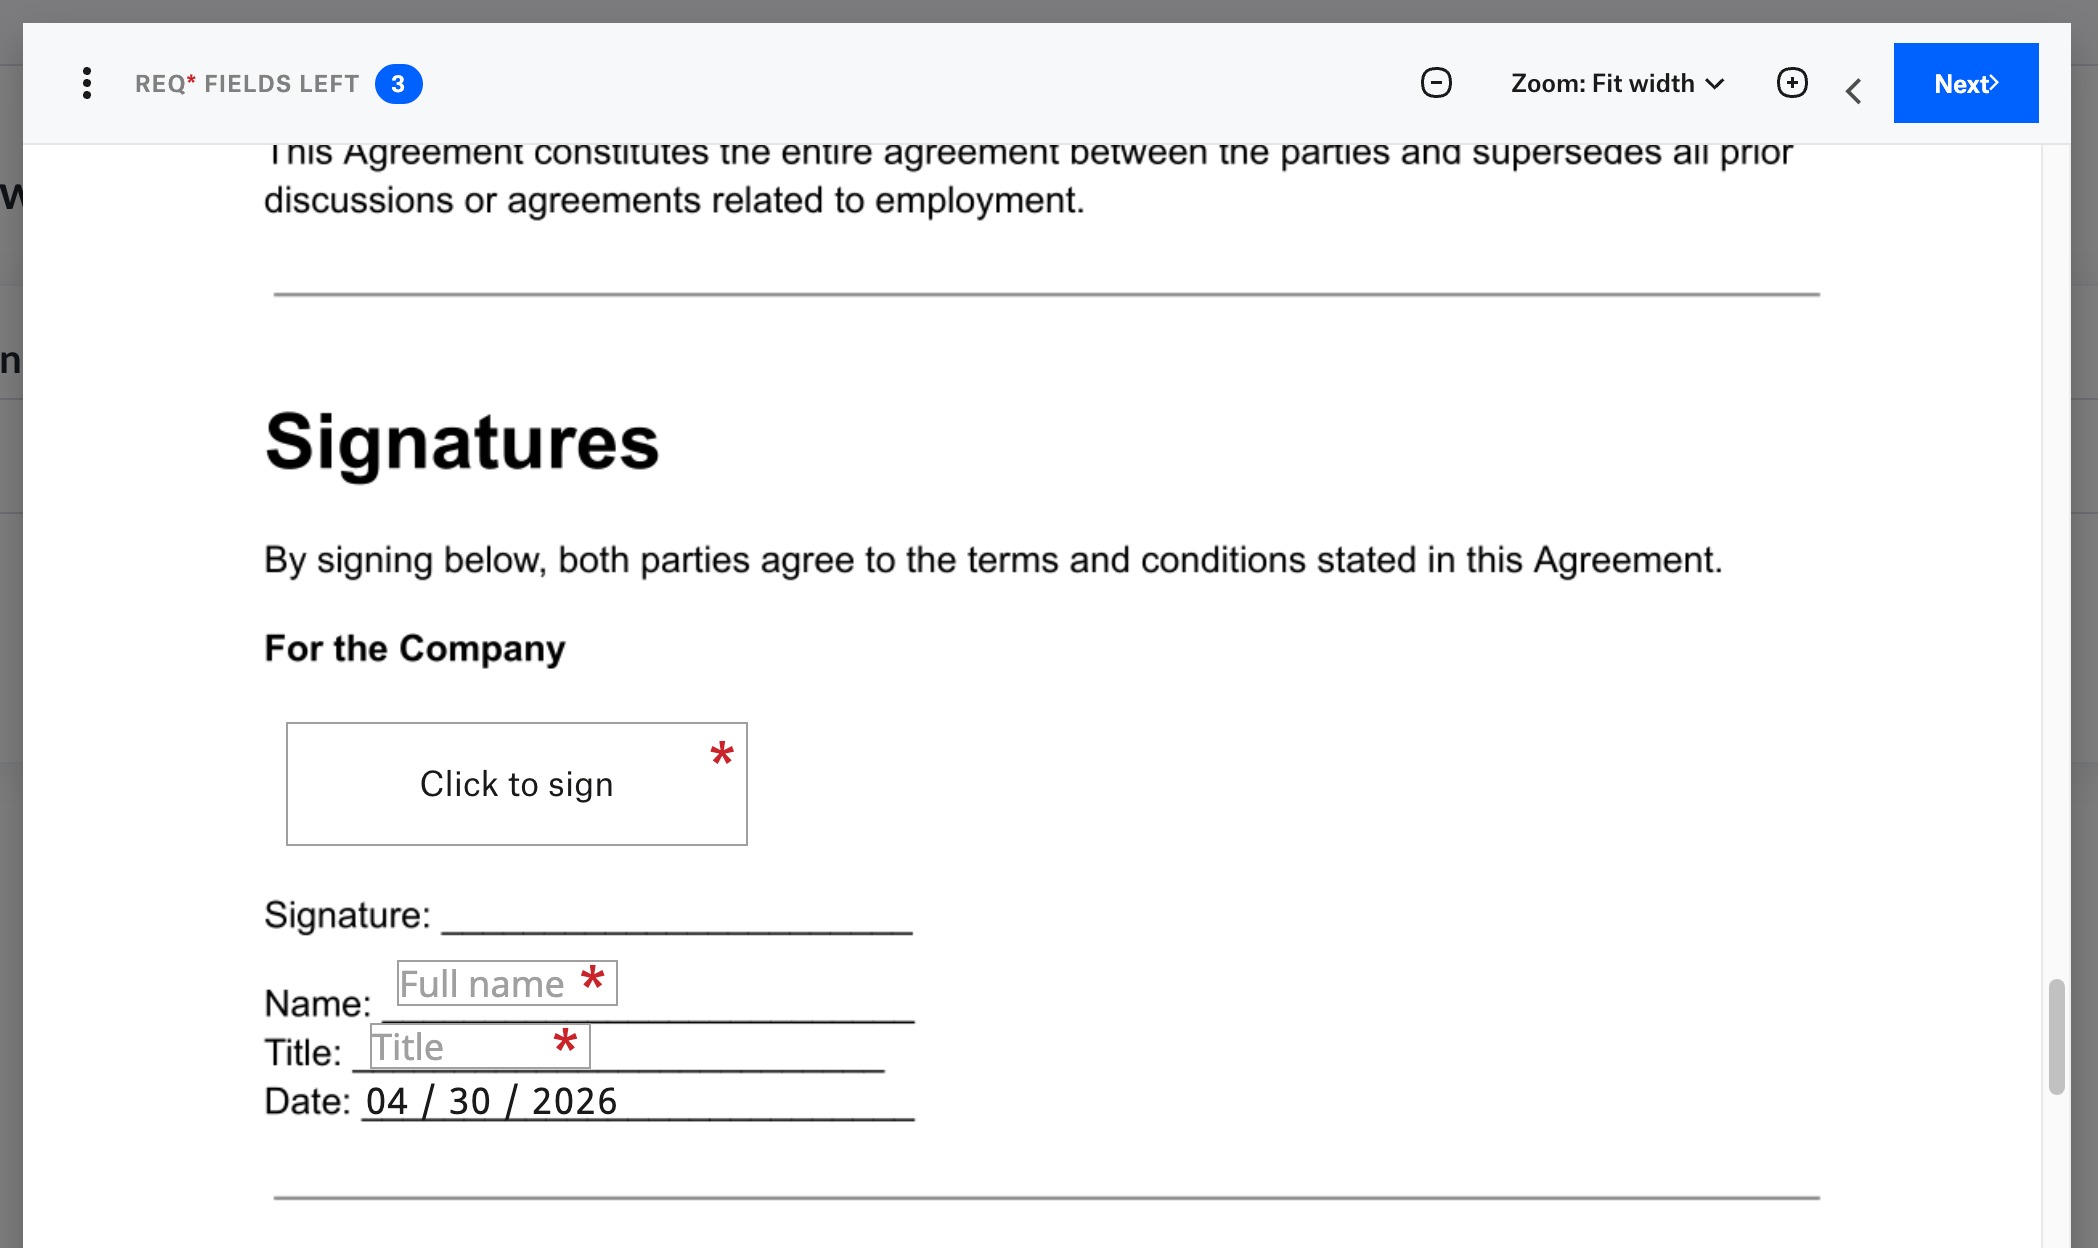
- Click Next
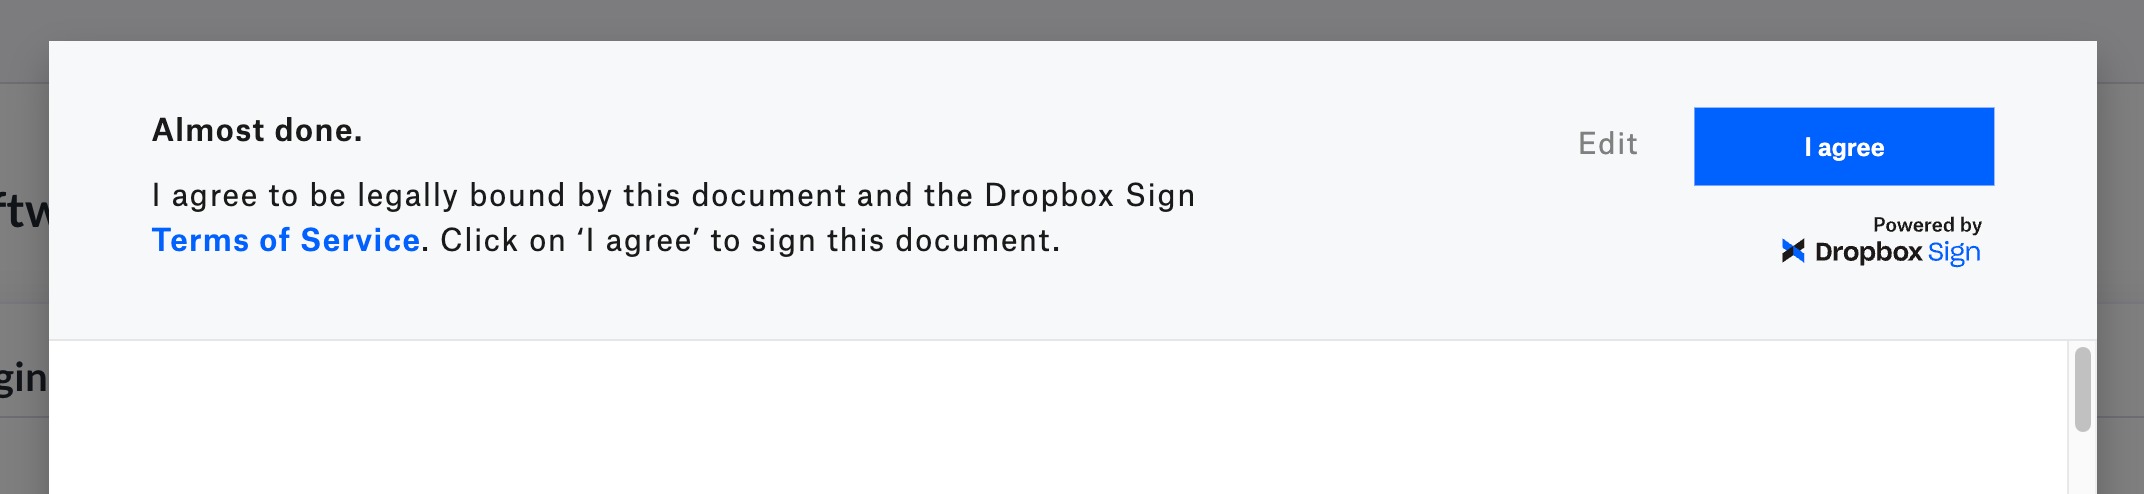
- They will need to Accept Terms & Conditions by clicking I Agree
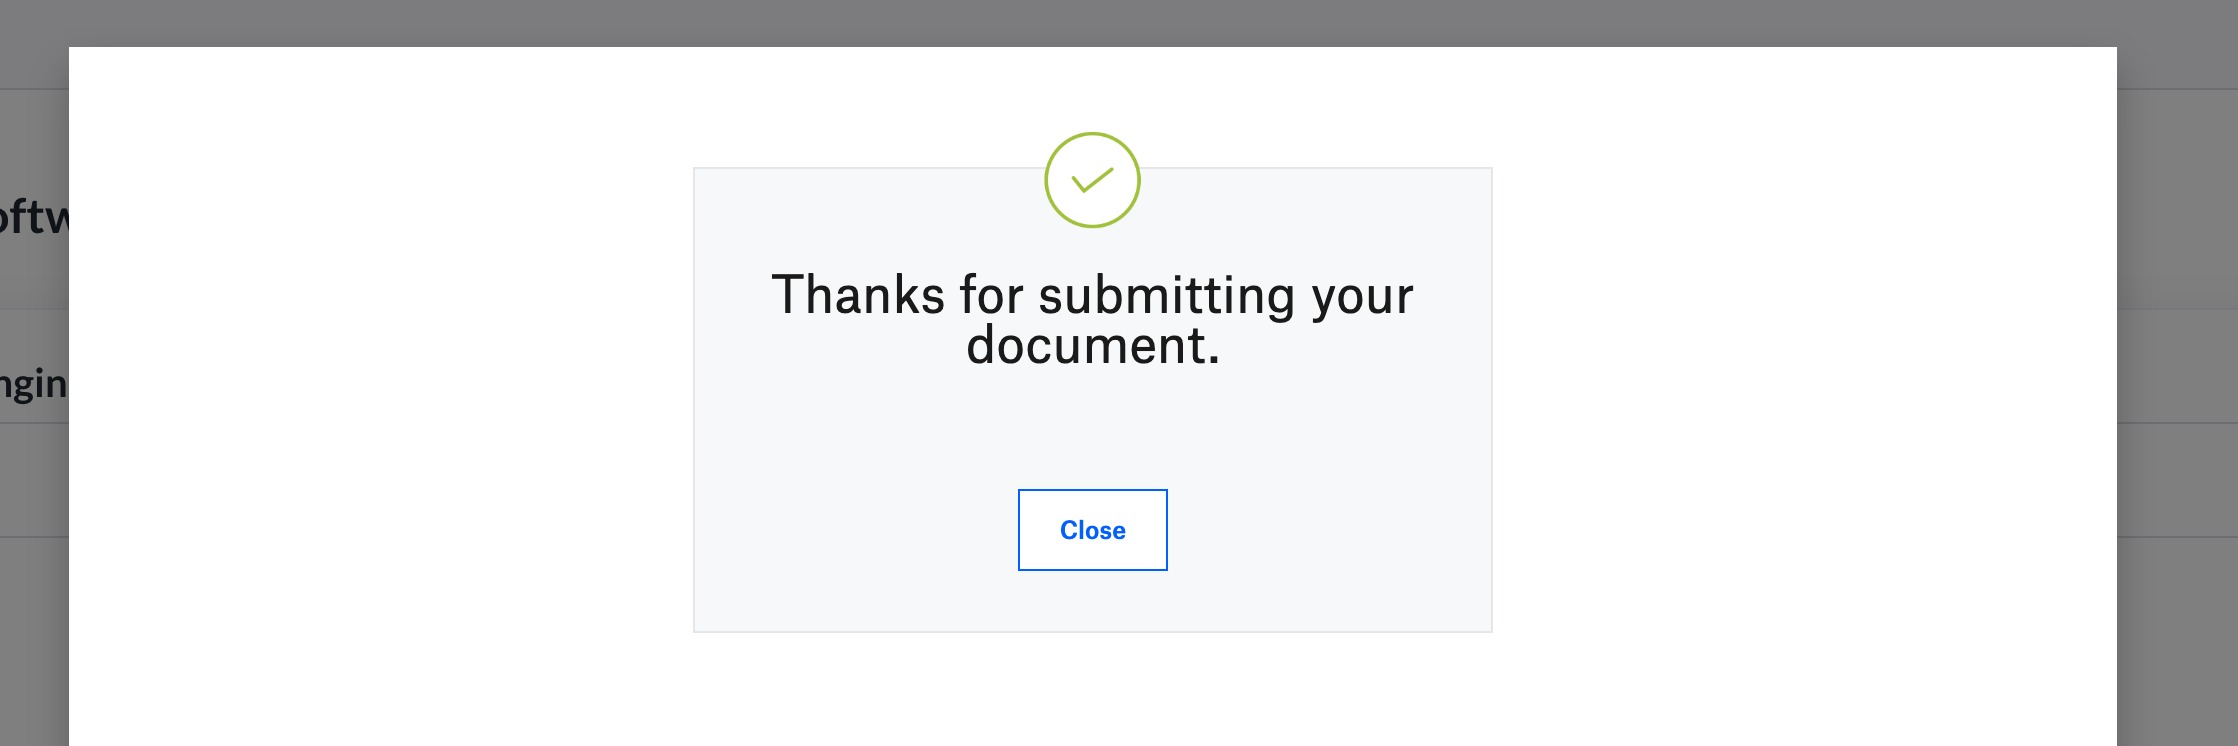
- Once completed, they signer sees a confirmation as below, and the next signer is notified automatically through email
Contract Status Updates
Where to View Status
- In the Offers & Contracts section of the Candidate page, the status will show under the Contract Details
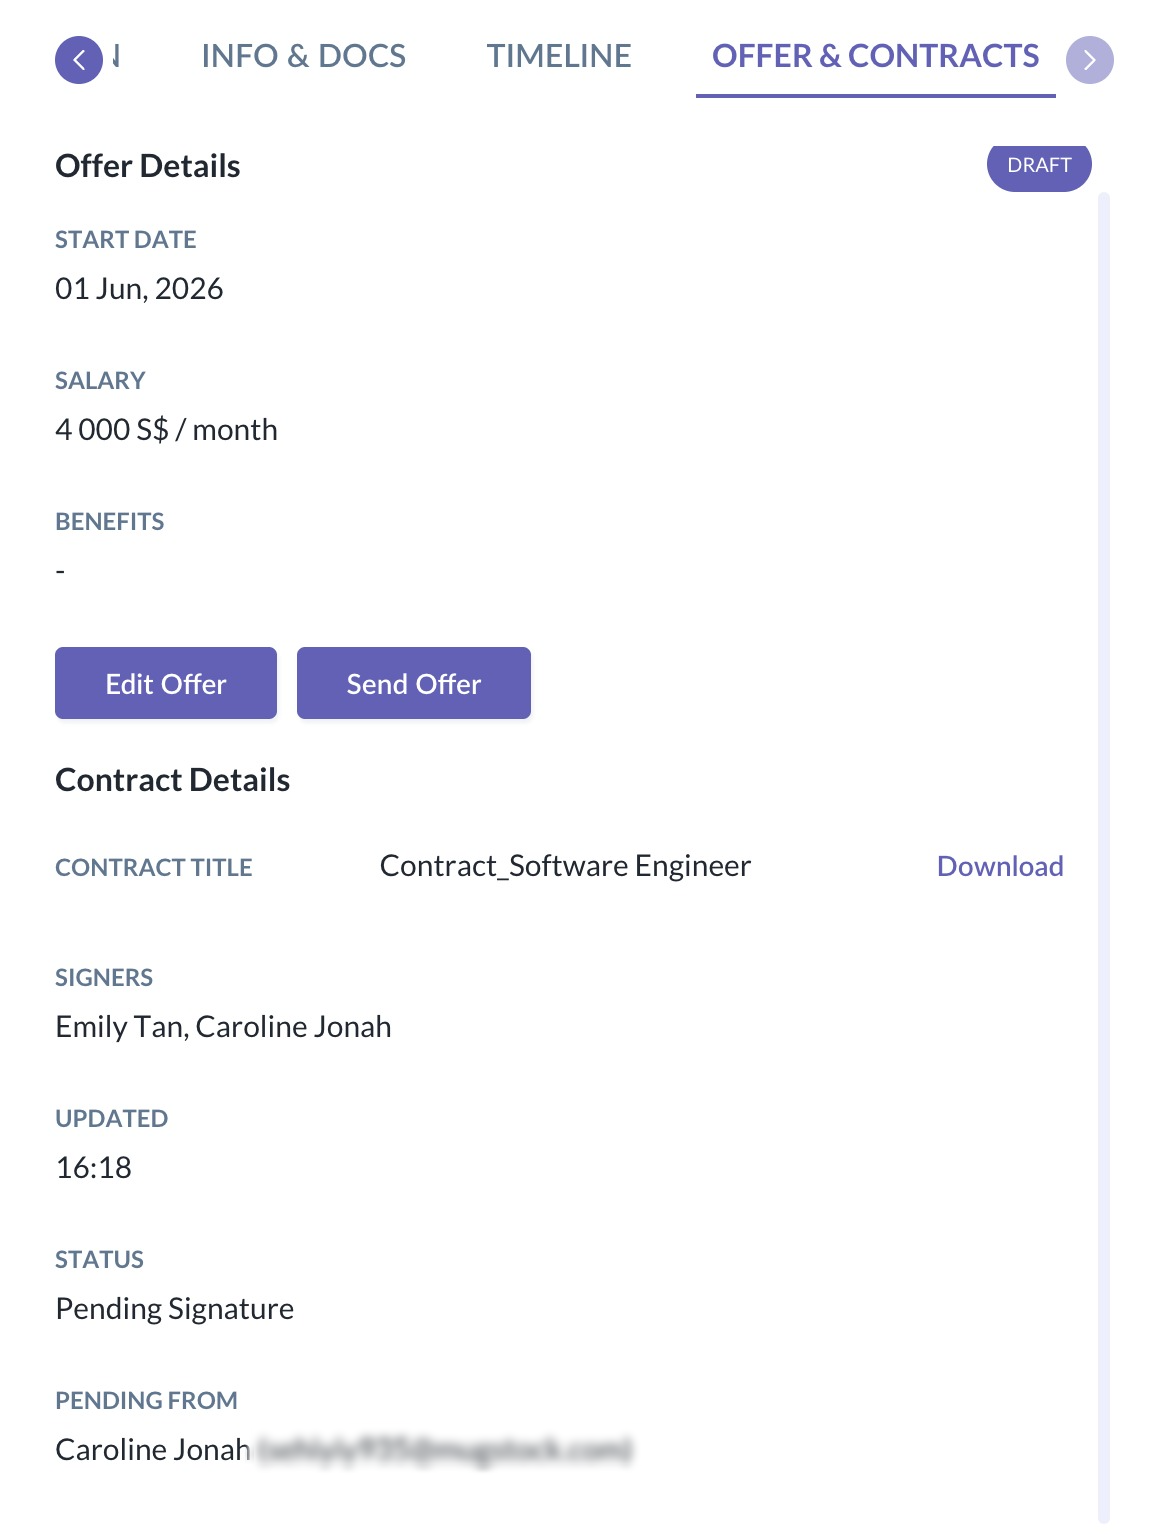
- On the Candidate Kanban Board, the status will also appear above the Candidate Name
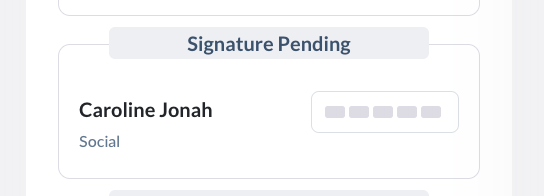
- Pending Signature → Waiting for signer(s)
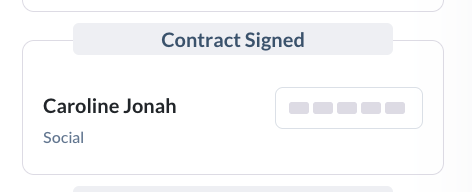
- Contract Signed → All signatures completed
Download or Cancel Contract
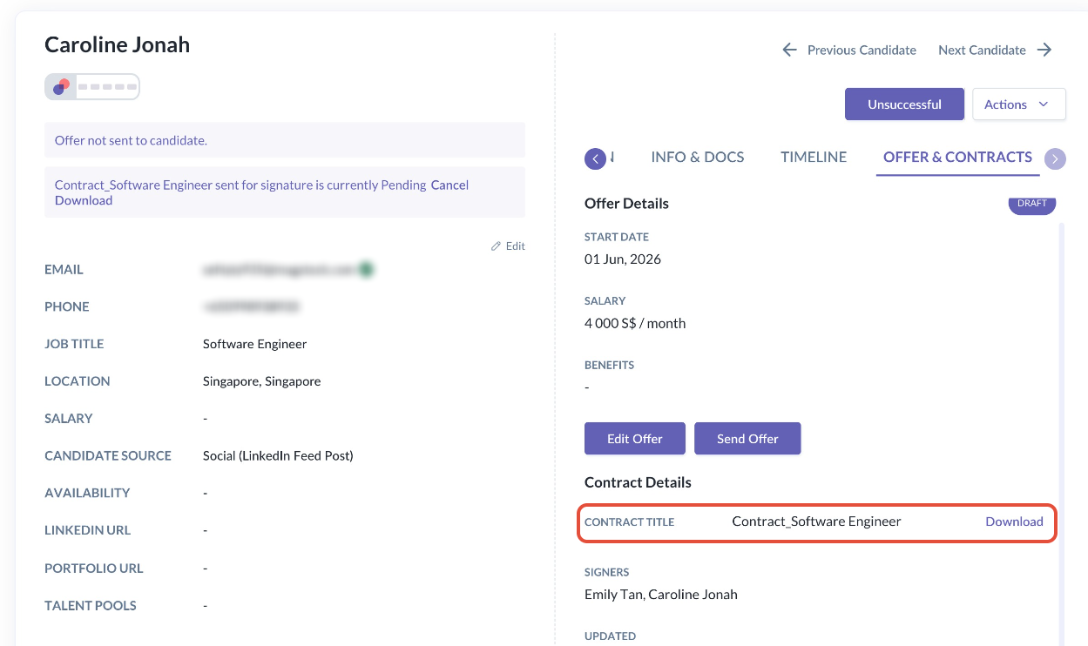
Download Contract
- Under the Contract Details, you can download the latest signed version of the contract
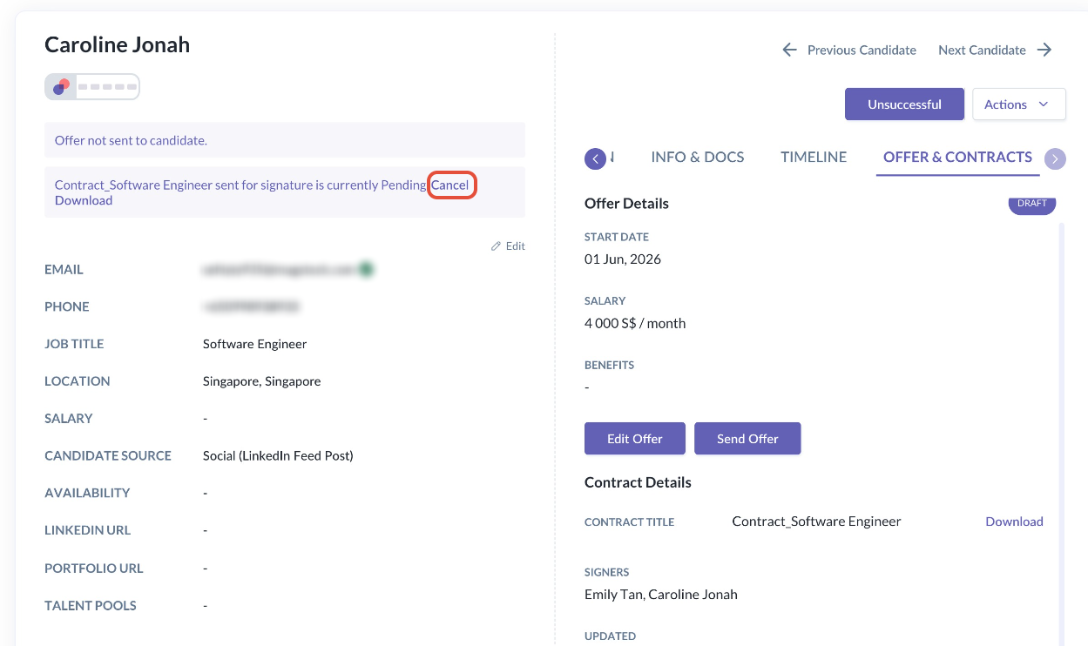
Cancel Contract
- You can always choose to cancel the Contract
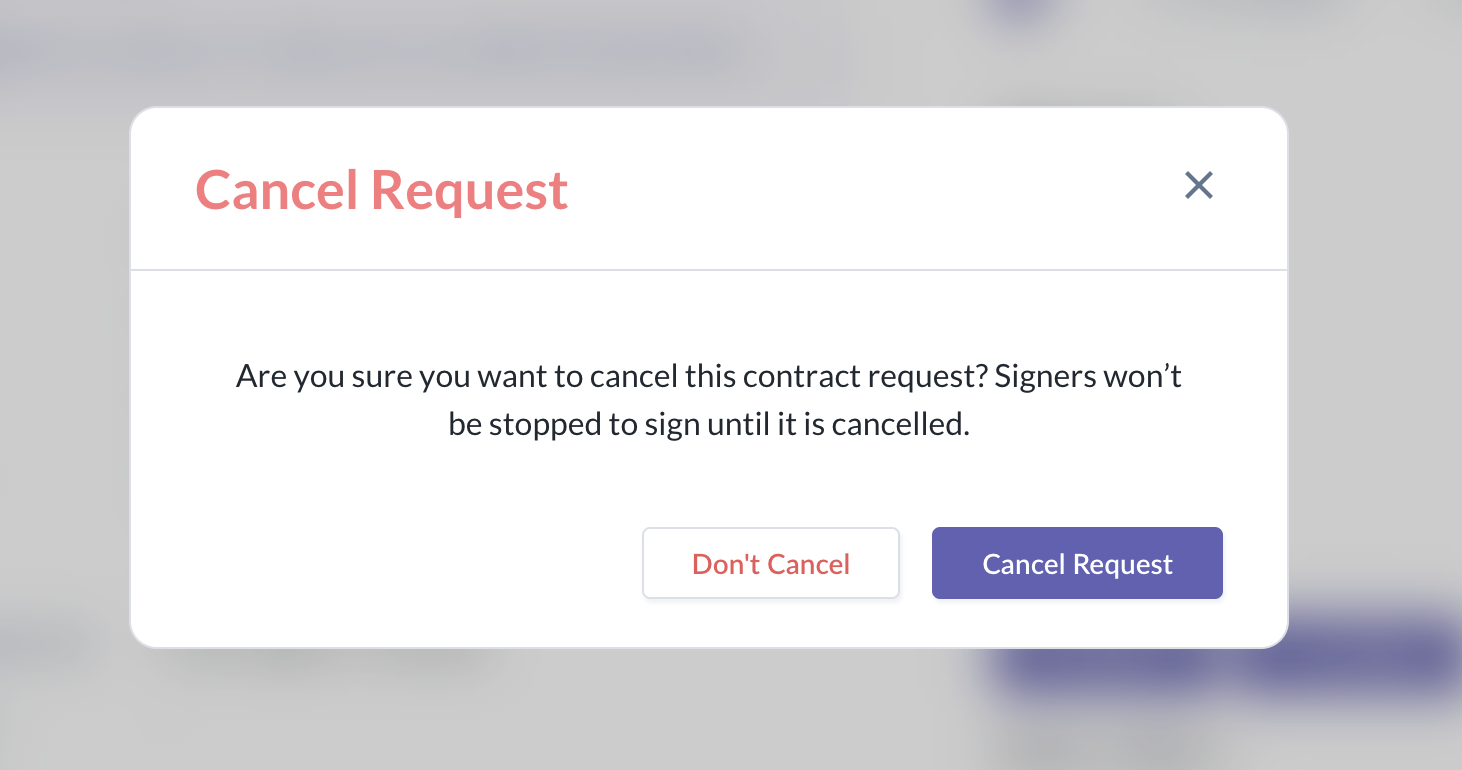
- Upon selecting Cancel, you will receive a pop up message to confirm on your action
Still Need Help?:
Reach out to our support team should you need further assistance
Was this article helpful?
That’s Great!
Thank you for your feedback
Sorry! We couldn't be helpful
Thank you for your feedback
Feedback sent
We appreciate your effort and will try to fix the article