Overview:
This article explains how to use the Bulk Send feature to send one document template to multiple employees at the same time, instead of sending it to one employee at a time.
Pre-requisite
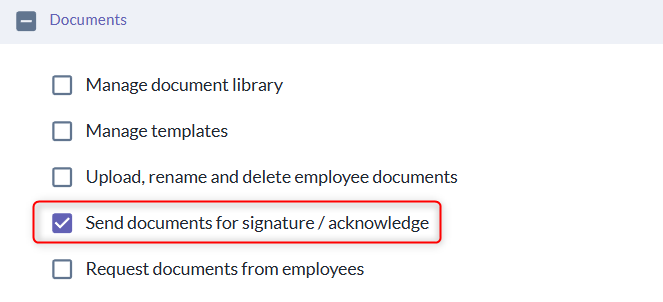
To bulk send internal templates, a user's role must be granted system function access with the "Send document for signature and acknowledge" permission.
How to Bulk Send Internal Template
- Go to Documents > Internal Templates > The Bulk Send button sits at the top of the page. Once you click the “Bulk Send”, a page with a left-side stepper that tracks the three steps shows up.
Step 1: Choose Template
- Select a template you want to send, the templates are pulled from your Internal Templates list and grouped by document type (e.g. PROBATION, AGREEMENT).
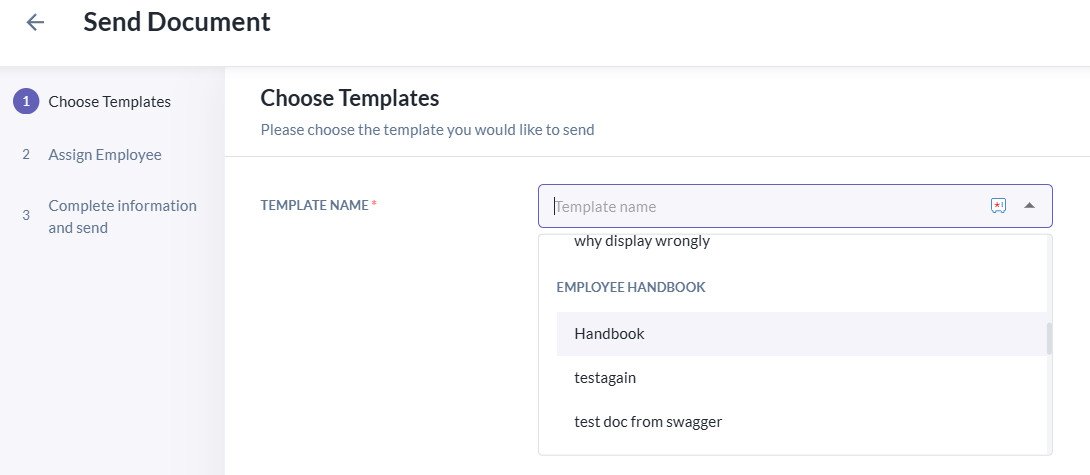
- Select a template you want to send, the templates are pulled from your Internal Templates list and grouped by document type (e.g. PROBATION, AGREEMENT).
Step 2: Assign Employee
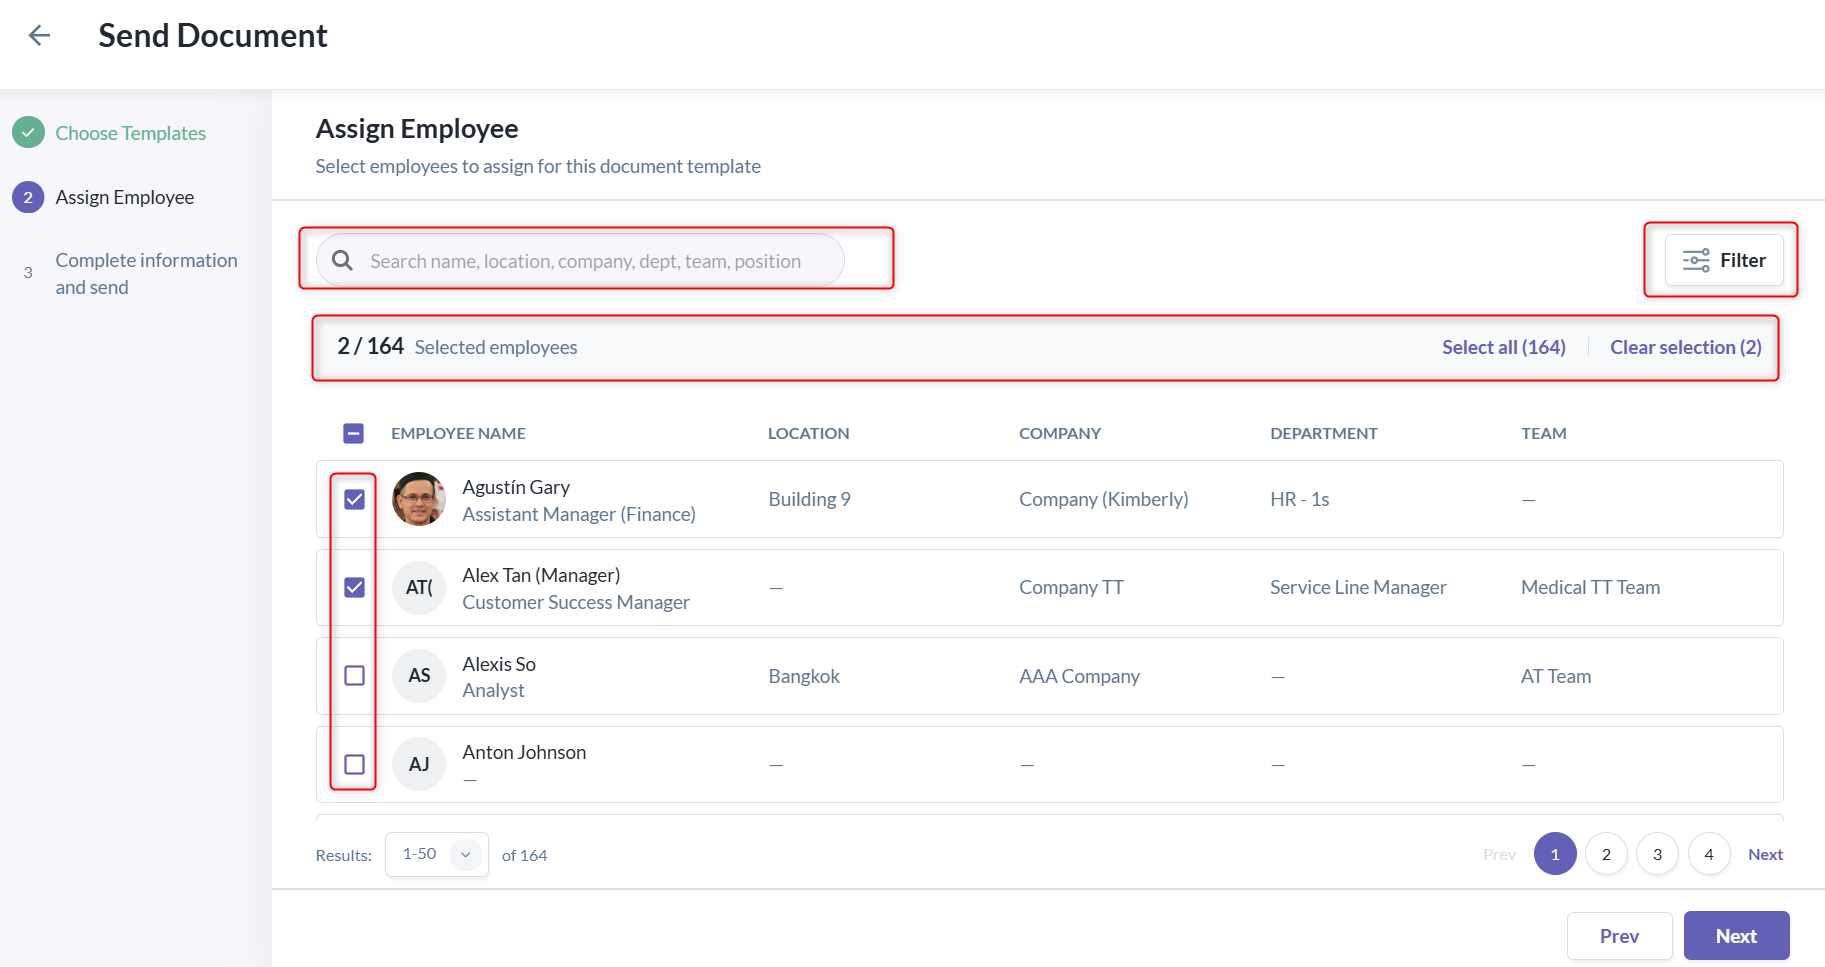
- You can use the search bar to find employees by name, or open the filter drawer to narrow the list down by criteria such as location, company, department, or team. As you select employees, a live selection counter keeps track of how many you've chosen so far.
- The table shows the following columns for each employee: Employee Name, Location, Company, Department, and Team.
- Select the checkbox next to each employee who should receive the document. You can select as many employees as you need. Once you've finished selecting, click Next to move on.
Step 3: Complete Information and Send
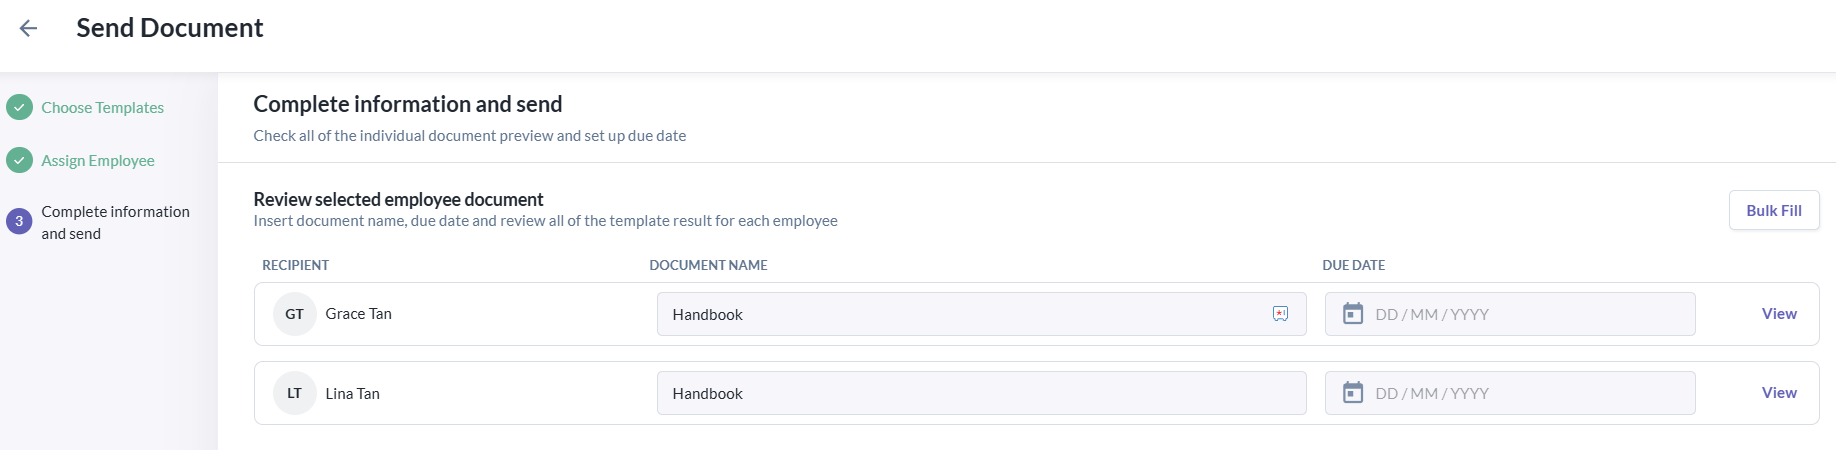
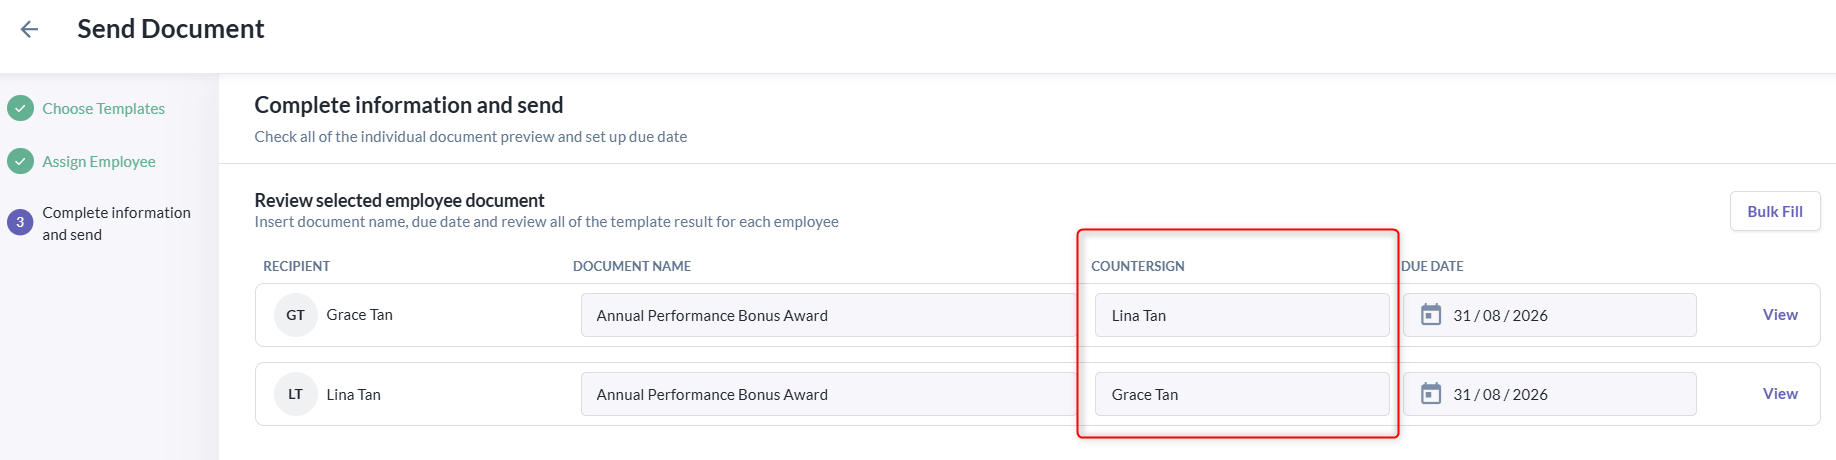
- This step gives you a chance to review and customize the document each employee will receive before anything is sent out. Every employee you selected gets their own row, and each row includes:
- Recipient — the employee who will receive the document.
- Document Name — pre-filled from the template's name, but you can edit it individually per row if you'd like a different name for a particular employee.
- Due Date — due date is required for every row; you'll need to set a due date before you can send.
- View — opens a preview of that specific employee's actual document, with their details already merged in, so you can double-check it before sending.
- If the template you chose uses the "With countersign" action type, you'll also see an additional Countersign column in this step. This lets you assign a different countersigner to each employee individually, rather than using the same countersigner for everyone.
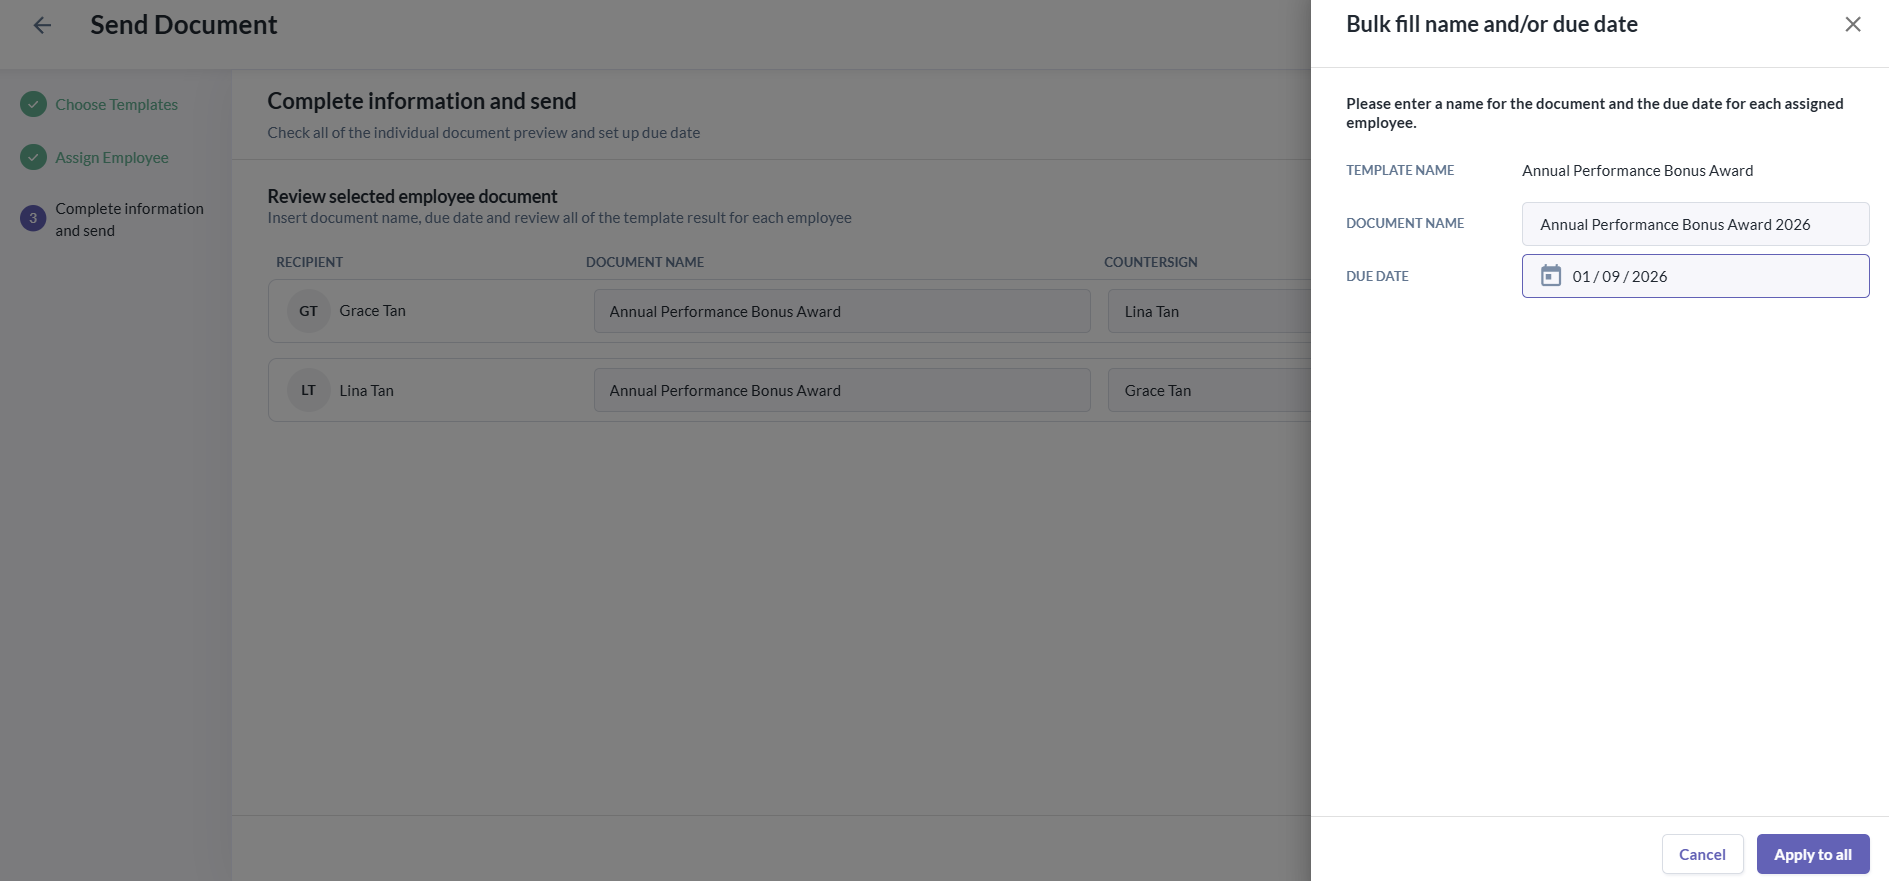
Bulk Fill same document name and due date
- You can use Bulk Fill to set the same document name and/or due date across every row at once.
- The "Apply to all" button will be available when at least the document name or due date field has a valid value.
Resolving missing data
- If an employee's profile is missing information that the template needs, a banner appears above the table and a warning icon flags the affected rows.
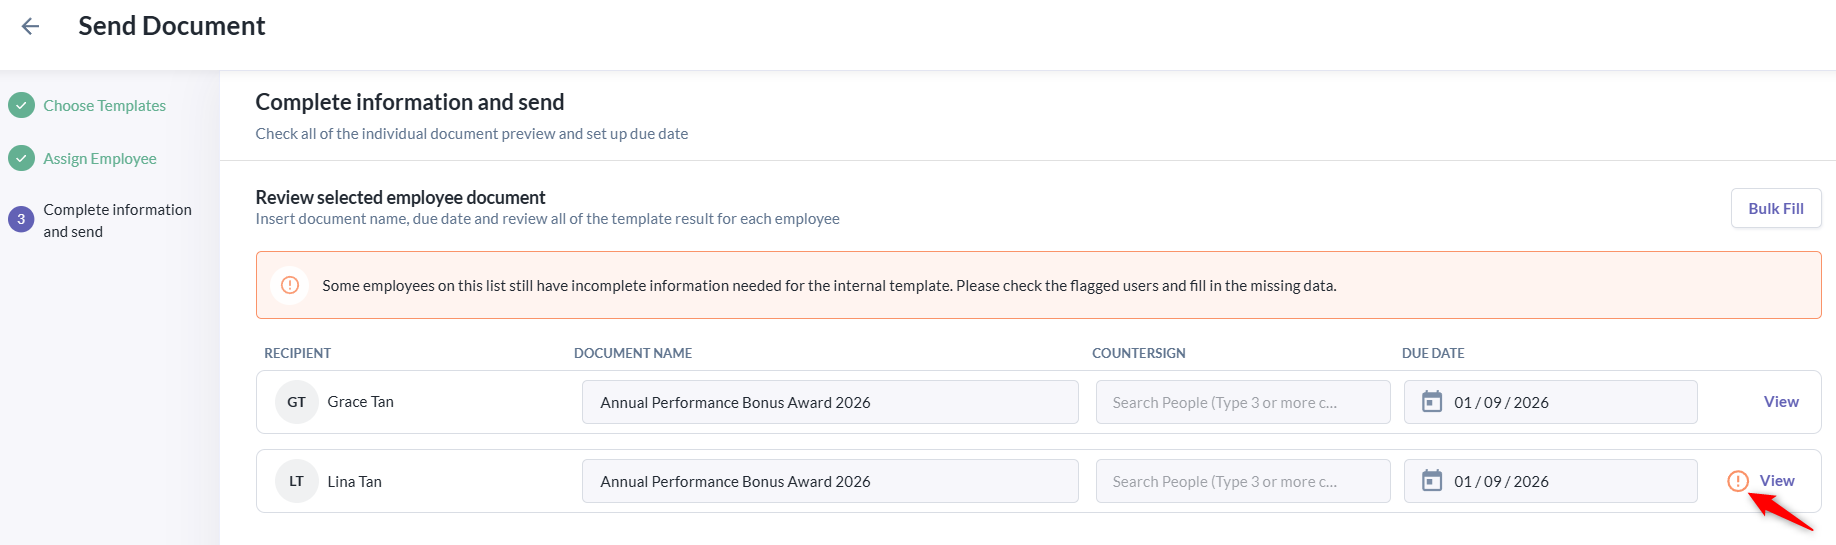
- To fix a flagged row that has missing information:
- Click View on that row to open the employee's actual document.
- In the preview, check the placeholder text color:
- Green text = filled from their profile.
- Red text = couldn't be resolved automatically.
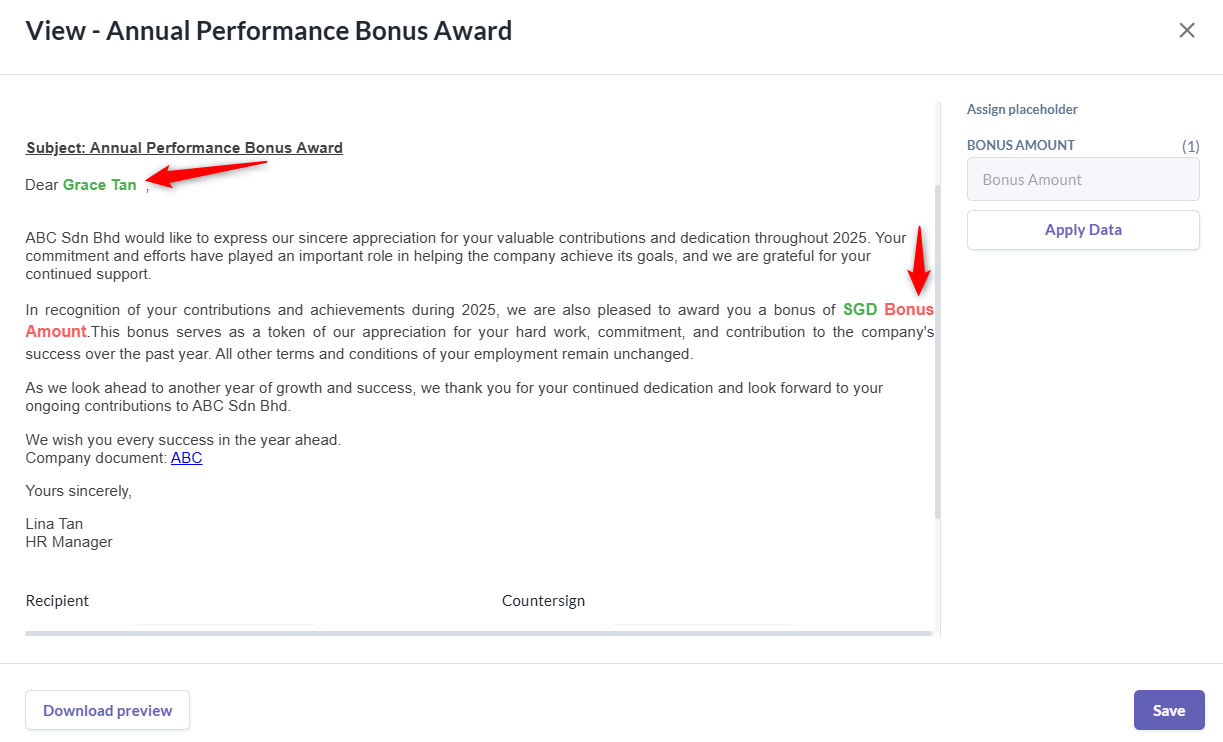
- Enter the missing values in the Assign Placeholder panel on the right.
- Click Apply Data to drop the values into the preview and click Save.
- If an employee's profile is missing information that the template needs, a banner appears above the table and a warning icon flags the affected rows.
- This step gives you a chance to review and customize the document each employee will receive before anything is sent out. Every employee you selected gets their own row, and each row includes:
Send out the template
- Once every row is resolved and no warning icons remain, you can now click Send to start the batch.
- You don't need to keep the page open while this runs — processing happens in the background, so you can navigate away or close the tab.
- Note: Please note that for large batches, this can take several minutes to complete.
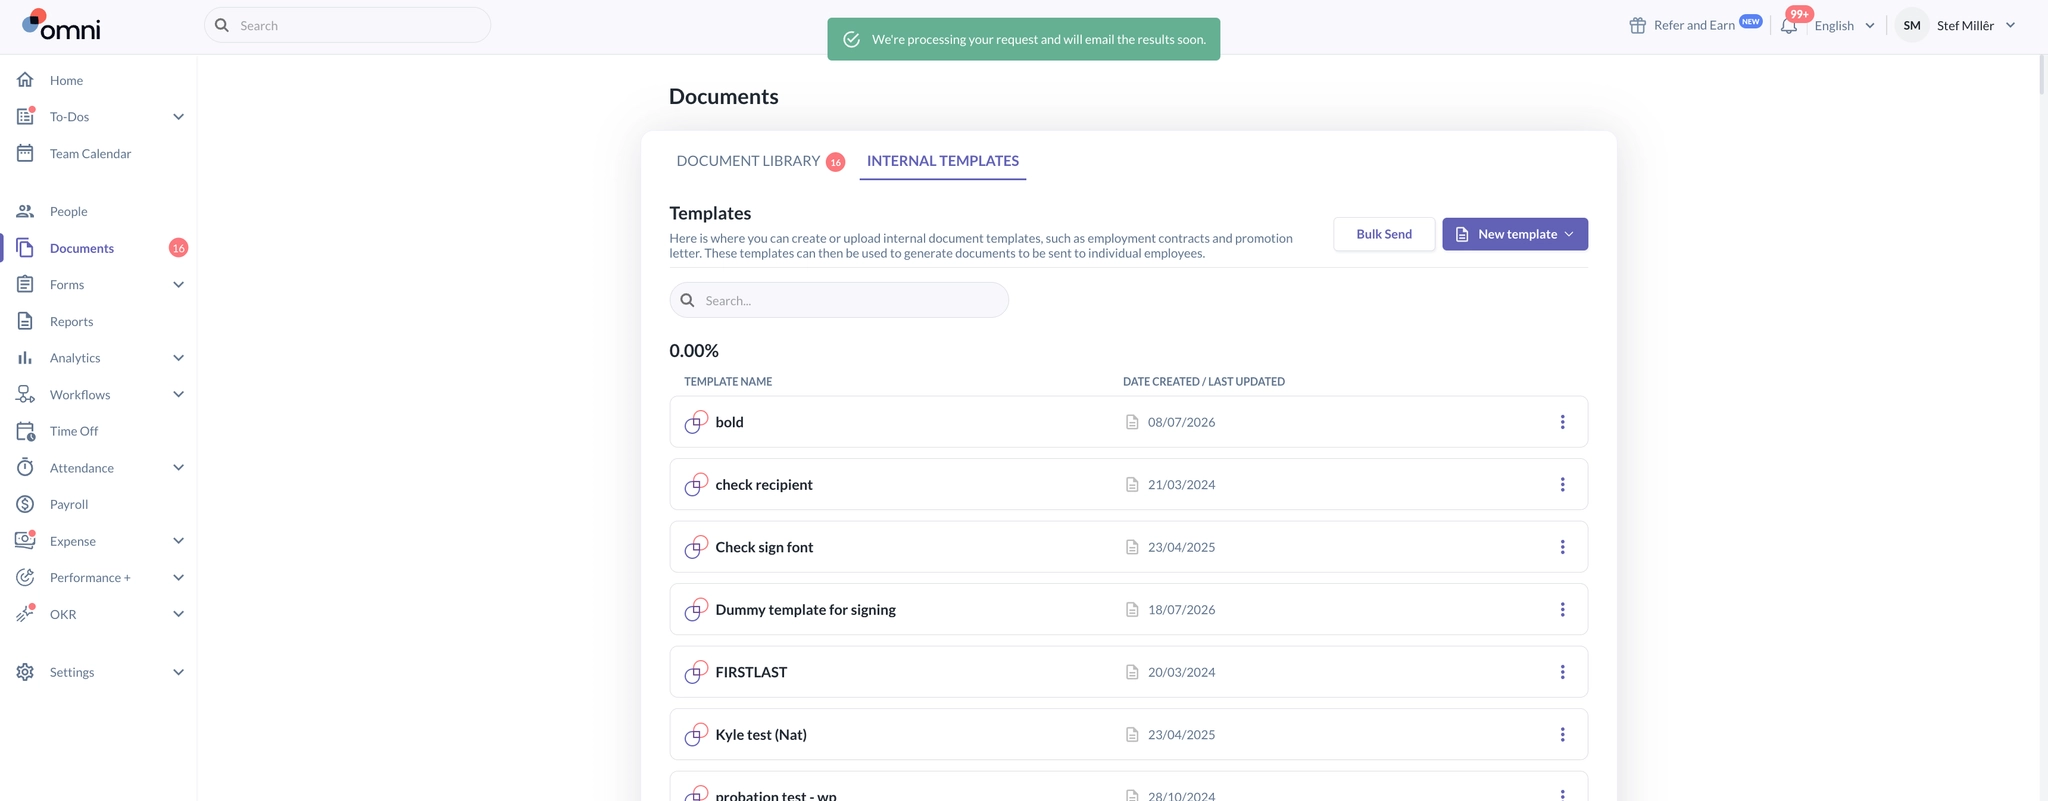
- Note: Please note that for large batches, this can take several minutes to complete.
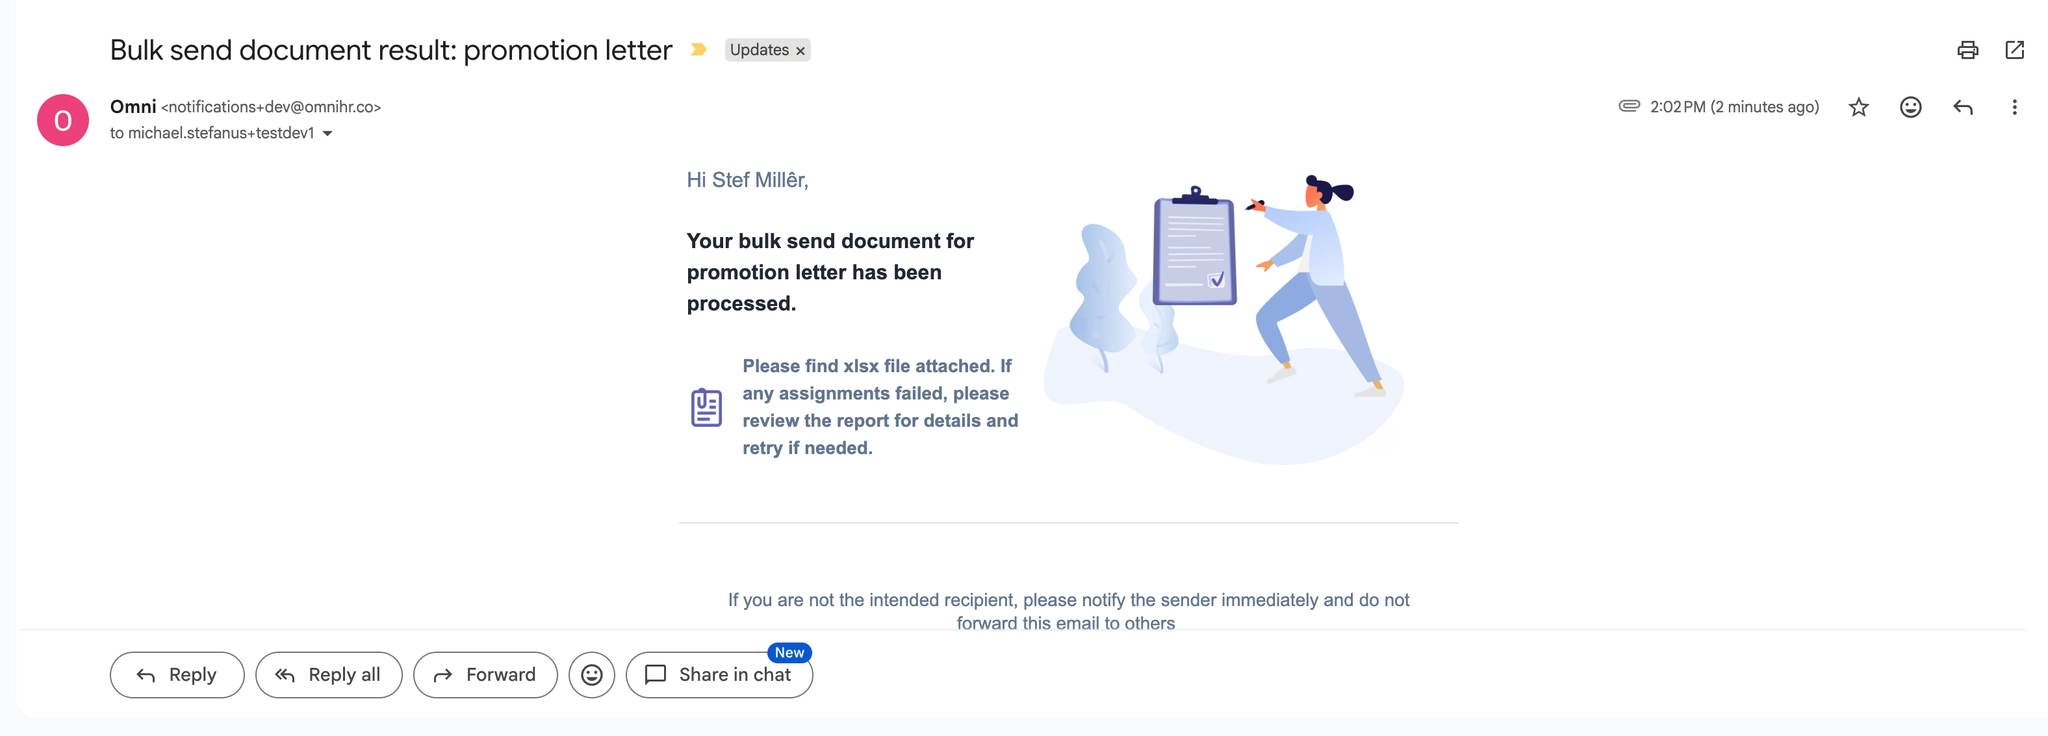
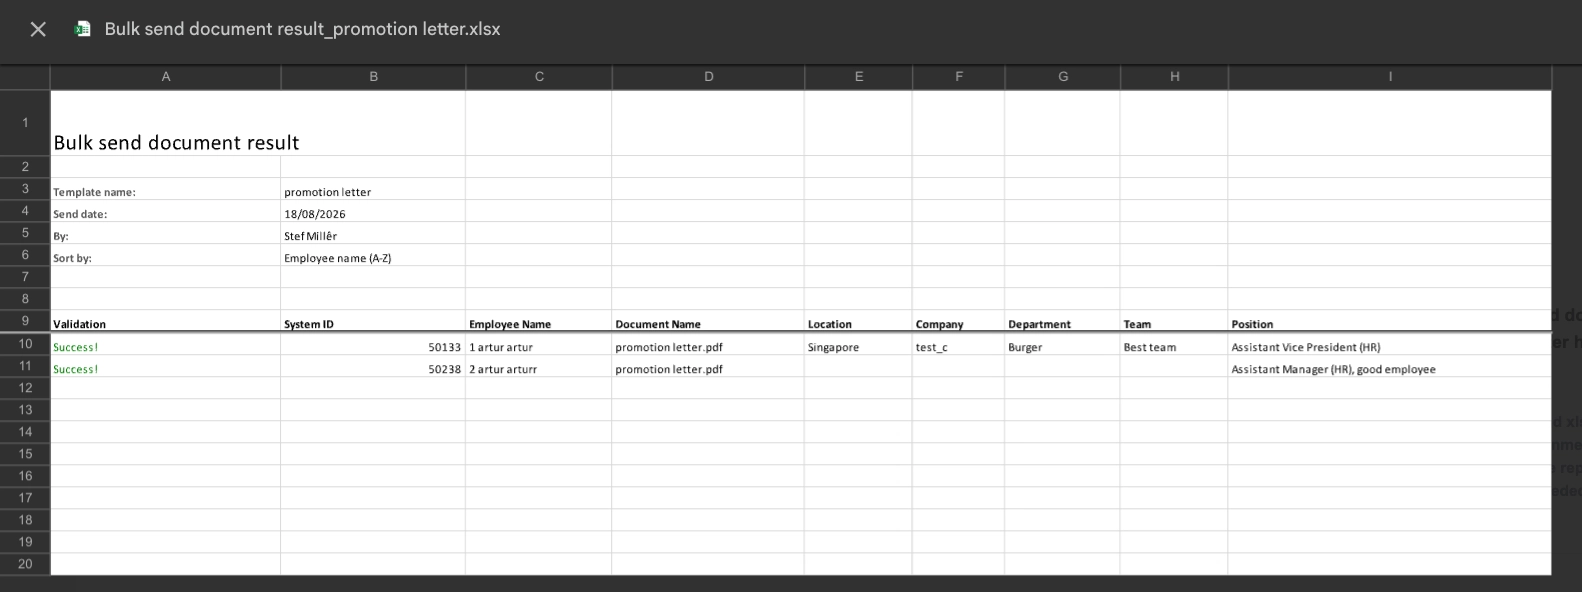
- When the batch finishes, you'll receive an email titled "Bulk send document result: [Template Name]." This email includes an attached sheet where you can check the outcome for every employee in the batch.
- In the validation file, in each row, you'll see either a green Success! or a failed reason if that particular document failed to send.
Still Need Help?:
Reach out to our support team should you need further assistance.
Was this article helpful?
That’s Great!
Thank you for your feedback
Sorry! We couldn't be helpful
Thank you for your feedback
Feedback sent
We appreciate your effort and will try to fix the article