Overview :
This guide walks you through how to submit your expenses in the new Expense view, including what to expect at each step and how to handle past claims.
You can easily track and manage your expenses through the new Expense view — just make sure your claim is within the available balance and linked to the correct policy.
TABLE OF CONTENTS
How to Submit Expenses
Step 1. Go to Expense
There are three ways to start adding a new expense:
a) Go to your Profile → open the Expense tab.
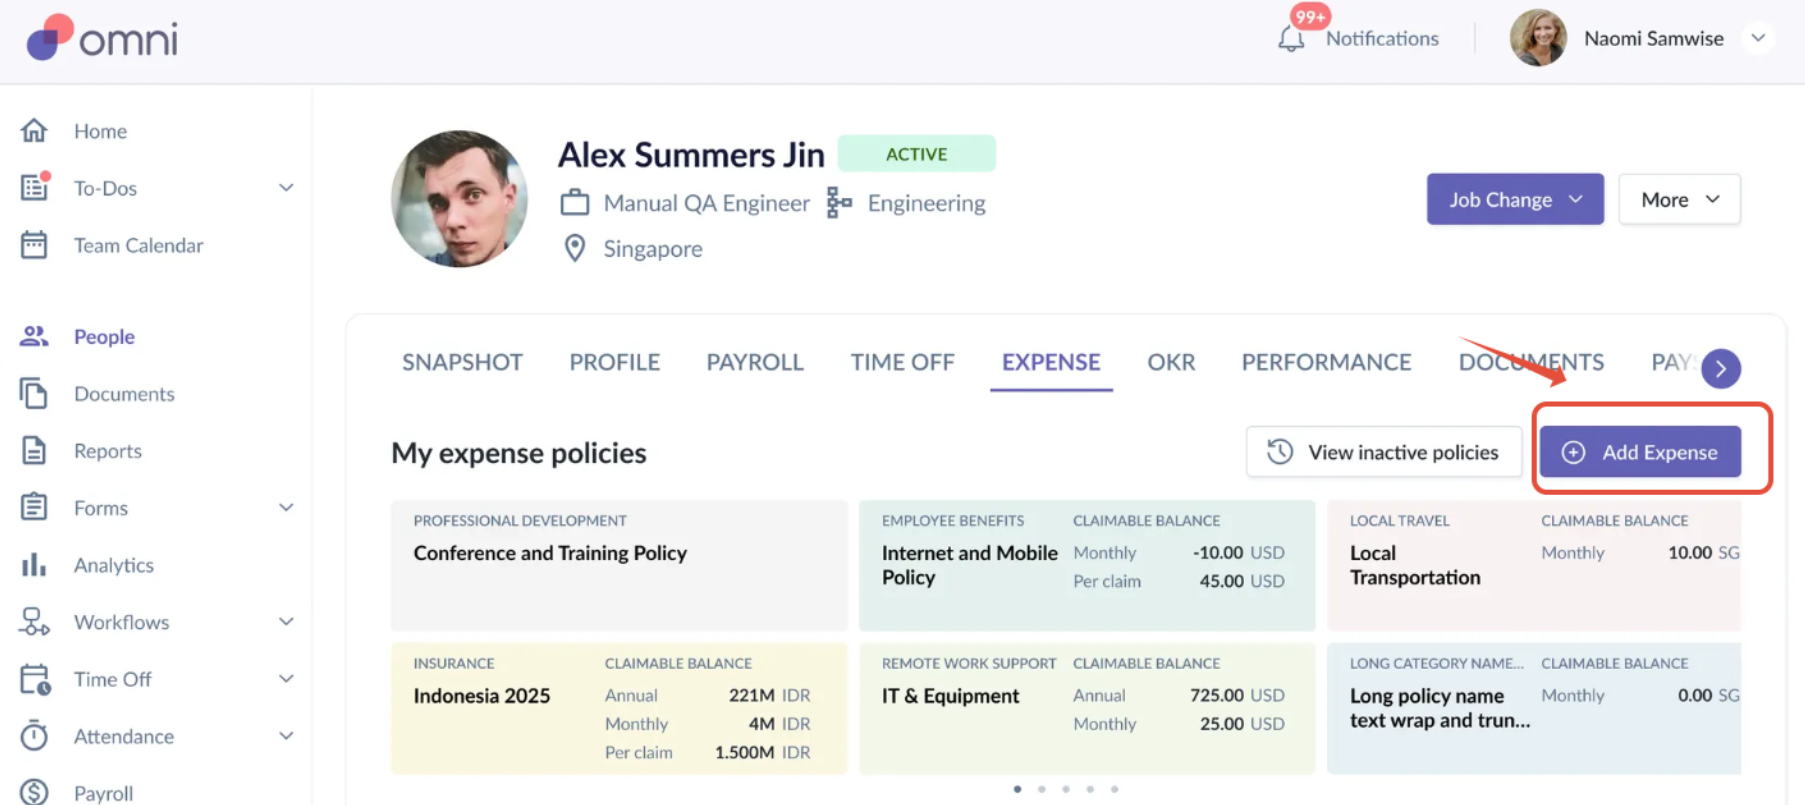
b) Go directly to the Expense page, and click Add Expense.


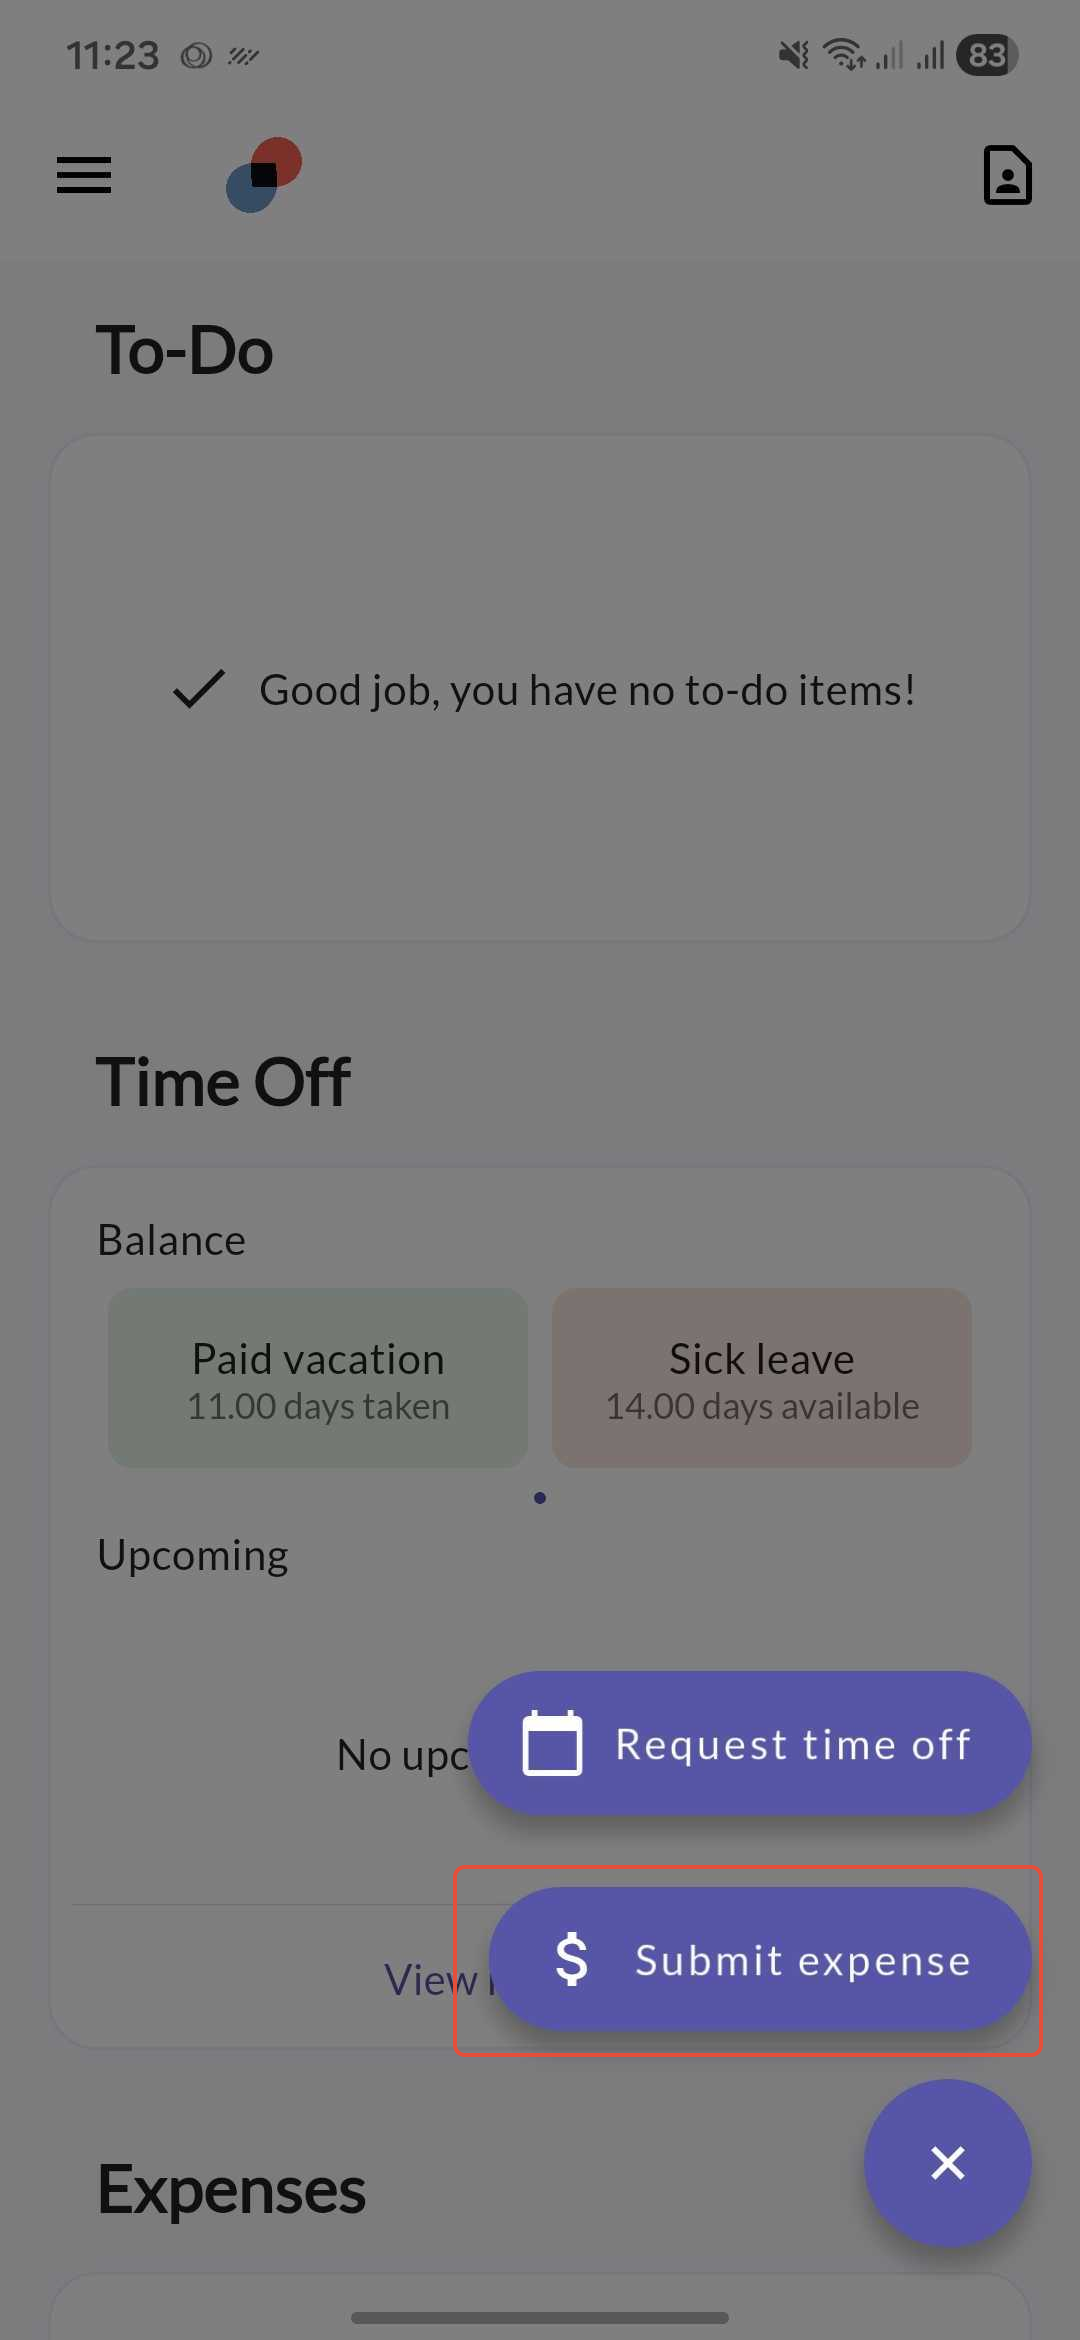
c) Or, If you’re using the mobile app, tap the floating “+” button and select Add Expense.
Once you’re on the expense form:
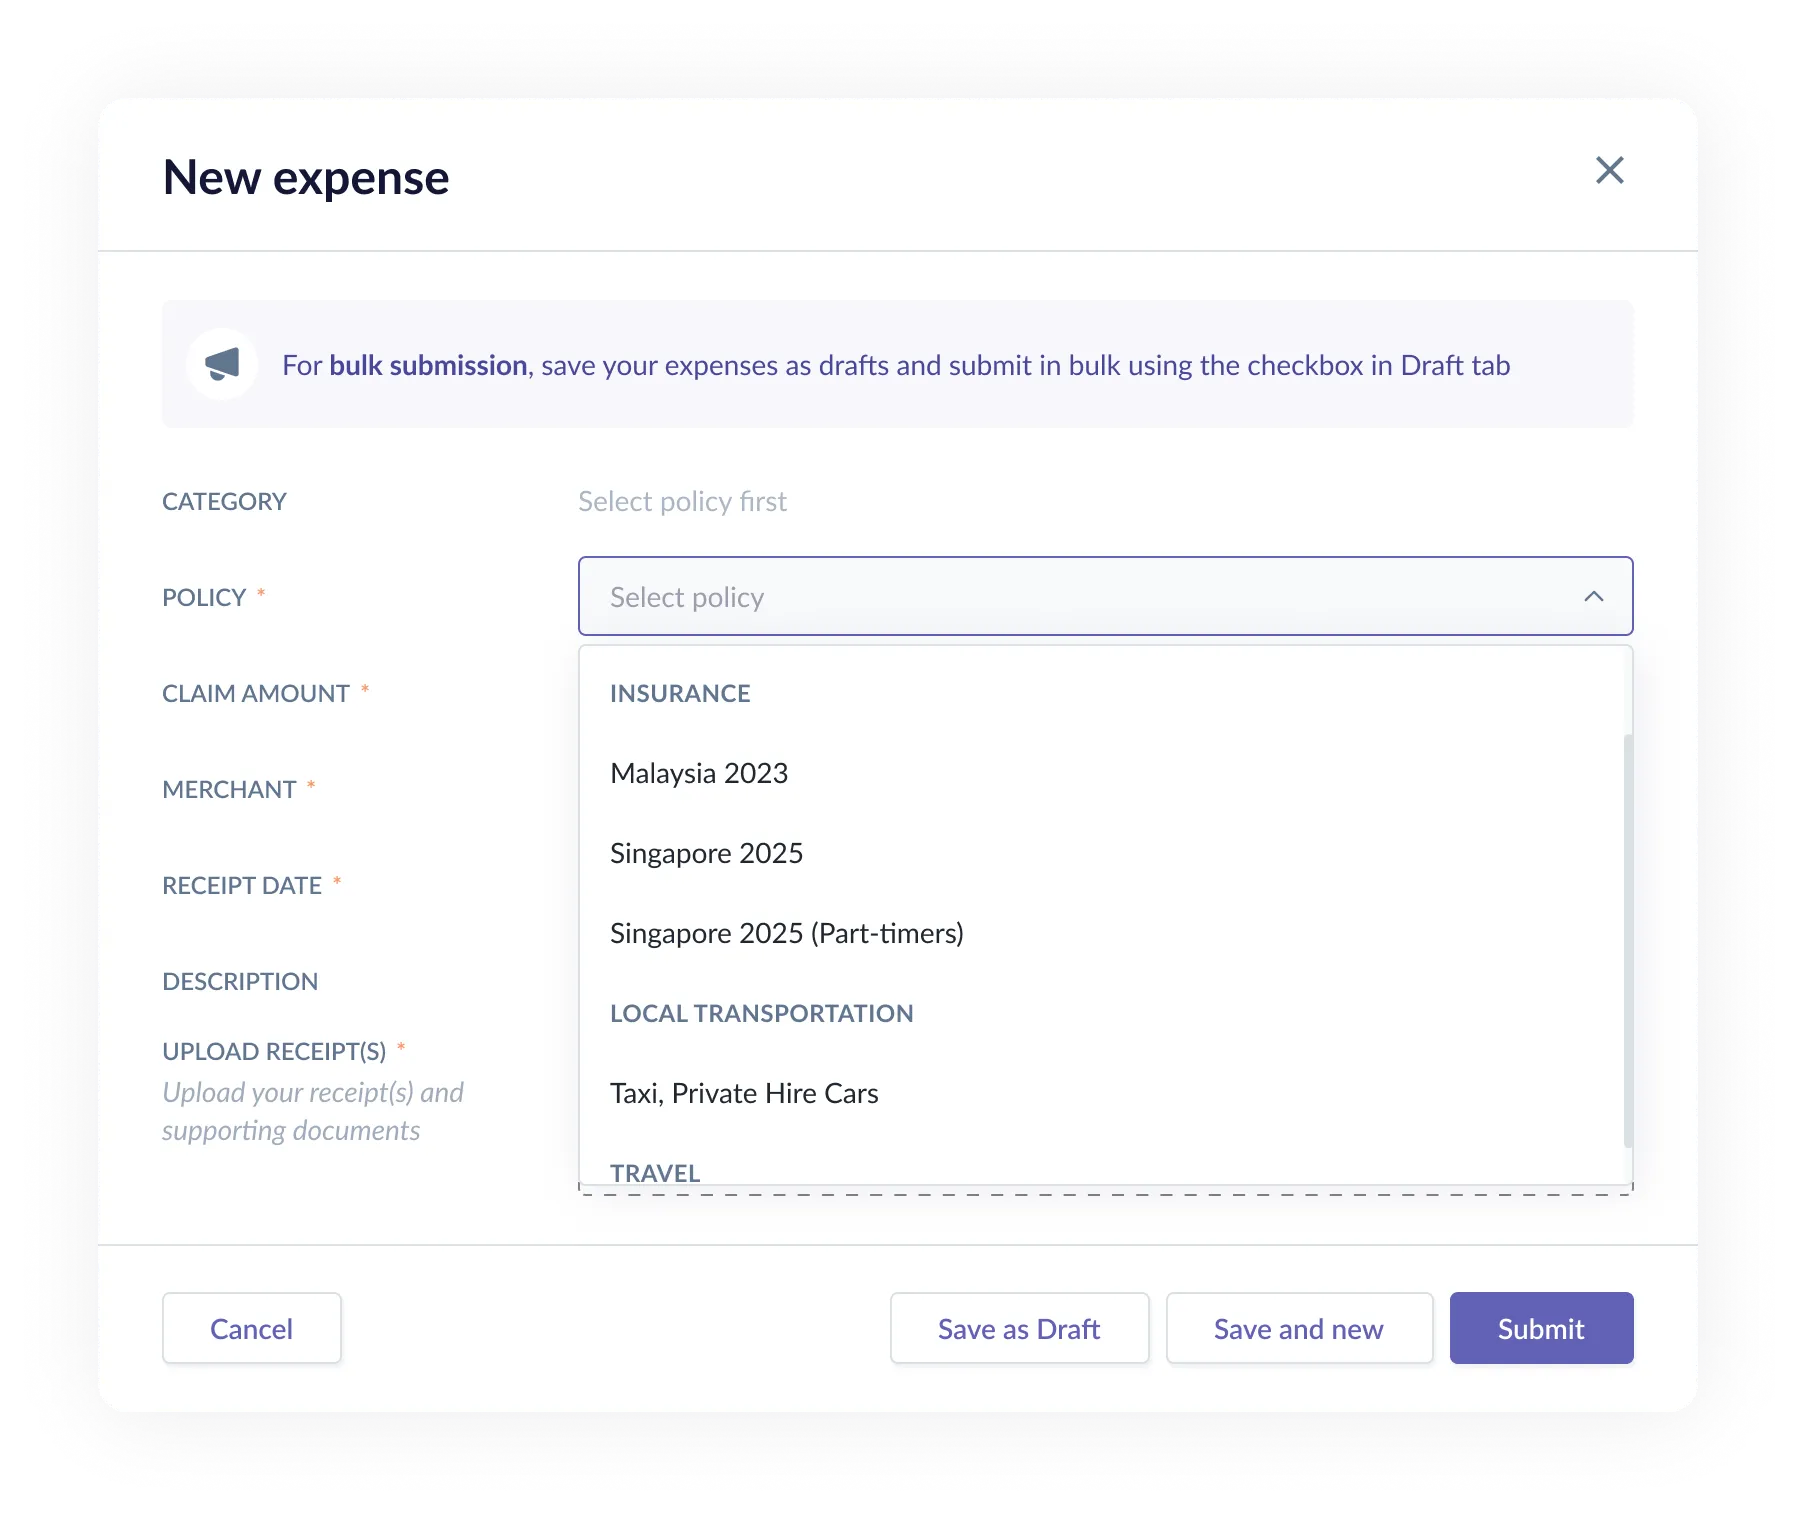
Step 2. Select an Expense Policy
- From the dropdown, select the relevant Expense Policy.
- Once selected, the Expense Category will automatically populate.
- You’ll also see your claimable balance (if applicable) for that policy.
Step 3. Fill out all required expense details (e.g., date, amount, description, attachment).
Step 4. Once all details are complete, choose how you want to save your entry:
- Save as Draft – if you want to review or edit later.
- Save and New – if you have multiple expenses to input.
- Submit – once everything is confirmed and ready to send.

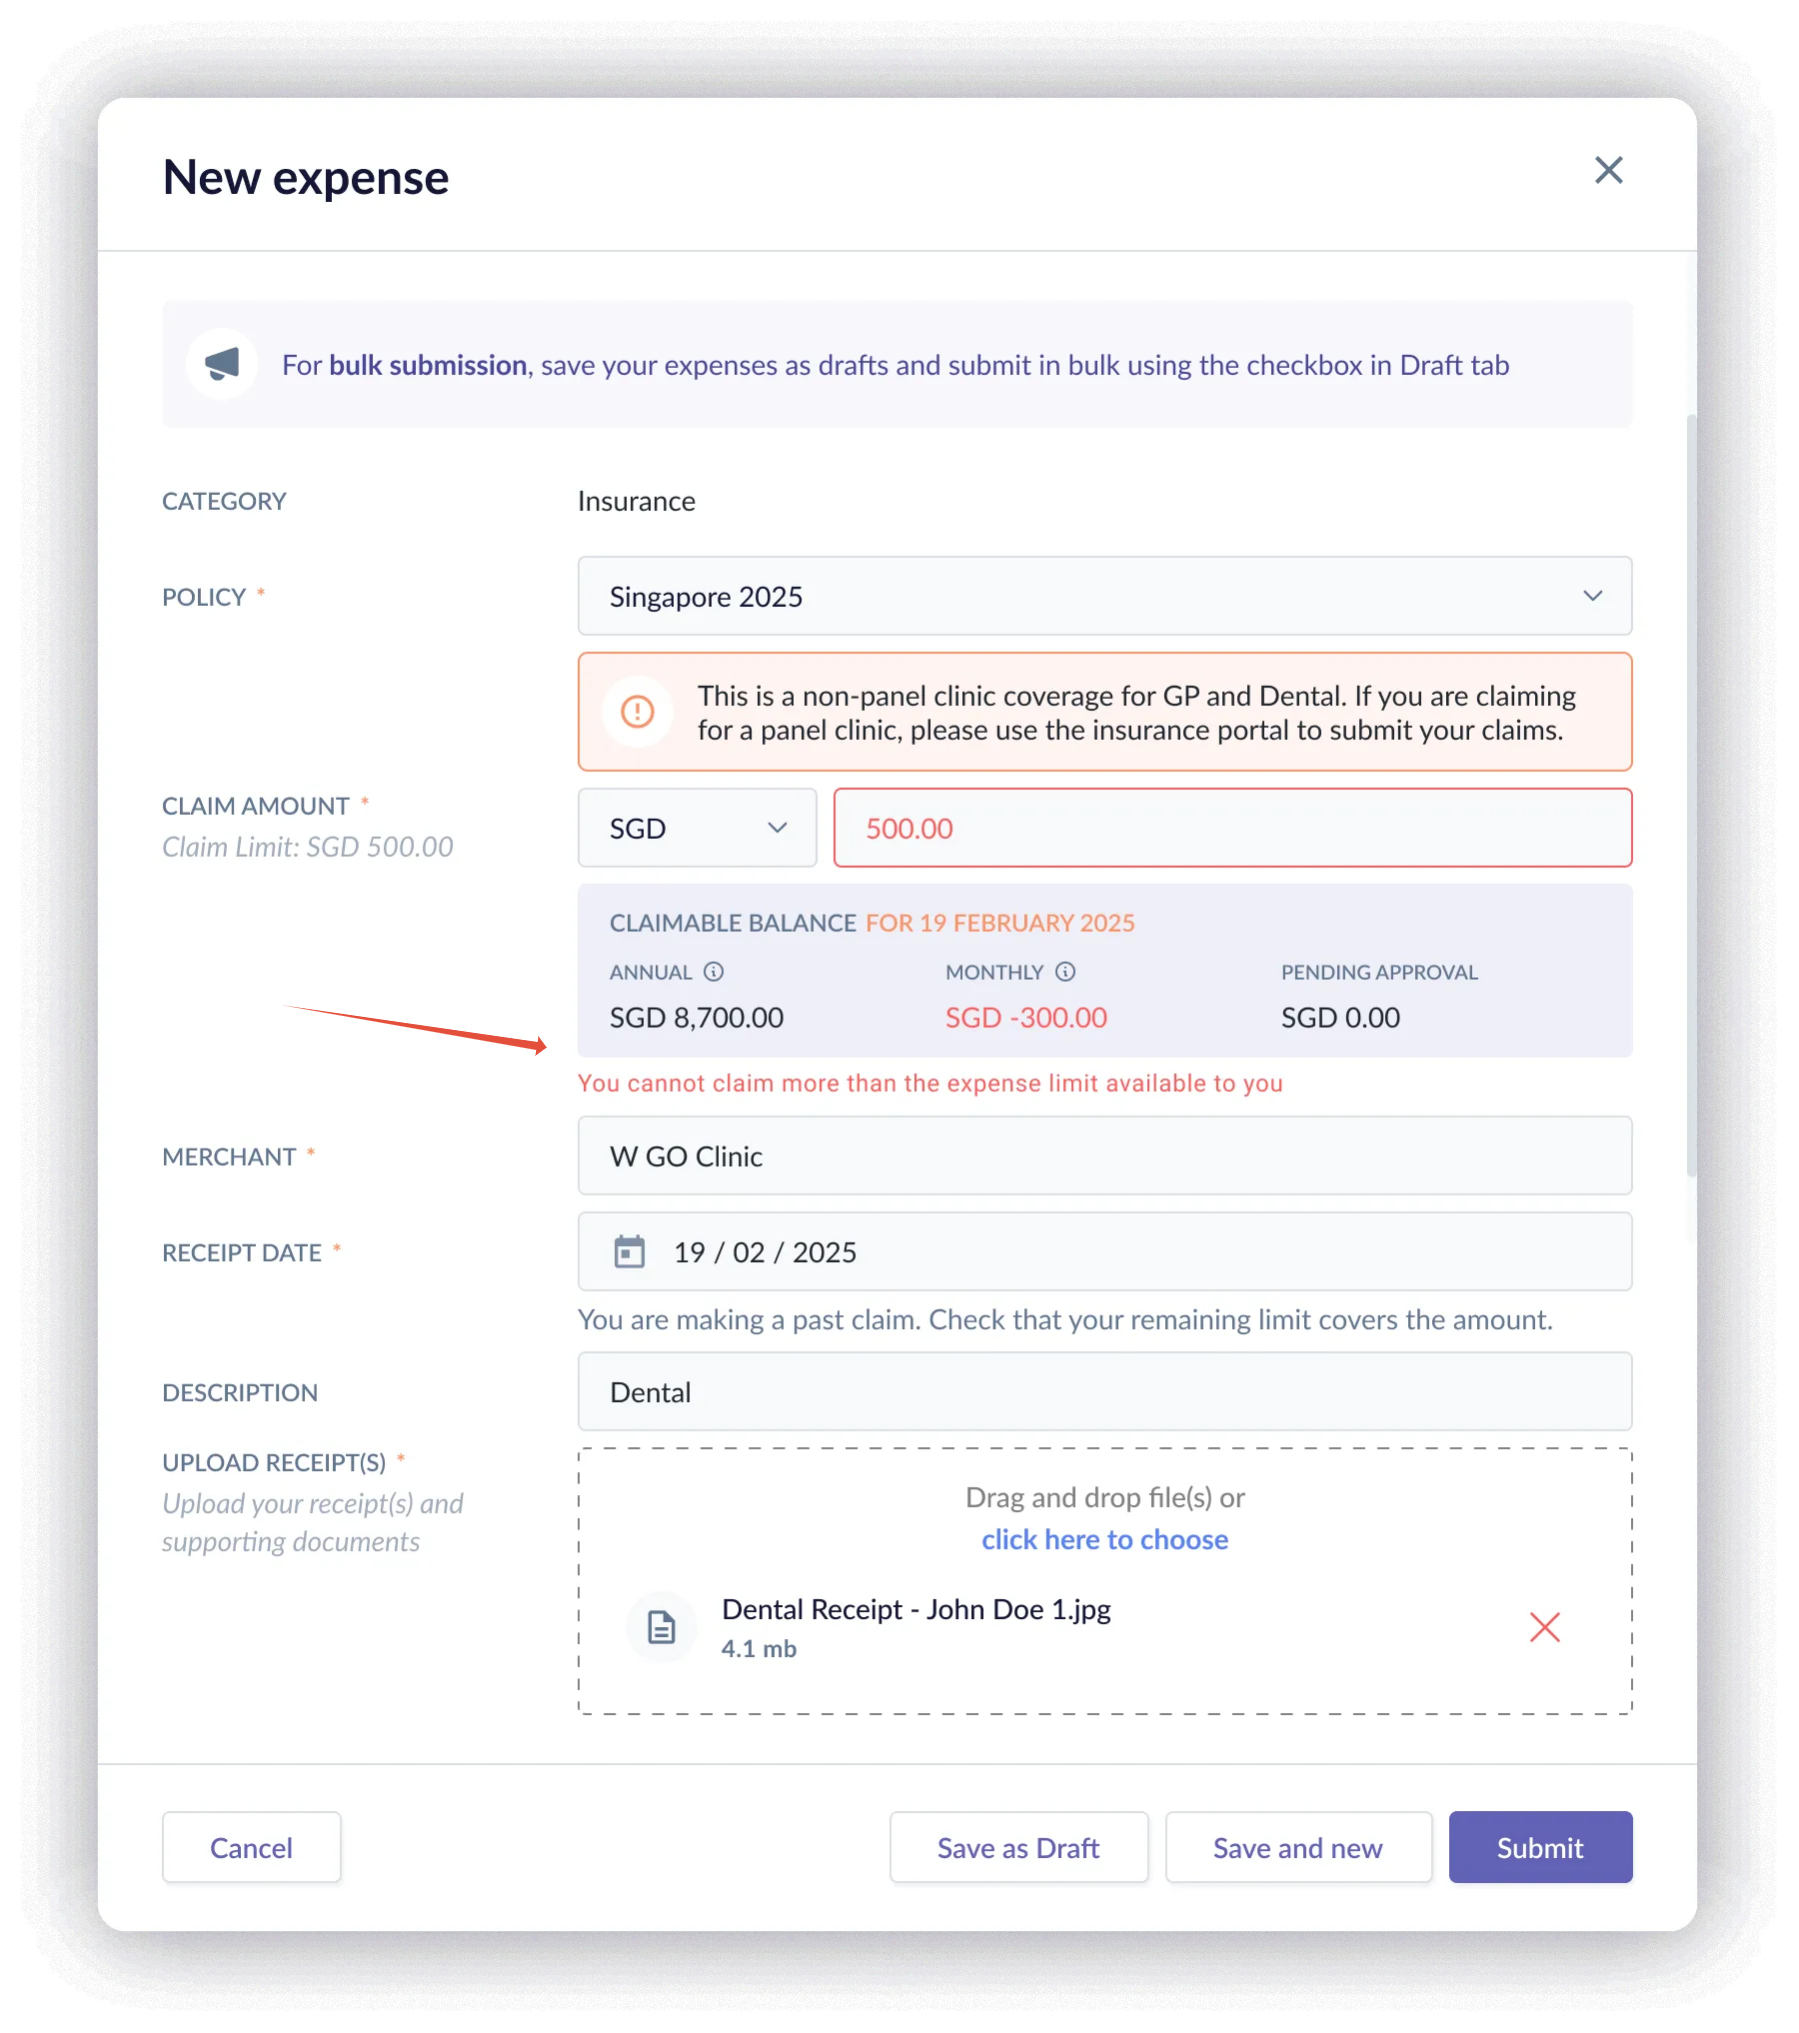
Important Note: You cannot submit an expense that exceeds your remaining balance for that policy.

Submitting Past Claims
If you try to submit a claim for an older date, the system will check whether your available balance on that date was sufficient.
- If your balance was insufficient or not available, the system will prevent submission.
In this case, please reach out to your HR Admin for assistance. They can review your eligibility or adjust your balance if needed.
Still Need Help?:
Reach out to our support team should you need further assistance.
Was this article helpful?
That’s Great!
Thank you for your feedback
Sorry! We couldn't be helpful
Thank you for your feedback
Feedback sent
We appreciate your effort and will try to fix the article