Overview:
Admins can now bulk assign both custom and preset time off policies directly from the system.
Previously, time off policies had to be assigned individually through each employee profile or via import files that required Excel preparation.
With the new Bulk Assign feature, admins can now assign policies to multiple employees more quickly and efficiently - without needing to prepare import files.
This guide will walk you through:
- Important things to review before bulk assigning
- How to assign employees to a policy
- What happens after submission
TABLE OF CONTENTS
- Prerequisite
- Best Practices Before Bulk Assigning Time Off Policies
- ⚠️ Important Before Bulk Assigning Policies
- How to Bulk Assign Employees to a Time Off Policy
- After Assignment — Review the Confirmation Email
Prerequisite
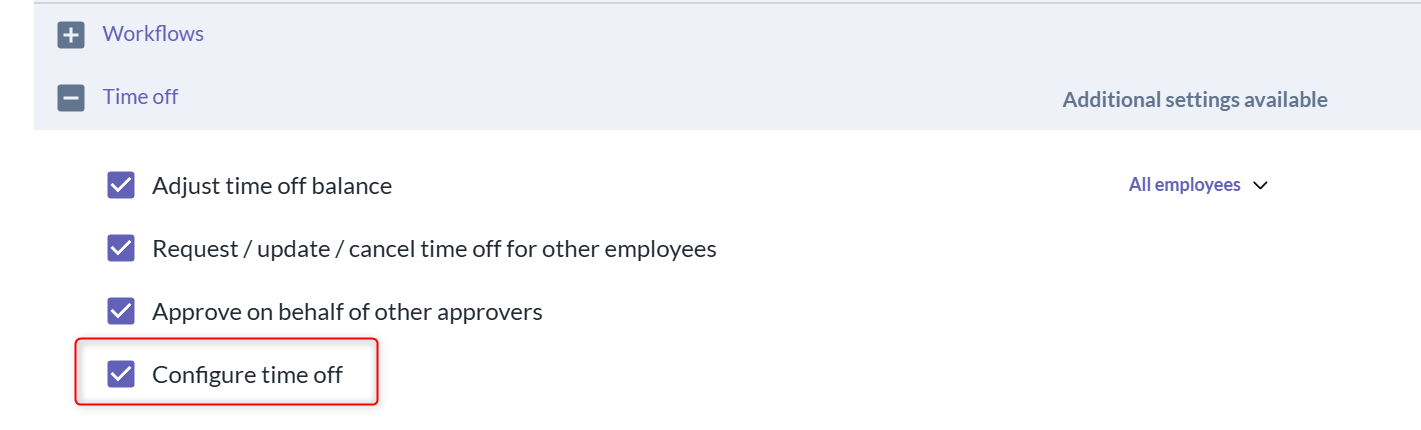
- Before you can do this, please ensure you have the permission "Configure Time Off" under Setting > Access Control > Your Role > Your role's access to System Functions > Under Time Off section.
Best Practices Before Bulk Assigning Time Off Policies
We recommend reviewing the following before assigning or updating time off policies in bulk.
Step 1: Review Existing Policy Assignments
Before assigning employees to a policy, review:
- Which employees are already assigned to the policy
- Which employees have not yet been assigned
- Whether employees are already assigned to another policy under the same leave type
This helps prevent unintended policy changes or duplicate assignments.
You may review assigned employees from: Time Off > Time Off Policy > View Assigned Users
Step 2: Generate Time Off Reports as Backup
Before making any changes, we recommend generating:
- Time Off Balance Reports
- Time Off Transaction Reports
These reports can be used as your backup reference if you need to review balances or assignment history later.
You may refer to this guide: Generating Time Off Reports
This helps prevent unintended policy changes or duplicate assignments.
Step 3: Test with 1–2 Employees First
Before assigning policies in bulk, we recommend testing with 1 or 2 employees first to confirm:
- The correct policy is assigned
- Effective dates are correct
- Balances are generated as expected
Once verified, you may proceed with the remaining employees.
⚠️ Important Before Bulk Assigning Policies
Employees Can Only Have One Active Policy Per Leave Type
If an employee is already assigned to another policy under the same leave type, assigning a new policy will automatically replace the employee’s existing policy assignment.
Example : Michelle is currently assigned to: Annual Leave 15 Days
If Michelle is included again when assigning: Annual Leave Singapore with an effective date of 1 May 2026 the system will automatically:
- Replace Michelle’s current leave policy assignment
- Assign Michelle to Annual Leave Singapore
- Generate a new leave balance based on the new policy
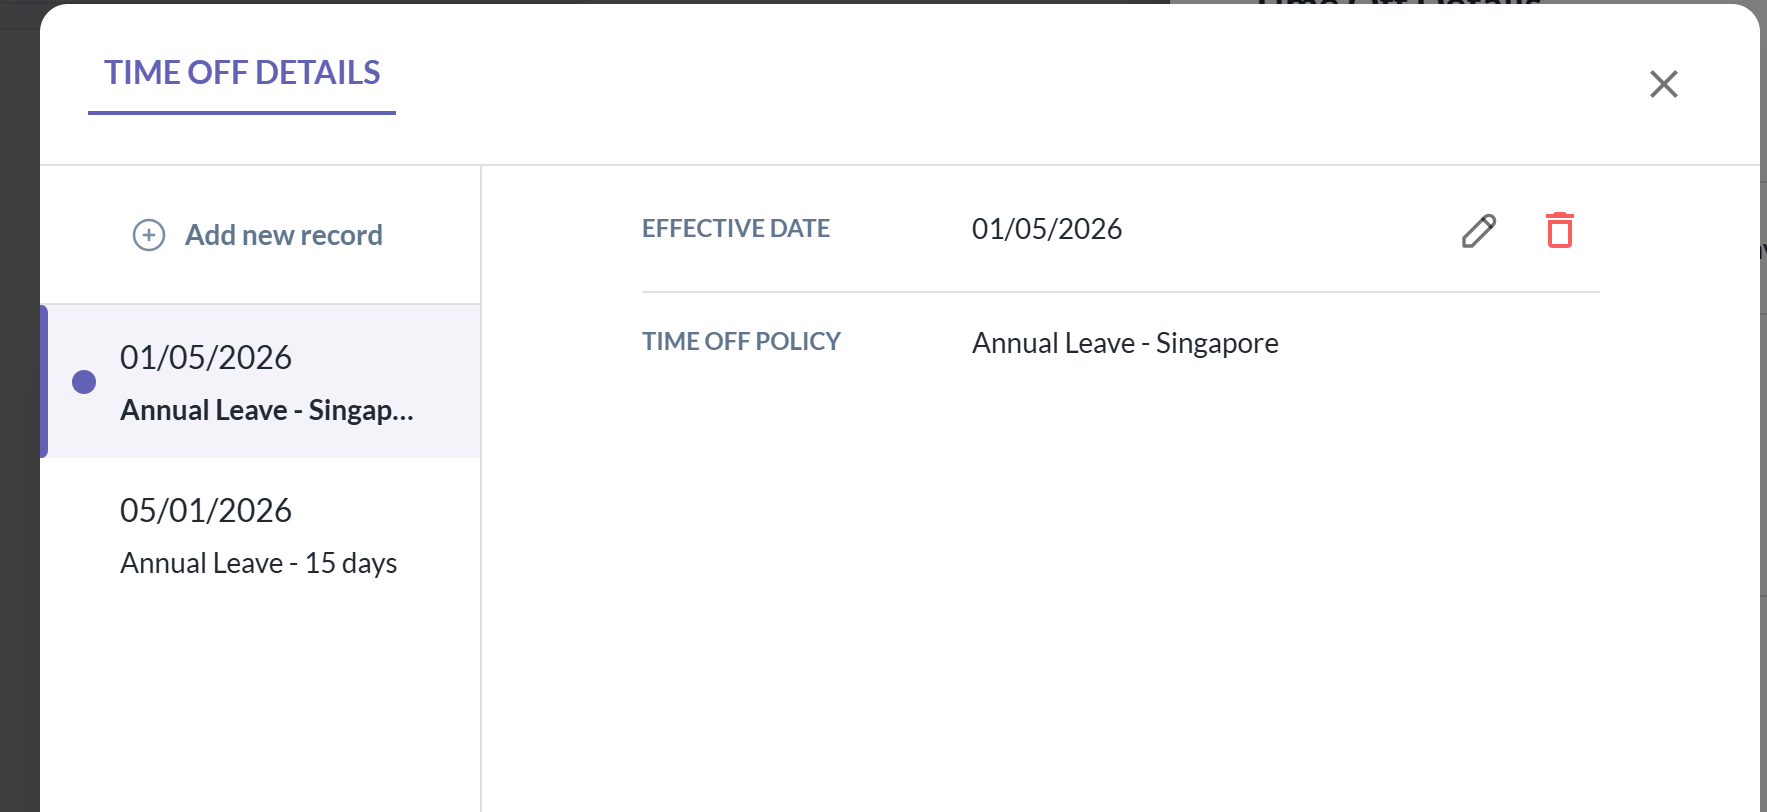
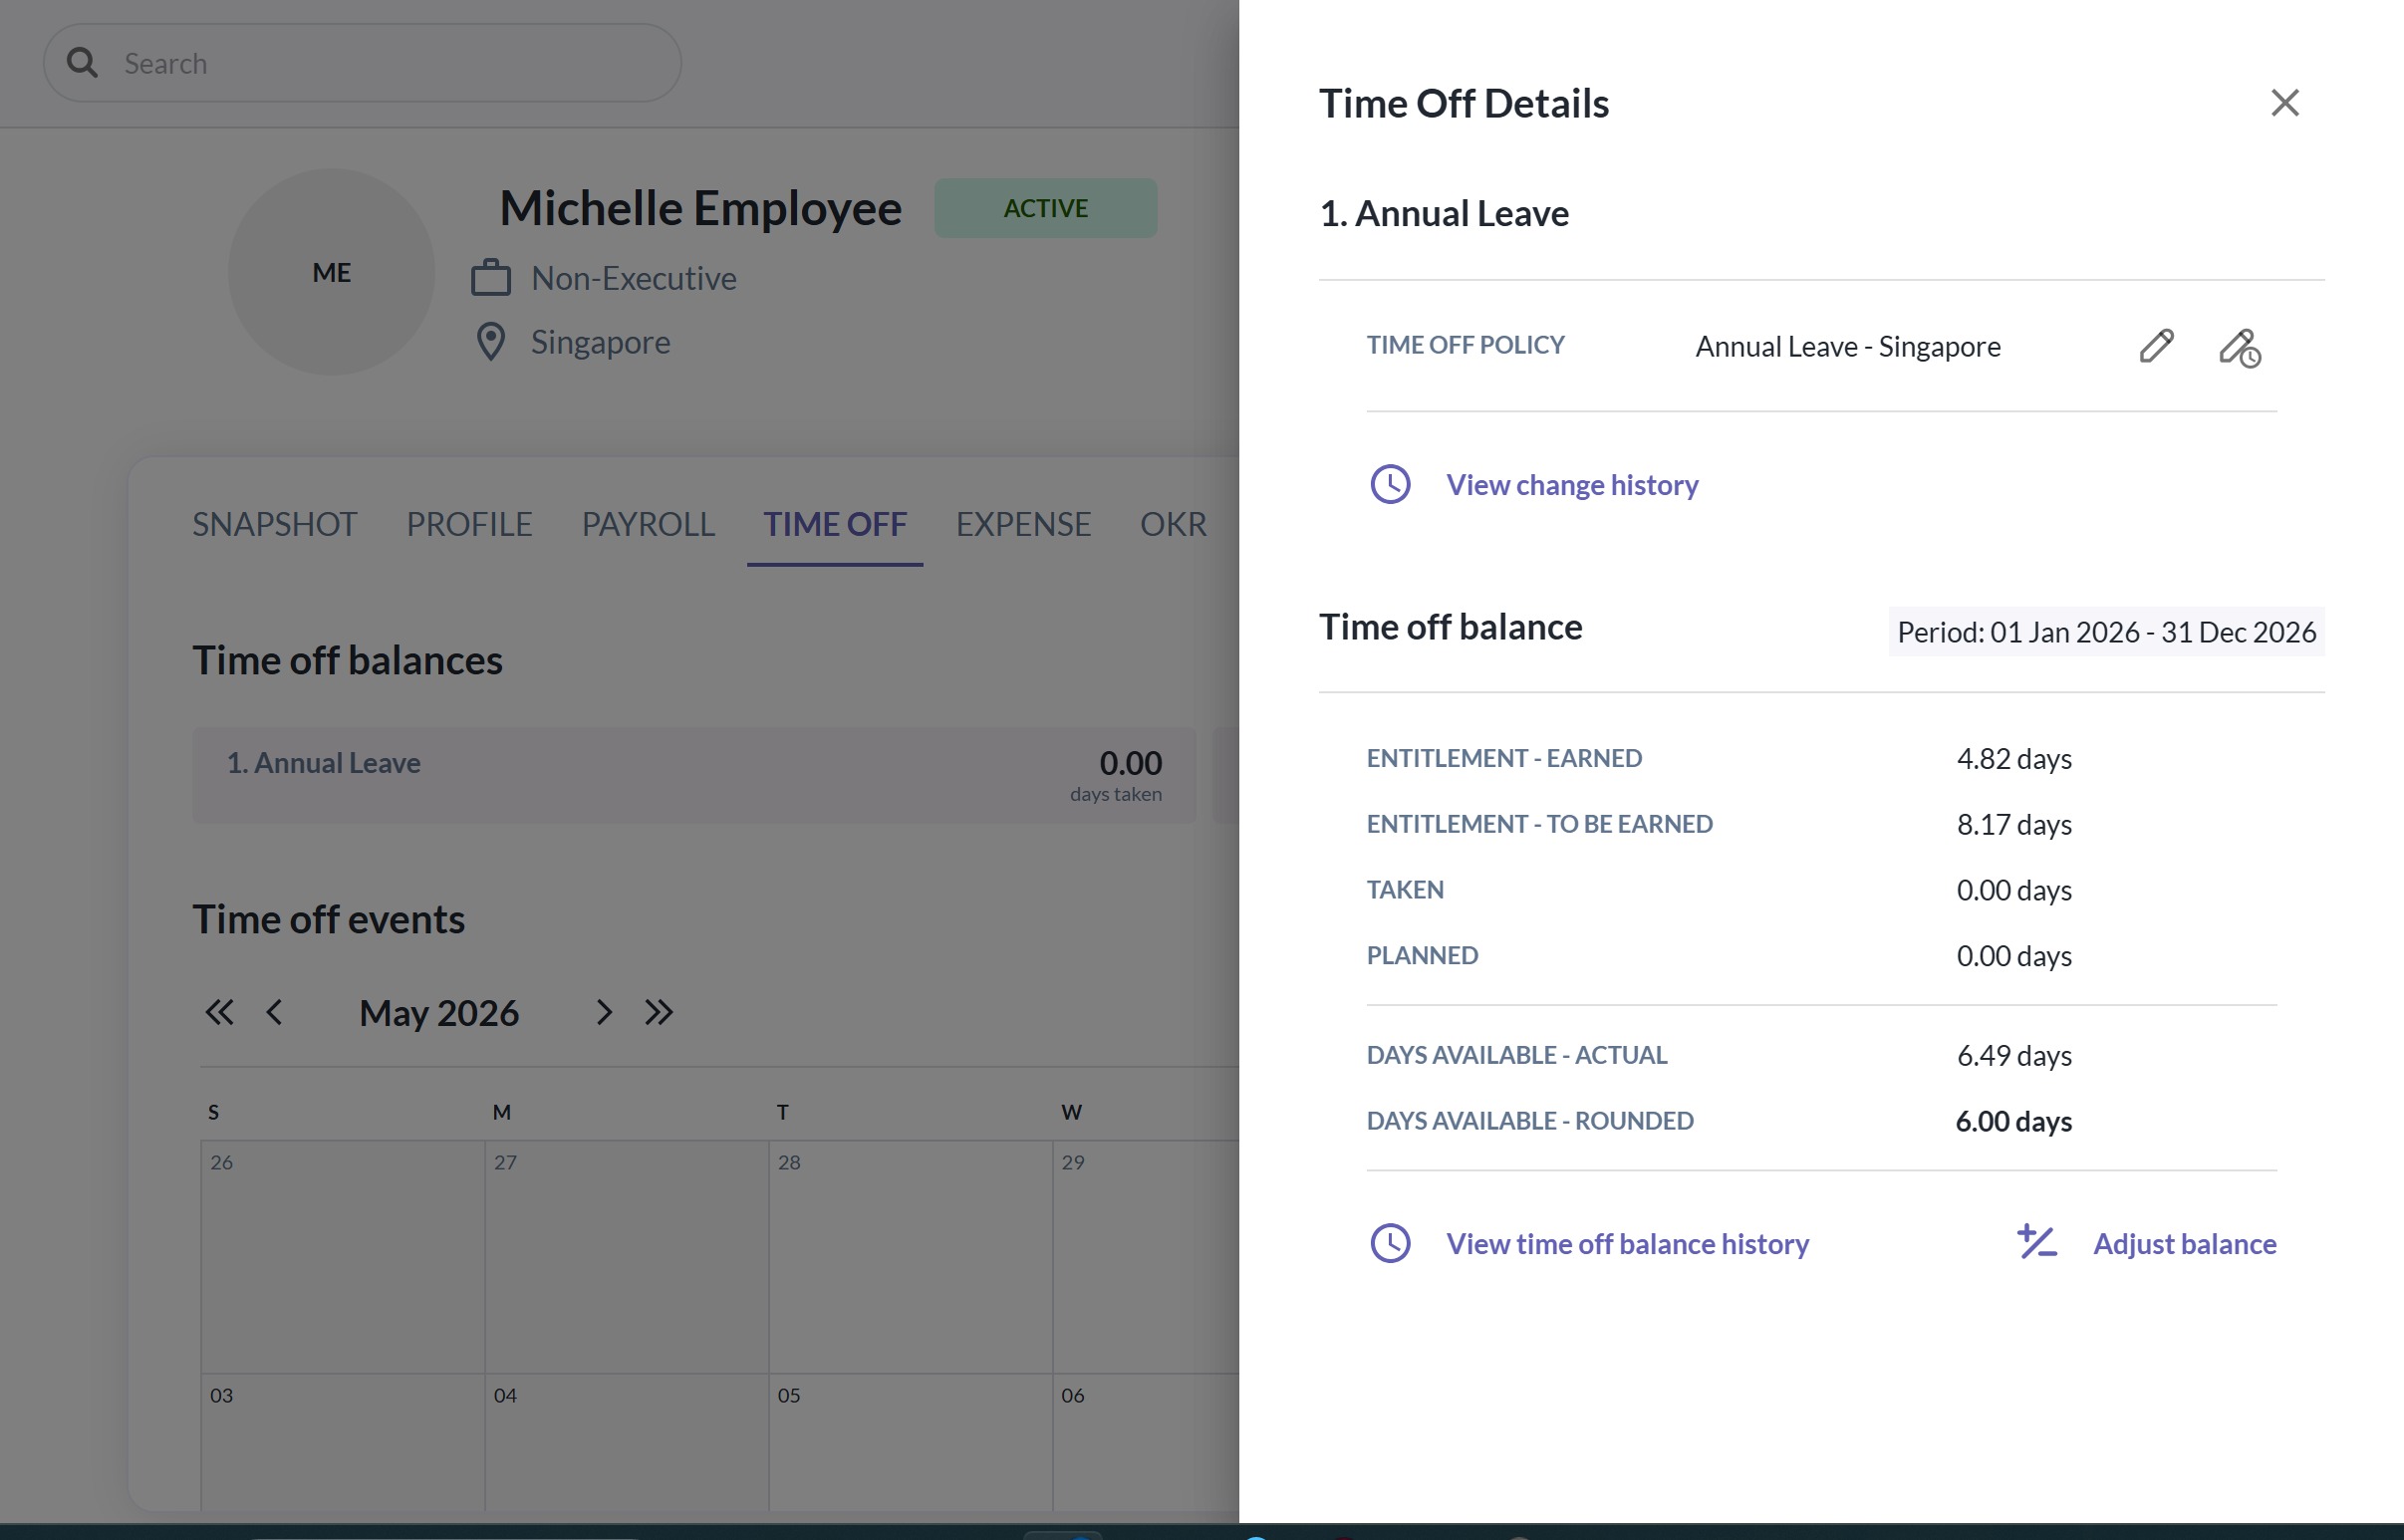
We recommend carefully reviewing employee assignments before proceeding with bulk assignment.
Need to Re-assign or Transition Policies?
If you need to:
- Re-assign employees to another policy, or
- Transition employees between policies
we recommend reaching out to support@omnihr.co for guidance before proceeding.
How to Bulk Assign Employees to a Time Off Policy
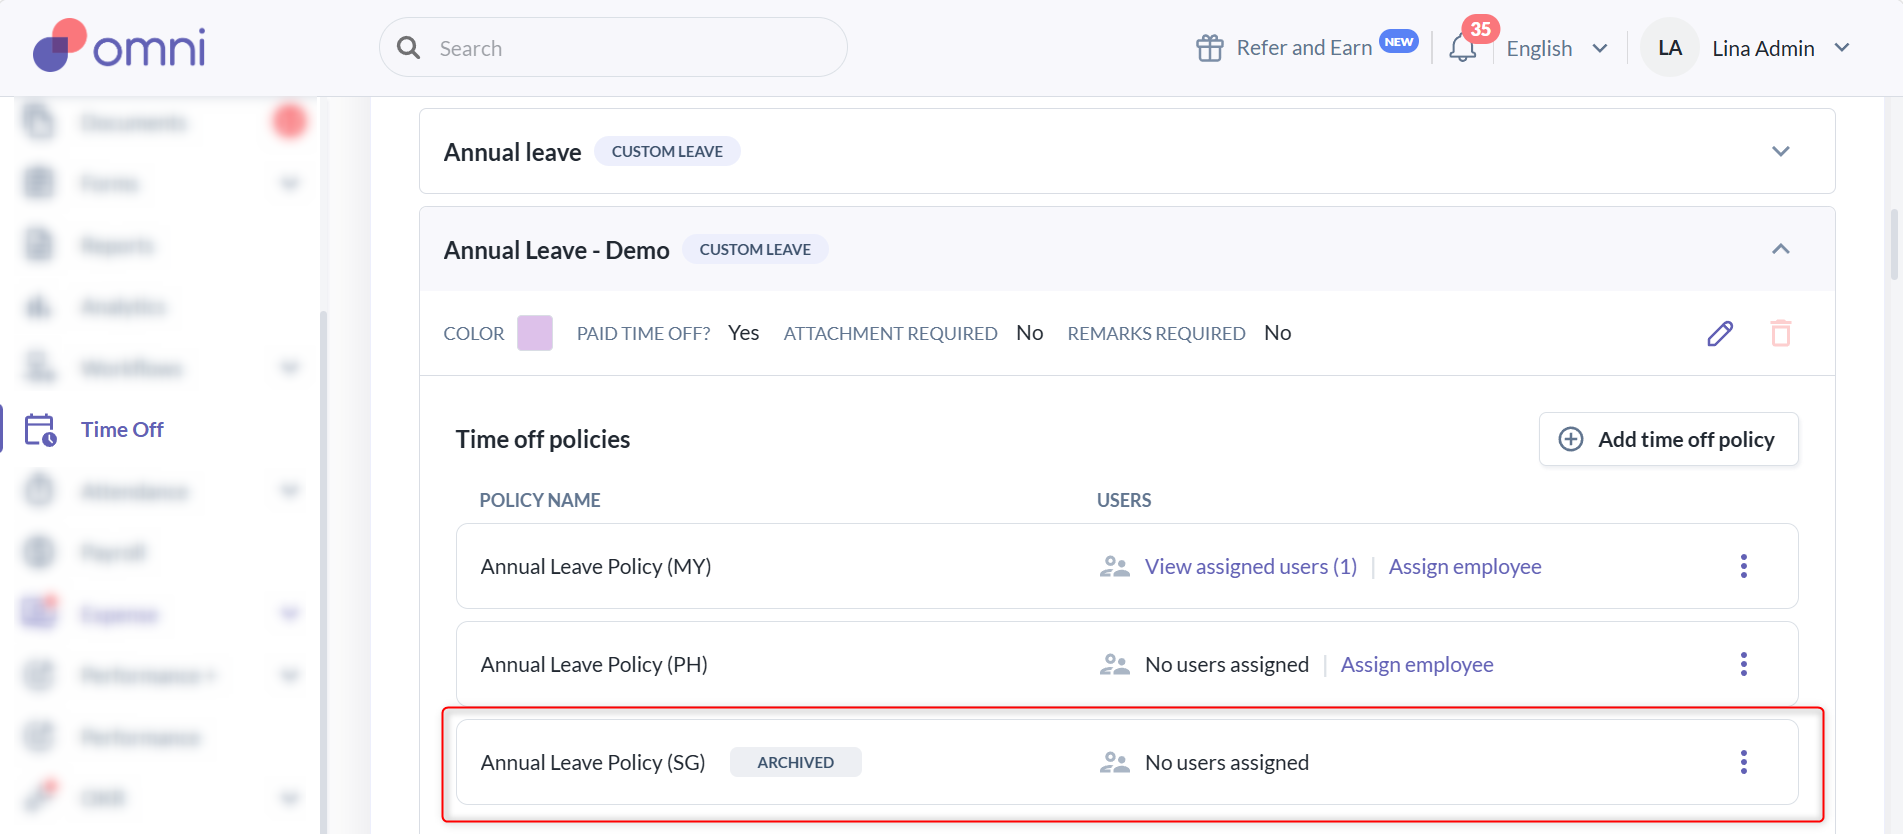
Step 1: Go to the Time Off Policy
- Go to Time Off
- Select the leave type you would like to manage (for example: Annual Leave)
- Navigate to the Time Off Policy section
- Under the selected policy, click Assign Employee
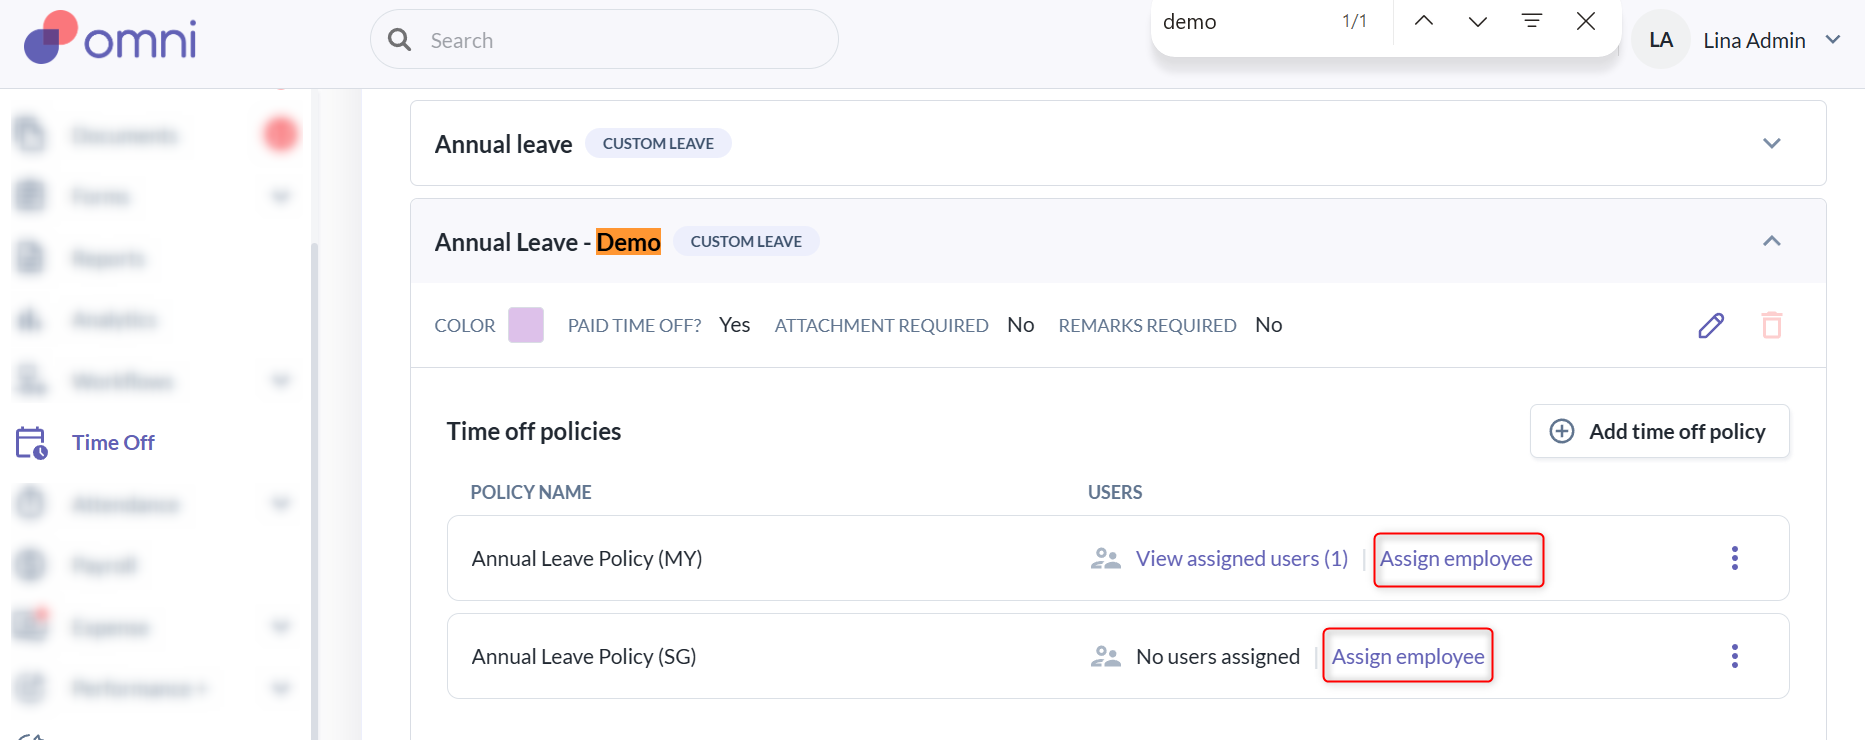
Note: Archived policies cannot be assigned to new employees.
Step 2: Select Employees
There are two ways to begin assigning employees:
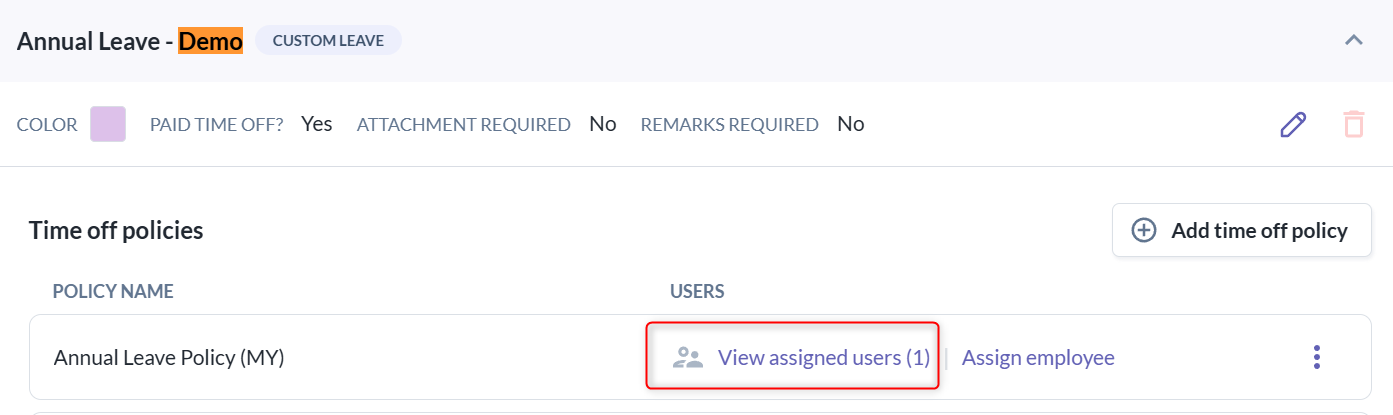
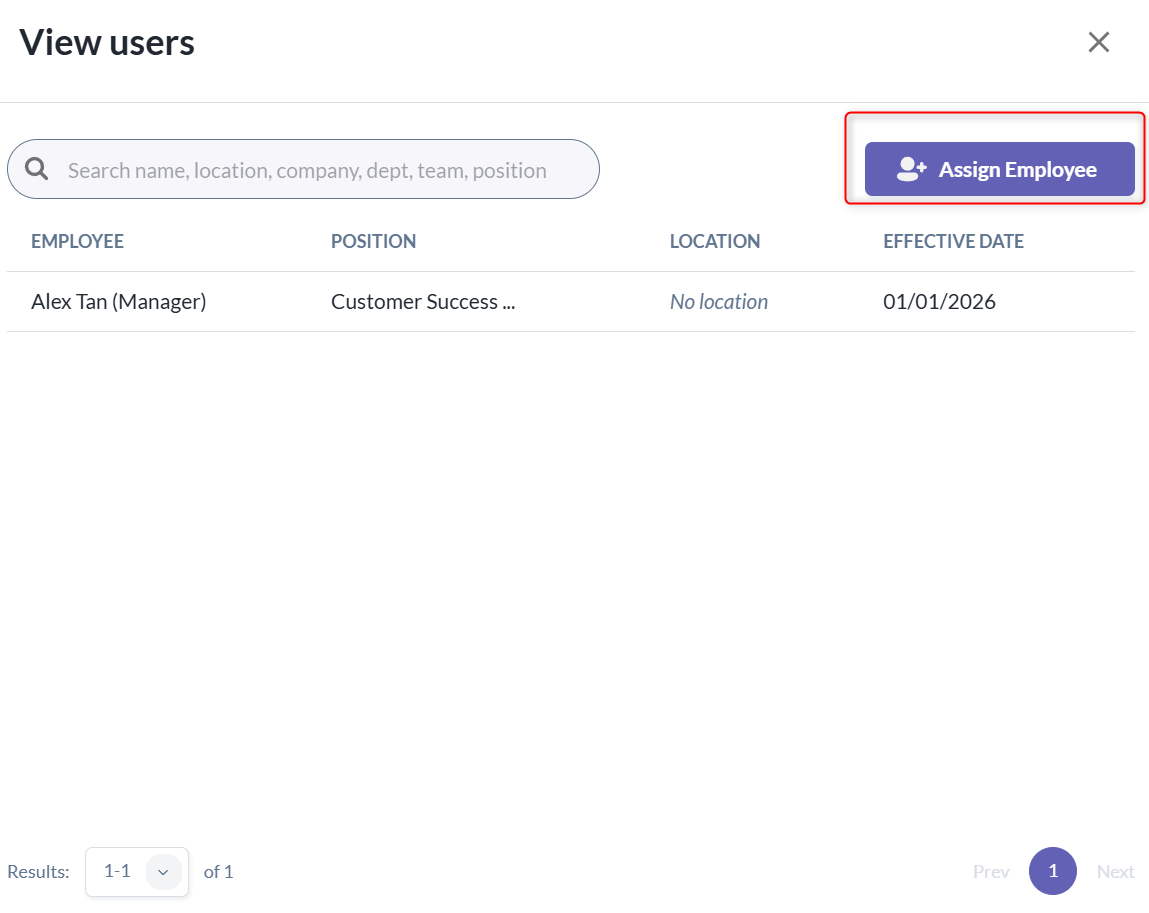
A) If the Policy Already Has Assigned Employees
- Click View Assigned Users
- In the pop-up window, click Assign Employee
- You will be redirected to the employee selection page
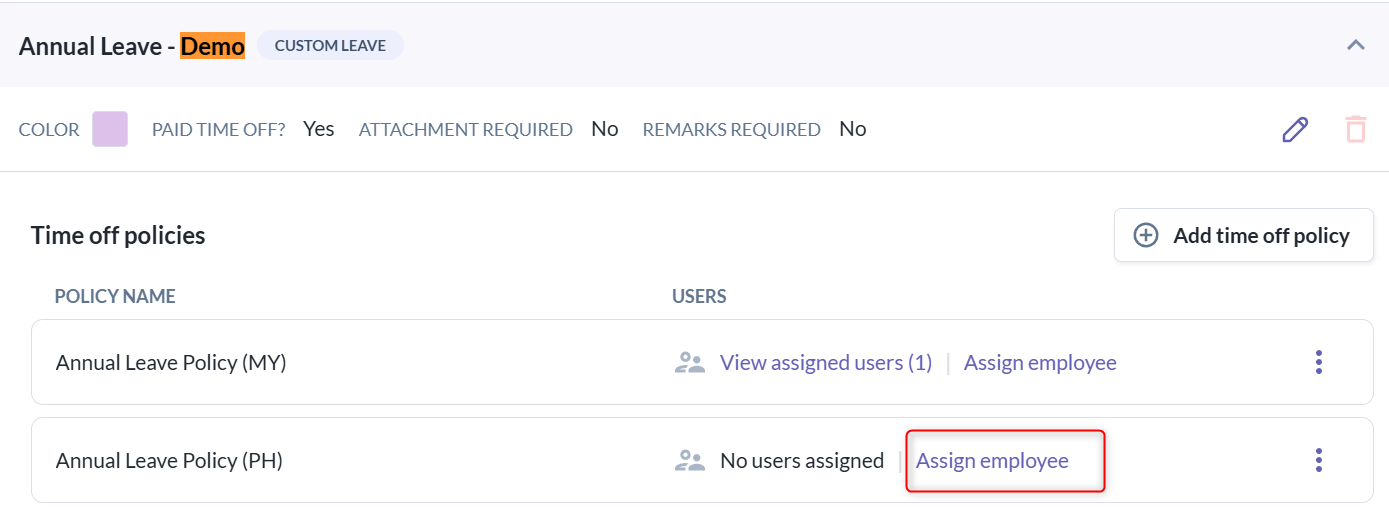
B) If the Policy Has No Assigned Employees Yet
Simply click: Assign Employee
You will be redirected directly to the employee selection page.
From the employee selection page, you may use the filter to :
- Search employees by name
- Filter employees by:
- Employee start date range
- Location
- Company
- Department
- Team
- Position
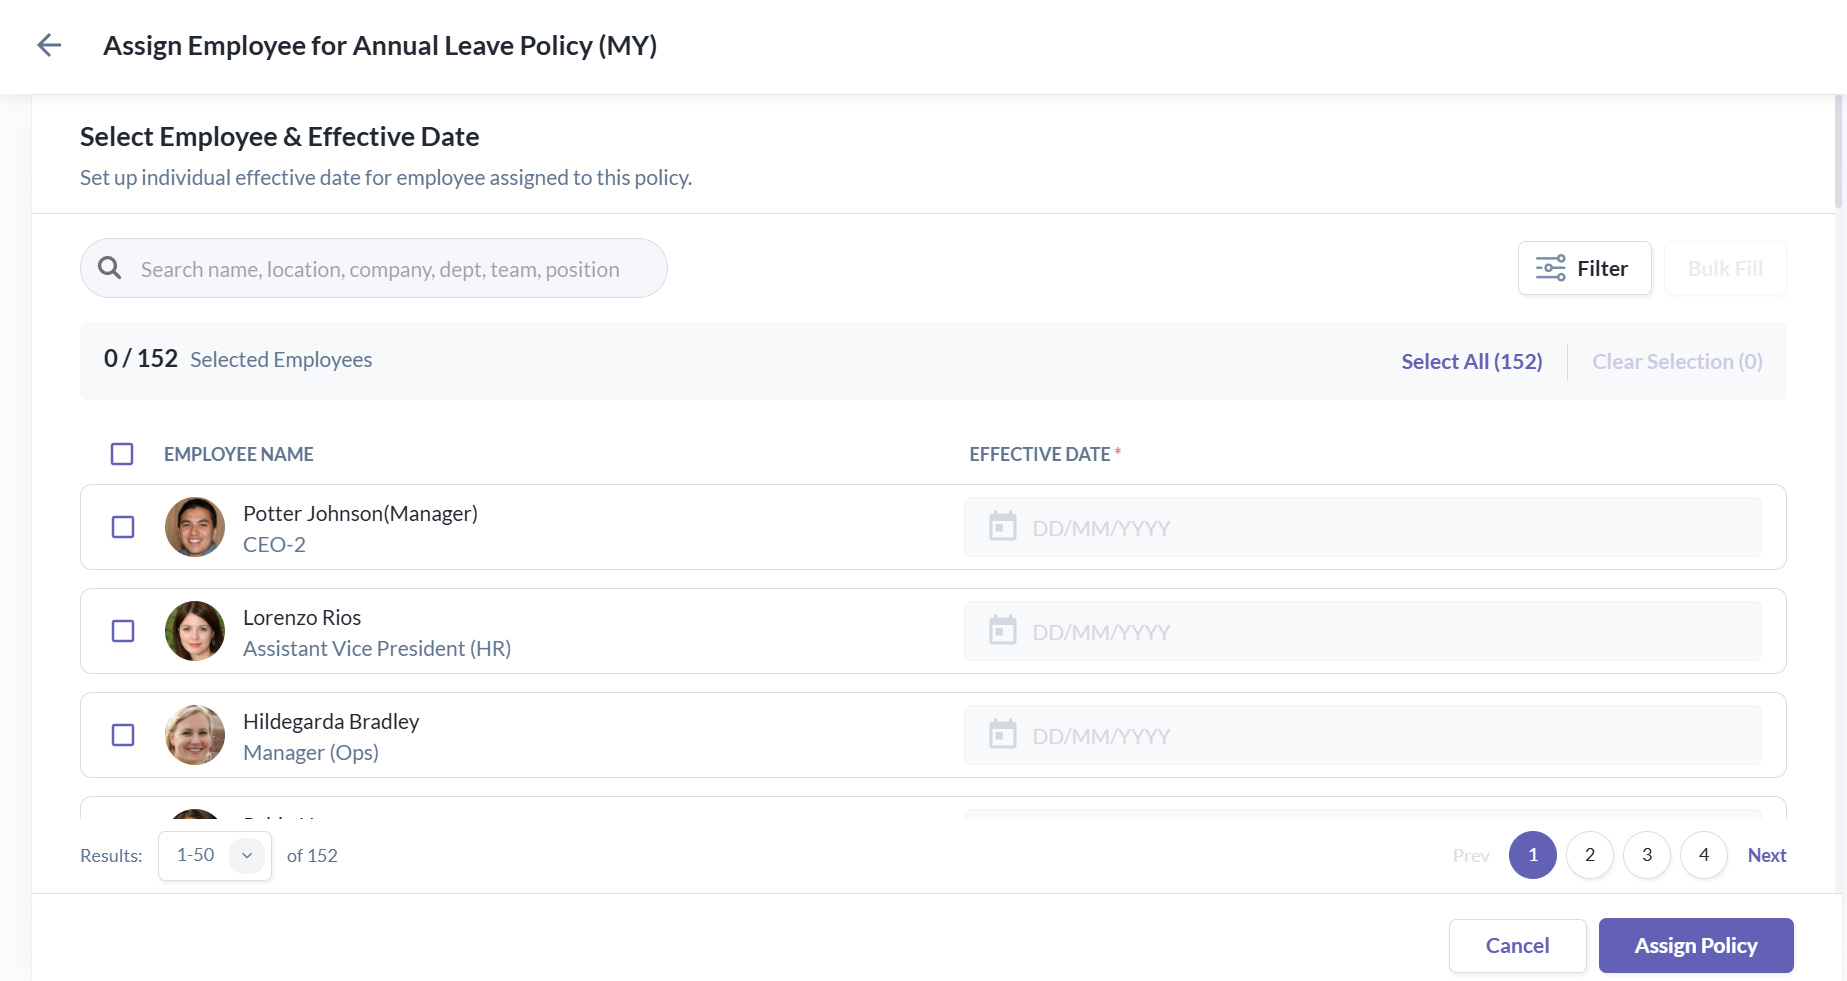
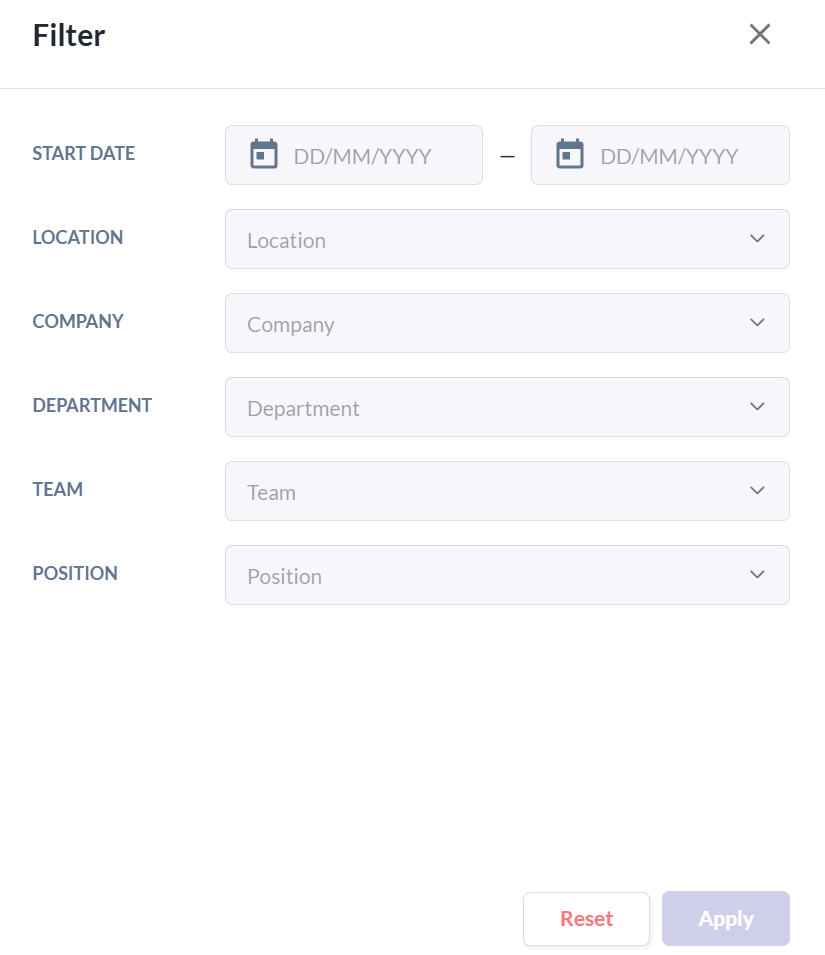
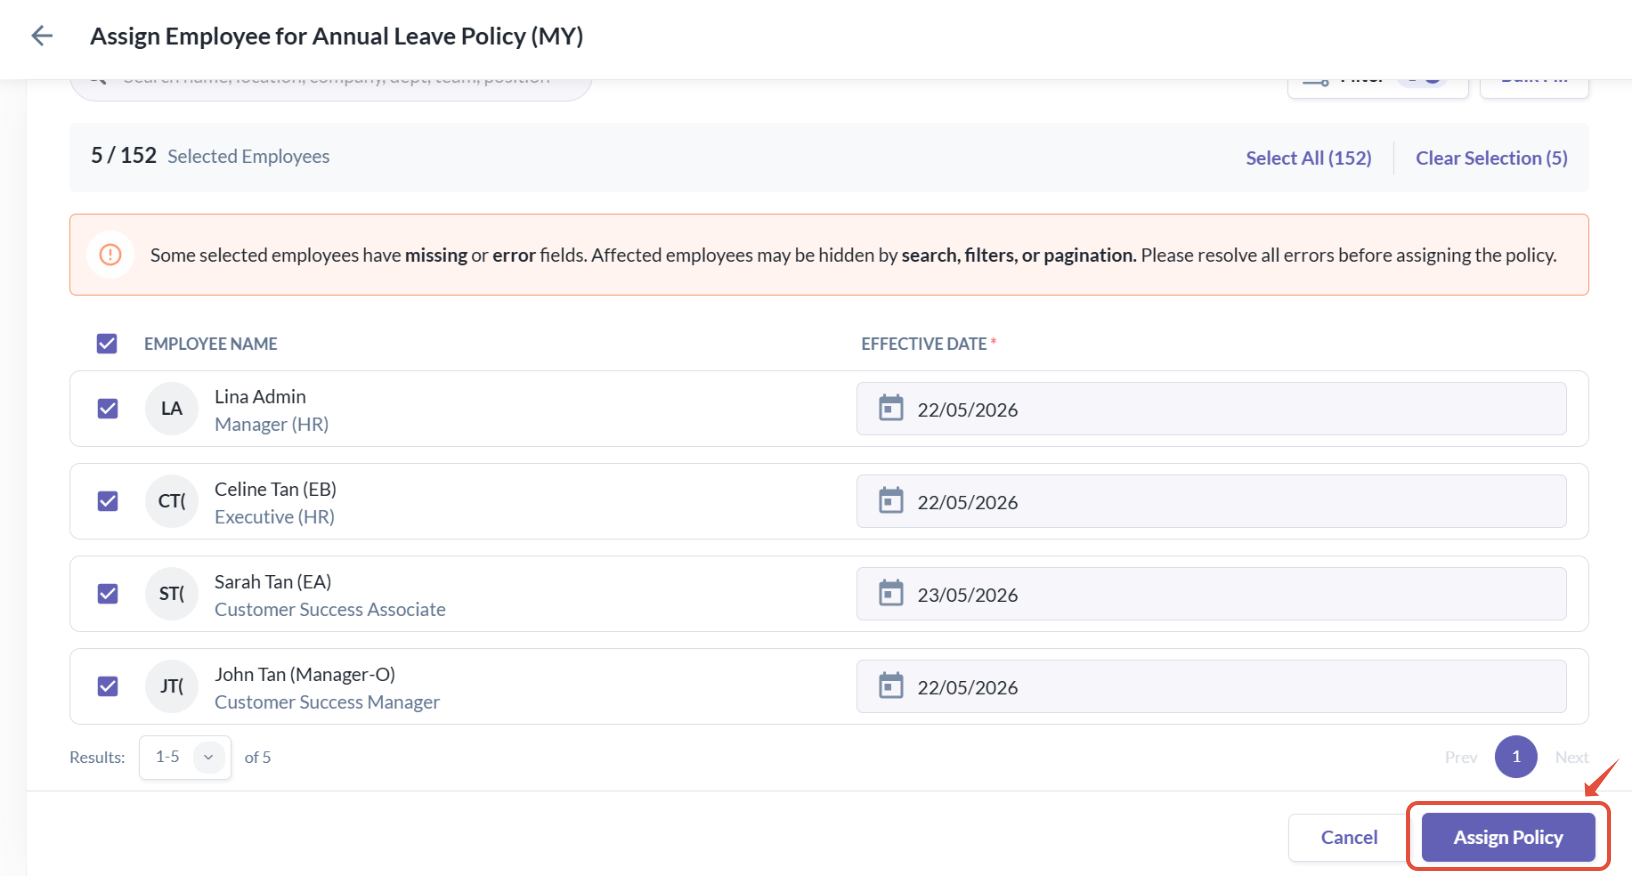
Step 3: Set Effective Dates
After selecting employees, set the effective date for the policy assignment.
You may:
- Enter effective dates individually per employee, or
- Use bulk fill to apply the same effective date to multiple employees at once
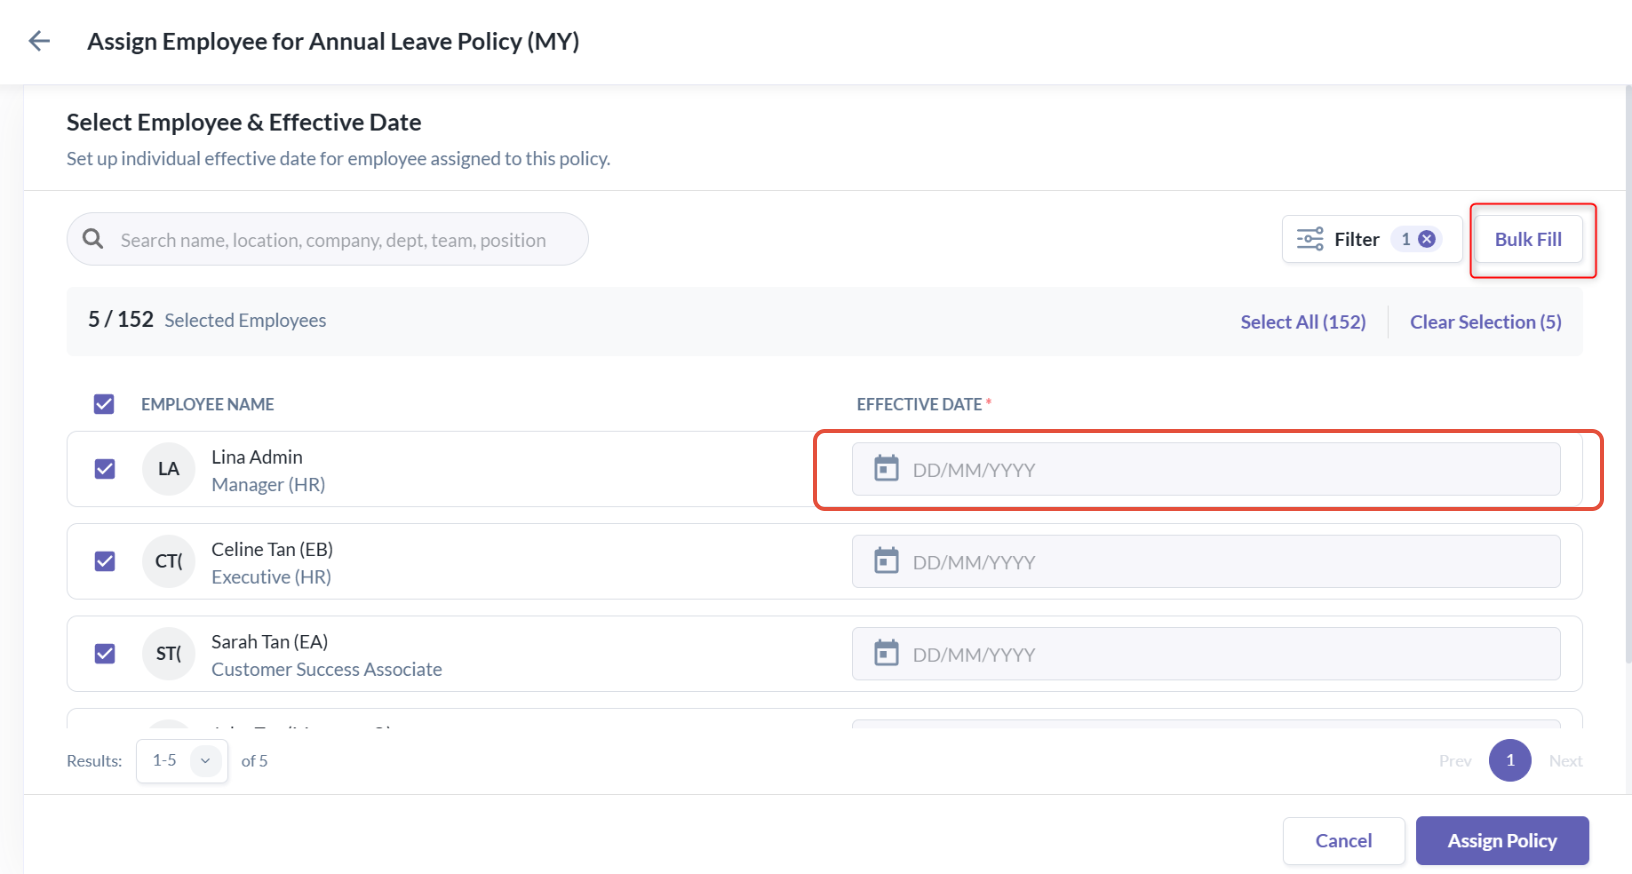
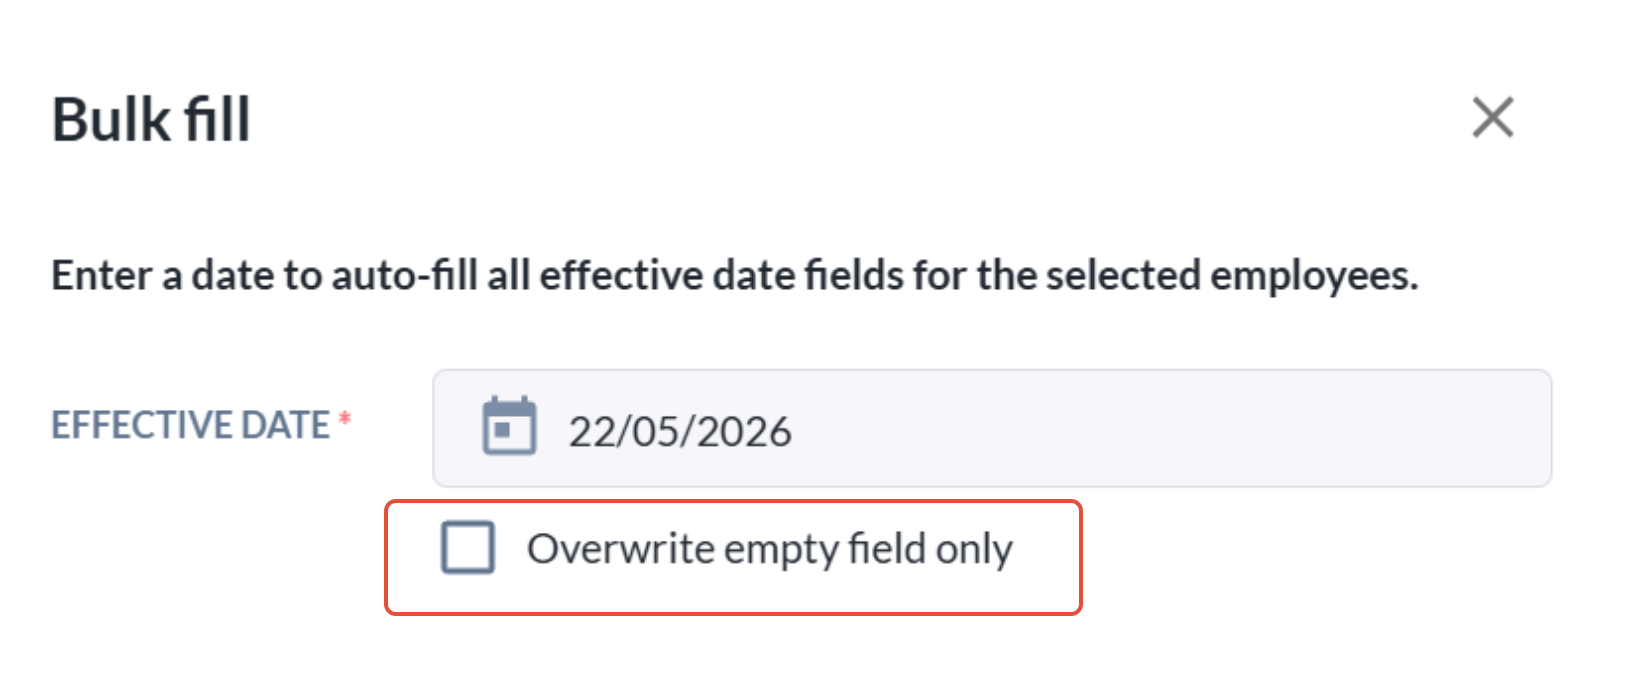
Optional: Use “Overwrite Empty Field Only” If some employees already have manually entered effective dates and you do not want them overwritten, enable: Overwrite empty field only
When enabled, the system will only fill in effective dates for employees whose fields are still empty.
Step 4: Assign the Policy
Once all employees and effective dates are completed, click: Assign Policy
If any selected employee is missing an effective date, the system will display an alert message before submission.
After Assignment — Review the Confirmation Email
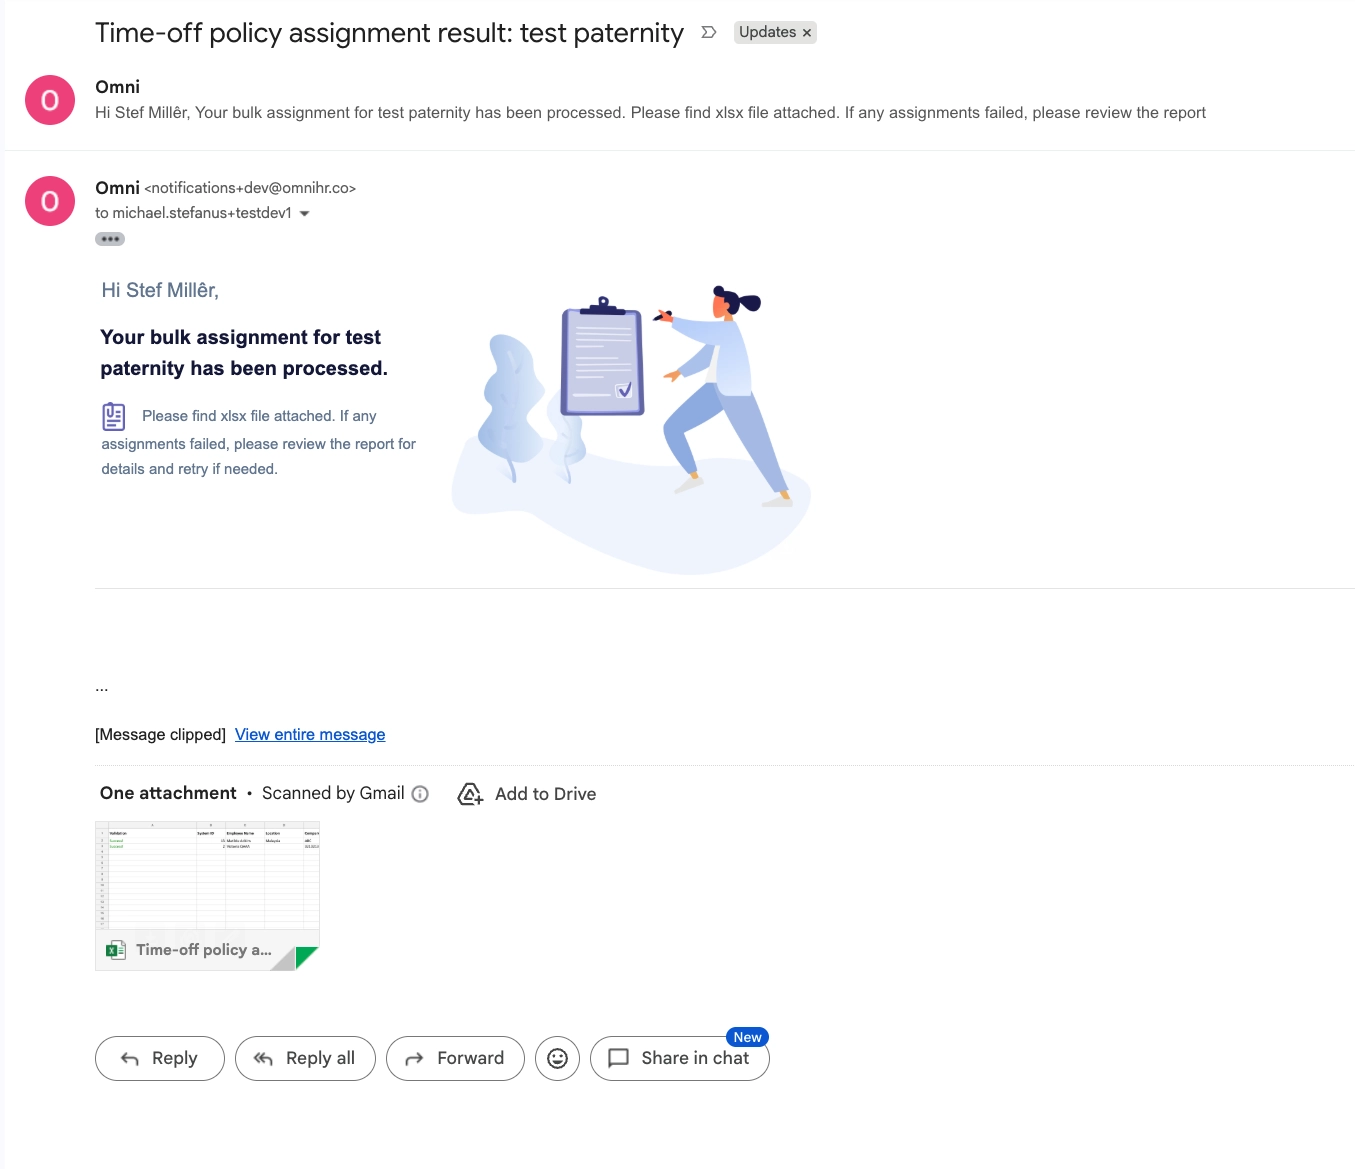
Once the assignment is submitted:
- A confirmation toast message will appear
- A confirmation email with the assignment result file will be sent to your primary email address
In the result file:
- Employees successfully assigned will display “Success!” under Column A (Validation)
- Failed assignments will display the corresponding error reason
We recommend reviewing the confirmation email and result file after every bulk assignment to ensure all employees were successfully assigned.

Still Need Help?
Reach out to our support team should you need further assistance.
Was this article helpful?
That’s Great!
Thank you for your feedback
Sorry! We couldn't be helpful
Thank you for your feedback
Feedback sent
We appreciate your effort and will try to fix the article